Test Publication
- Navigate to the left navigation menu and select Test Publications.
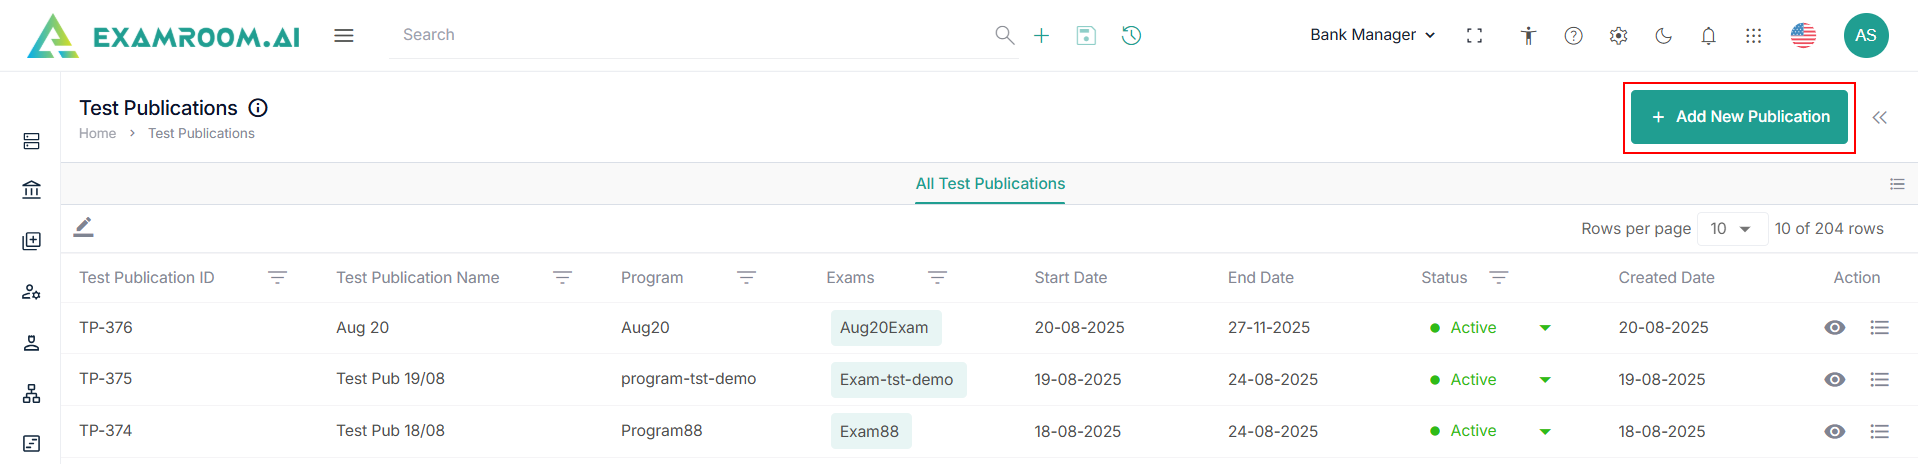
- The application displays the Test Publications page in a table view comprising of All Test Publication list.
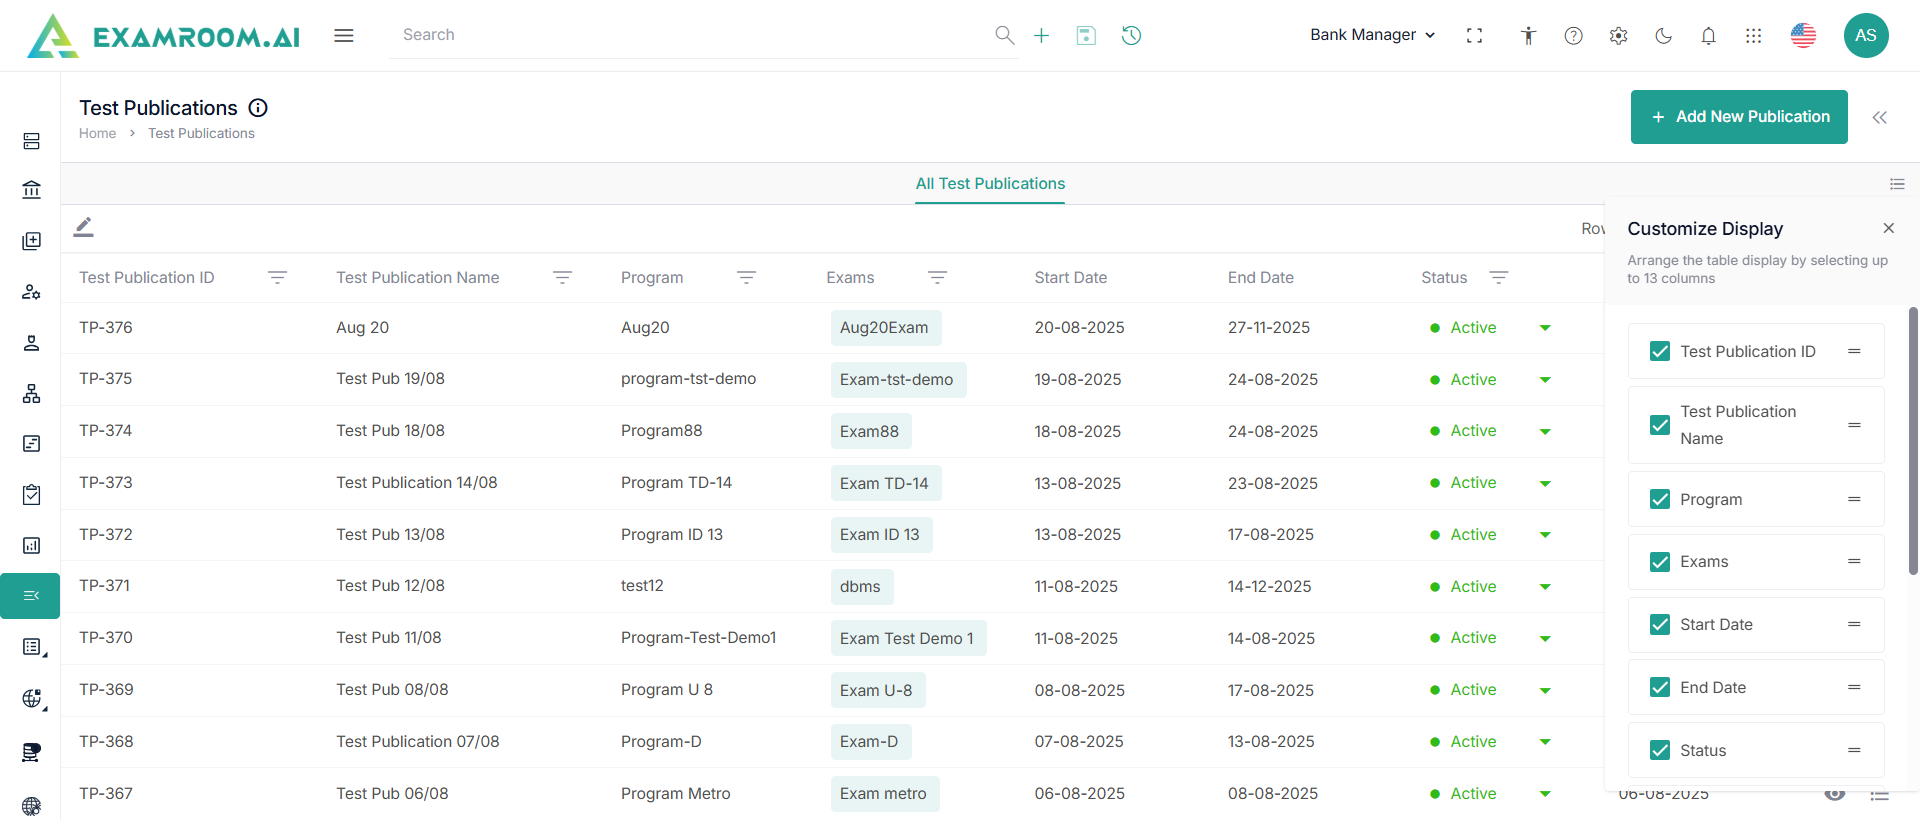
- Click the Hamburger Menu at the right of All Test Publications, to view the Customize Display of the tab columns/headers.
Note: Rearrange any of the table headers to display specific column information as required. - The following are the table headers:
- Test Publication ID: Unique ID generated when a Test Publication is created.
- Test Publication Name: Test Publication name of the Test Publication ID created.
- Program: The Program to which the Test Publication ID is created.
- Exam: The name of the Exam to which the Test Publication ID is created.
- Start Date: Date when the Test Publication starts.
- End Date: Date when the Test Publication starts.
- Language: Language of the Test Publication.
- Modified By: Name of the person who Modified the Test Publication.
- Modified Date: Date when the Test Publication is modified.
- Description: A short description of the Test Publication.
- Created By: Name of the person who created the Test Publication.
- Created Date: Date when the Test Publication was created.
- Status:
- Draft
- Active
- Inactive
- Action: A choice to Edit the Test Publication.
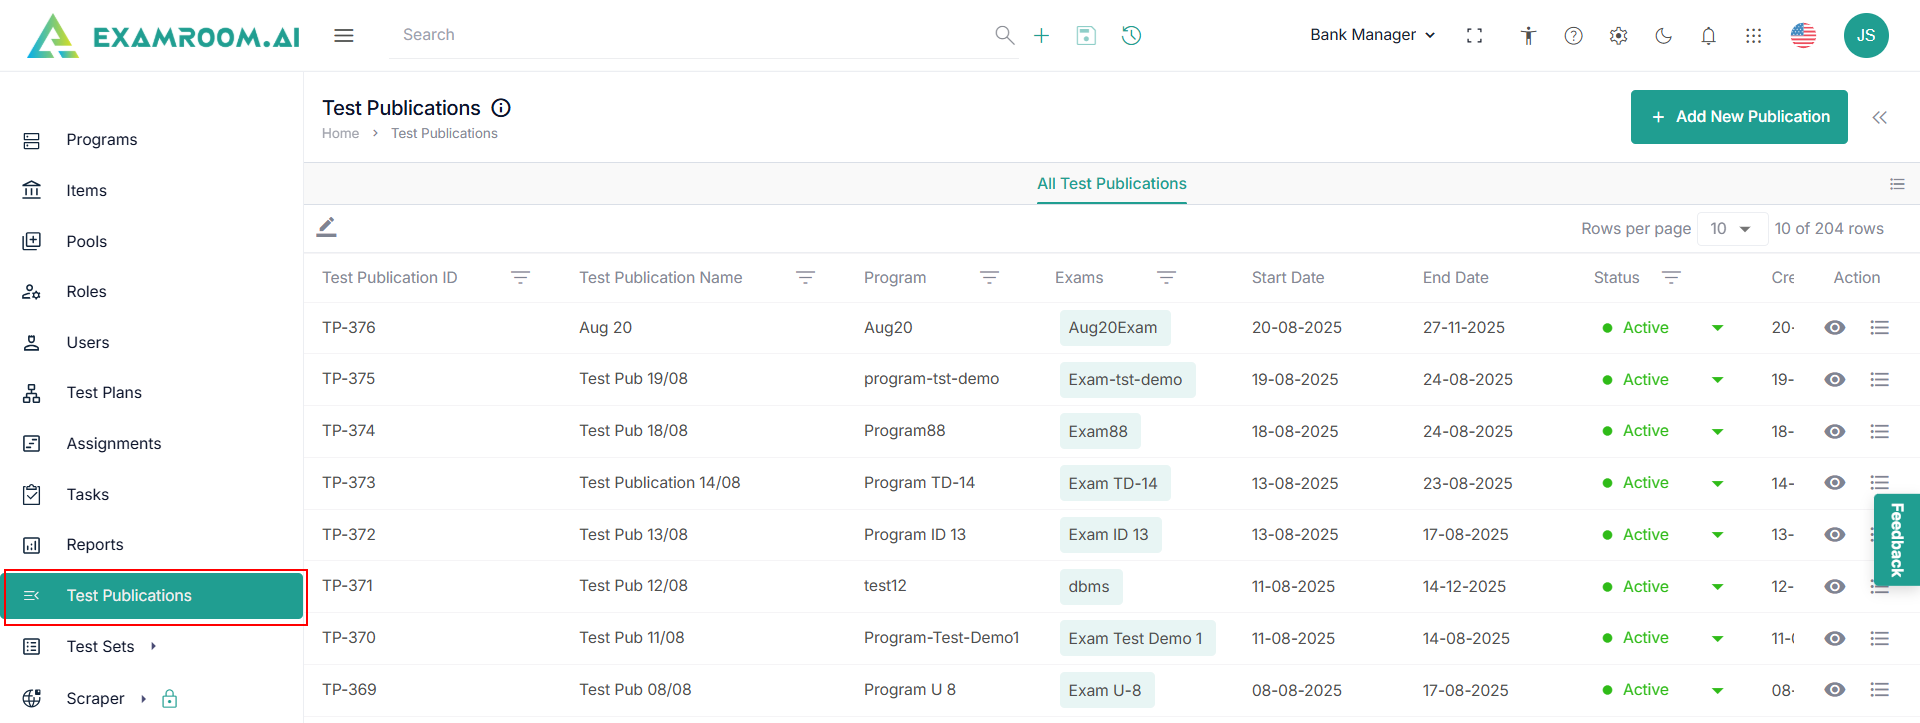
Add New Publication
To add a new test publication, perform these steps.
- Click Add New Publication.
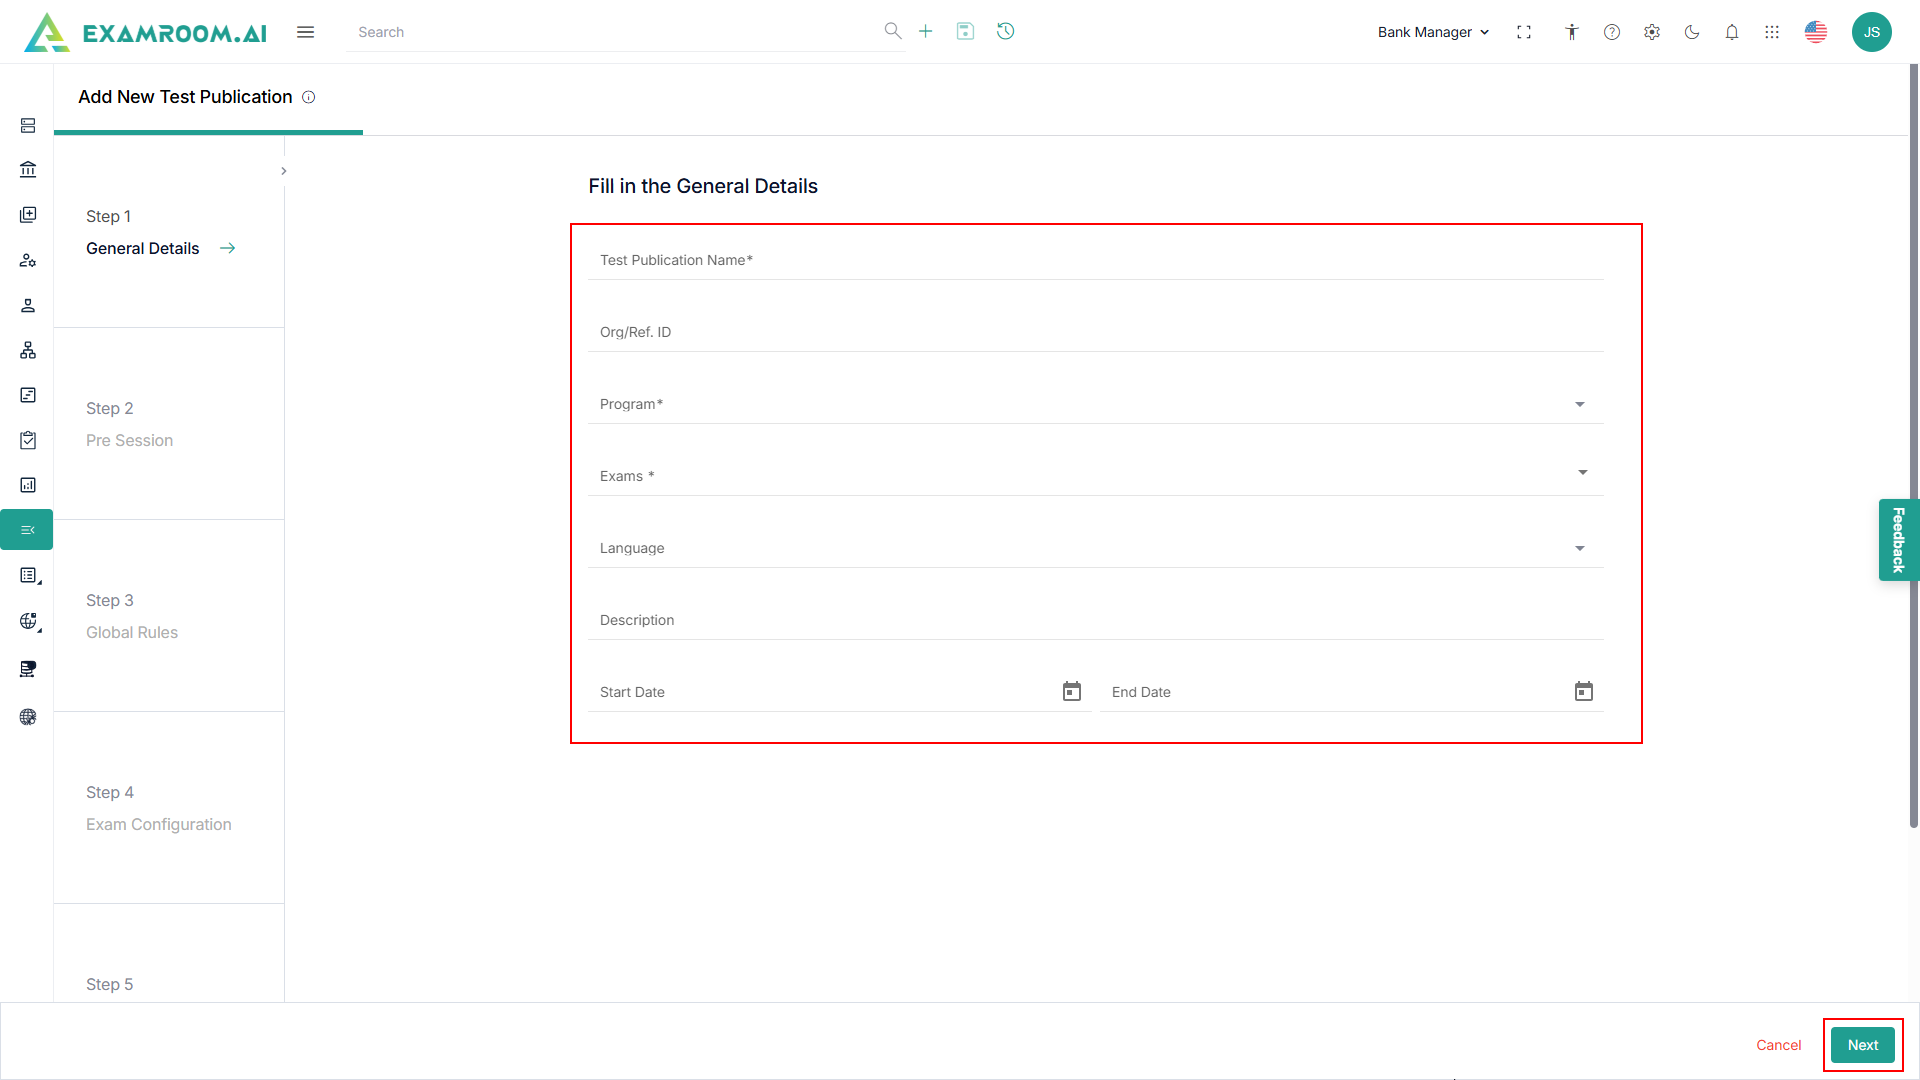
Step 1: General Details
- Enter the following general details in the Add New Test Publication page.
- Enter the Test Publication Name, Org/Ref ID, and Description.
- Choose the Program, Exam, and Language from the dropdown menu.
- Enter the Start and End date.
- Click Next to proceed to the next step.
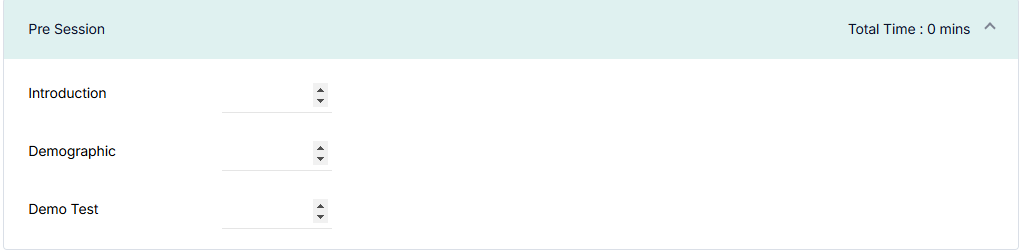
Step 2: Pre Session
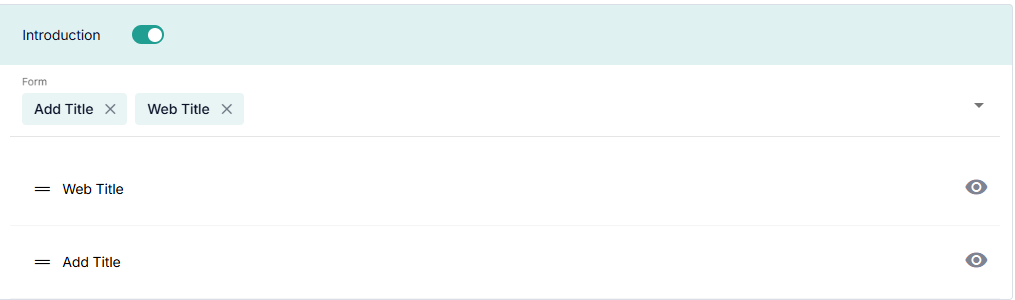
- Click the Introduction toggle button to view the Form field.
- Select individual or multiple Forms from the dropdown menu.
- Click the
View icon to view the selected forms.
- Use the
Drag and Drop icon to arrange the form in sequential order.
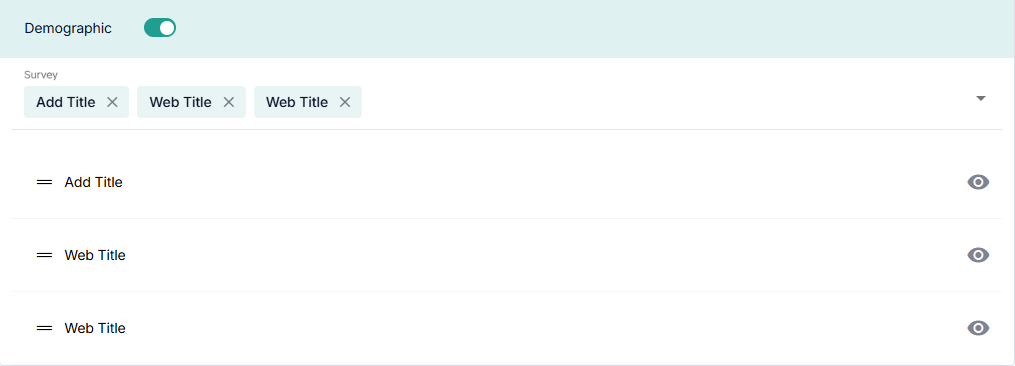
- Click the Demographic toggle button to view the Survey Field.
- Select individual or multiple Survey from the dropdown menu.
- View the selected Survey by clicking on the
- Use the
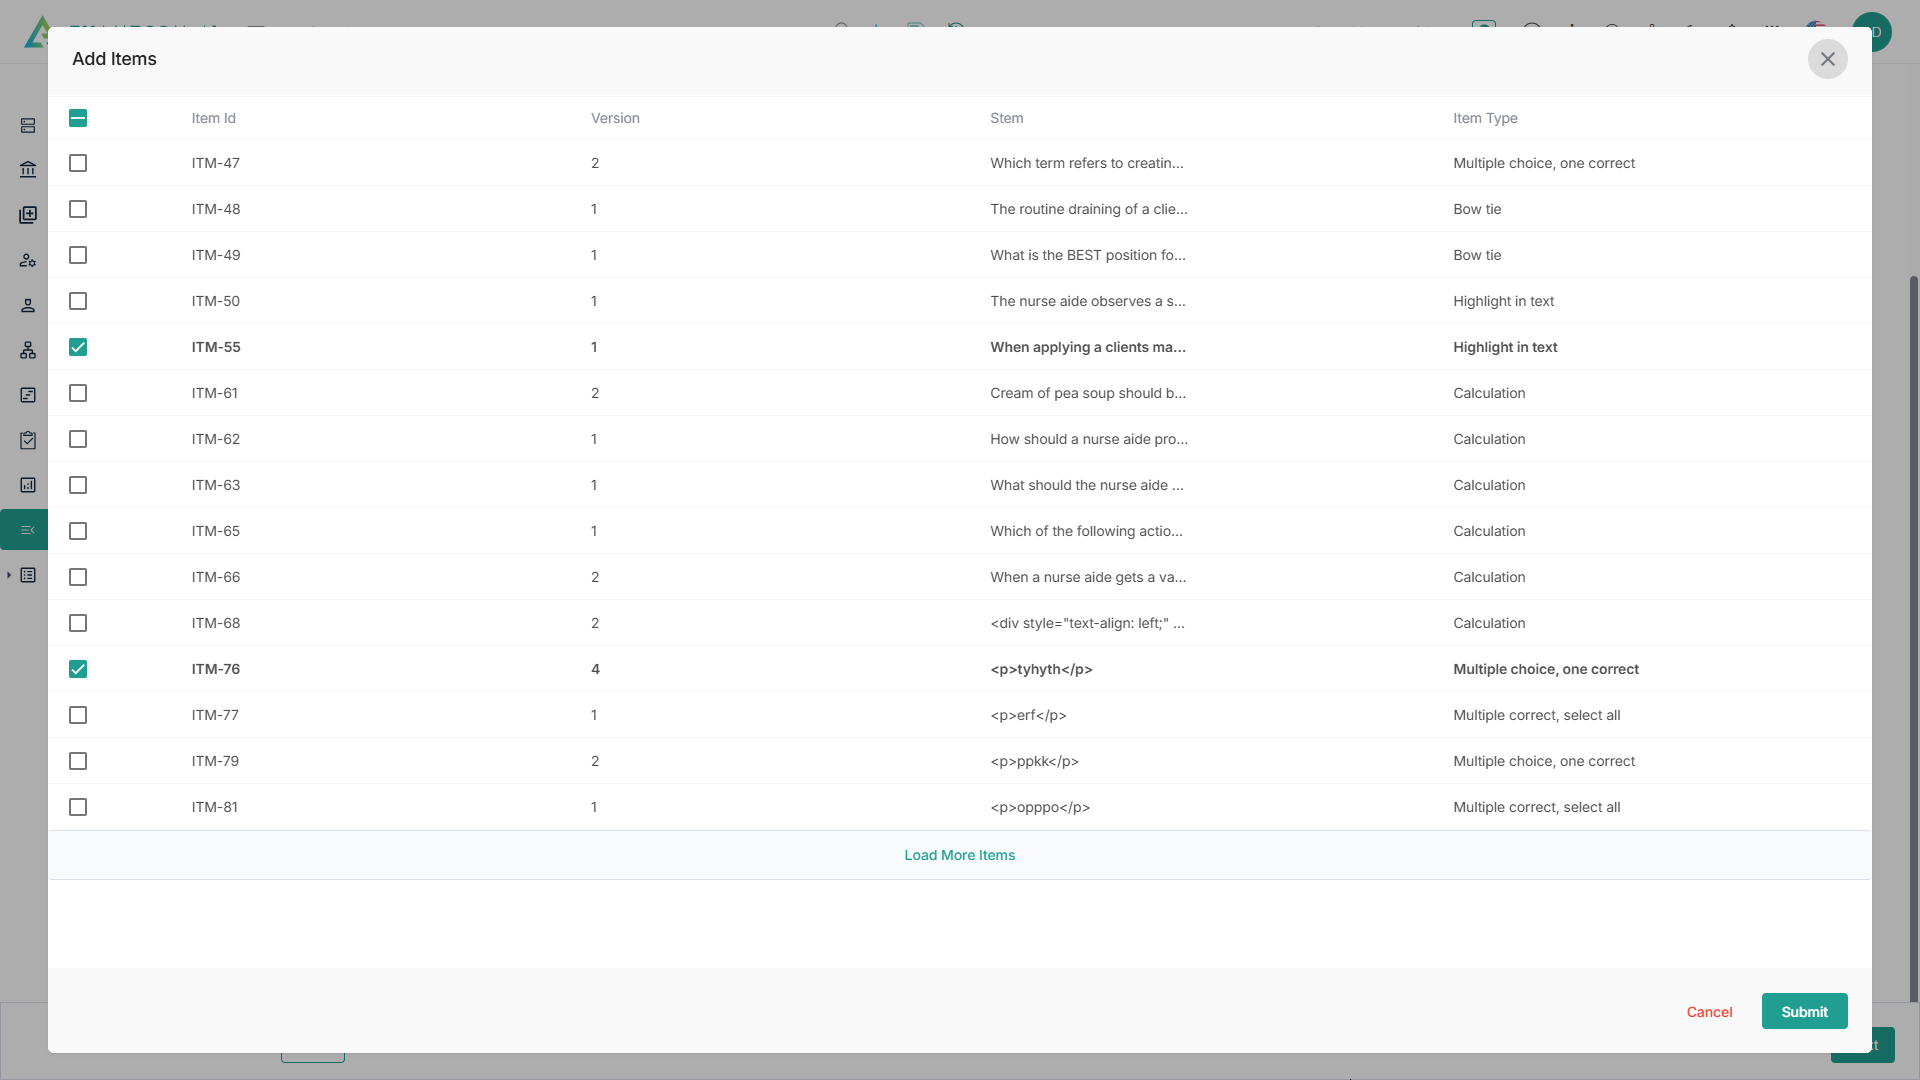
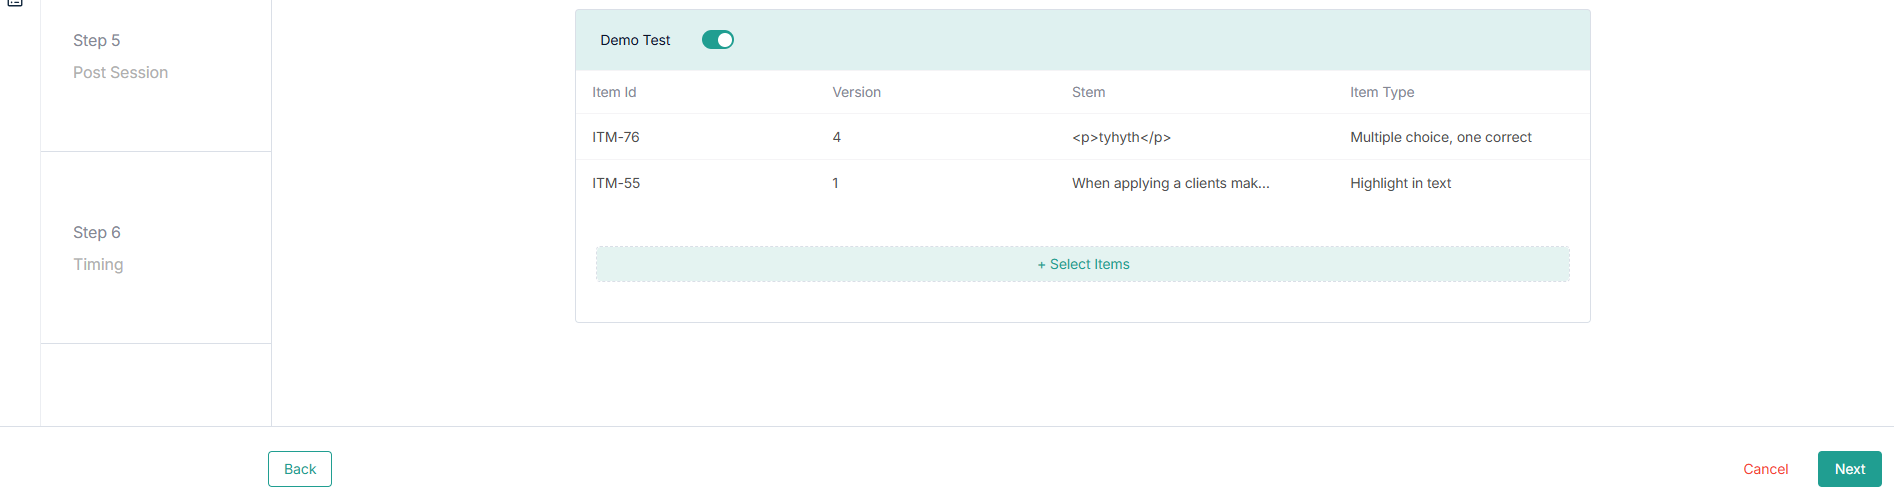
- Click Demo Test toggle button to add the items.
- Click Select Item to select the items.
- Click the checkboxes to add the item.
- Click Submit to add the items to the list.
- View the added items in the Demo Test section.
- Click Select Item to select the items.
- Click Next to proceed to the next step.

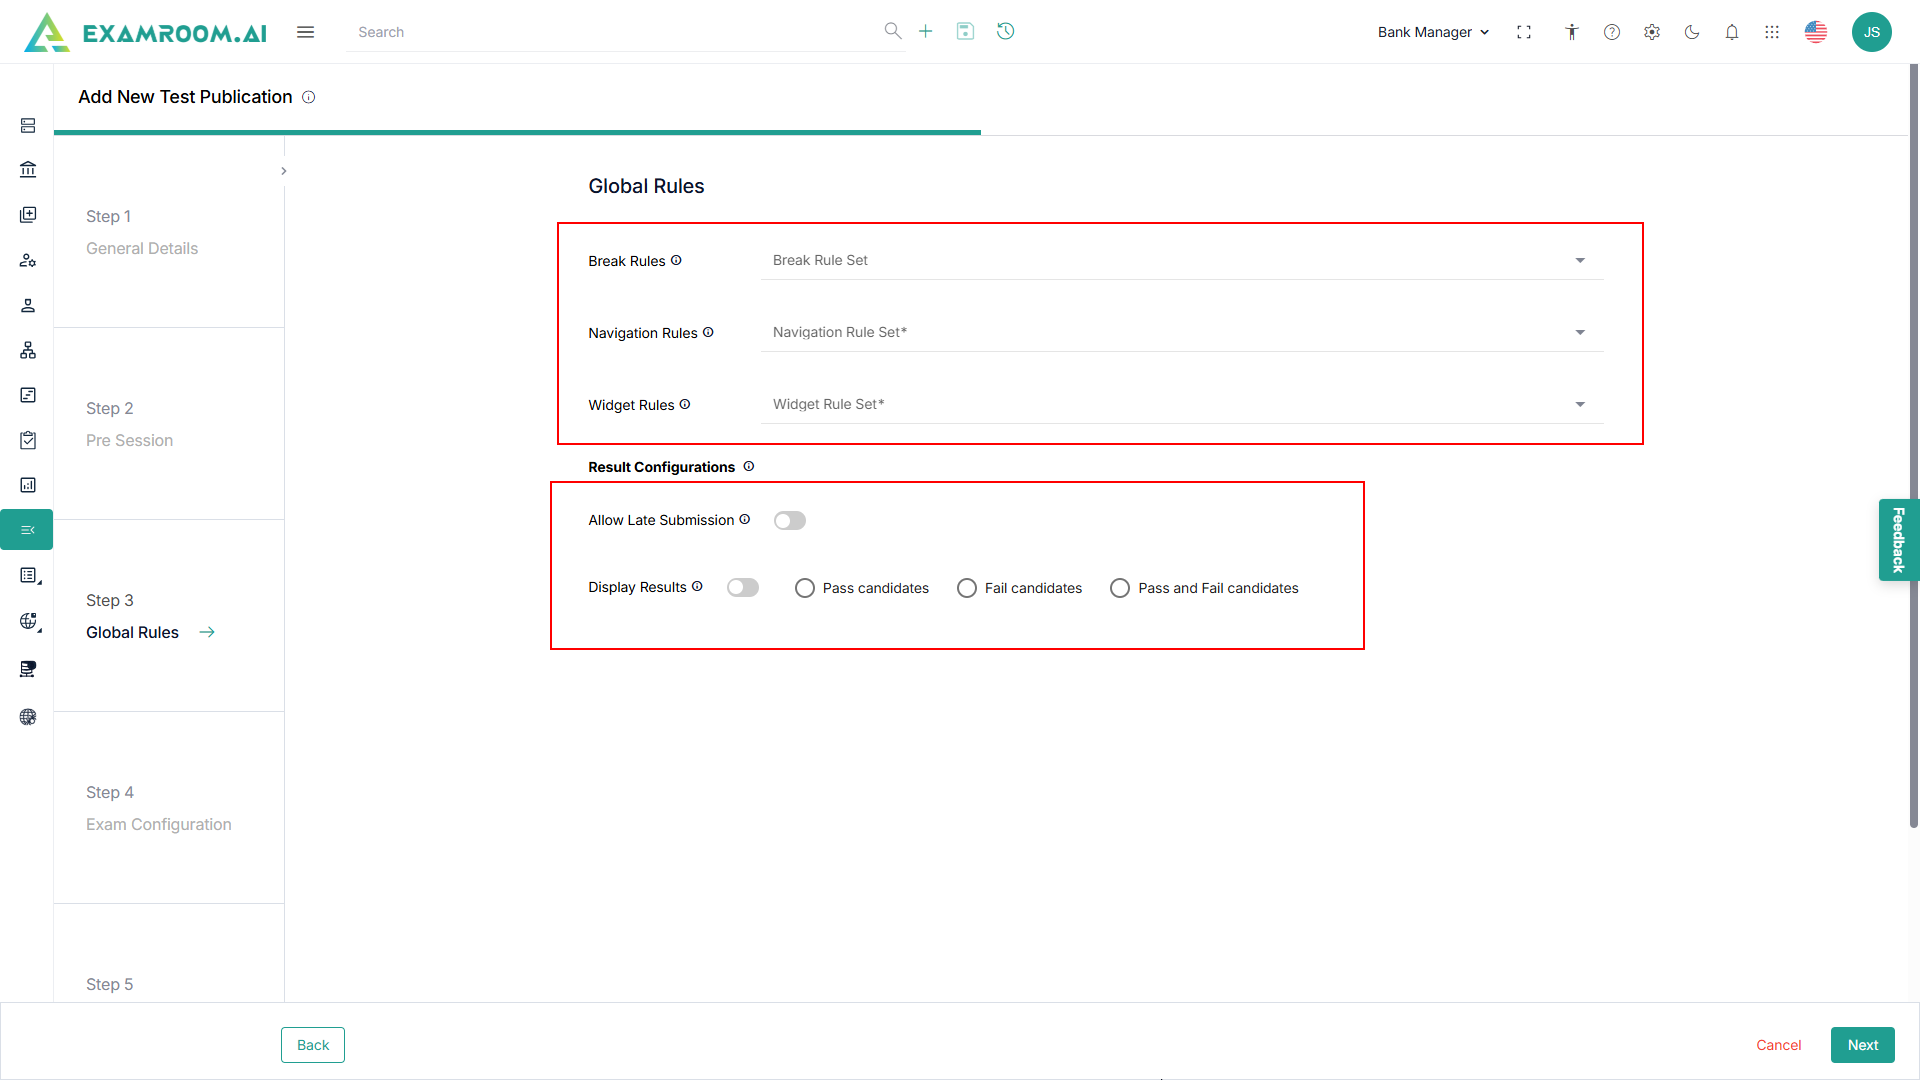
Step 3: Global Rules
- Select the Break Rules, Navigation Rules, Widget Rules from the dropdown.
- Click Next to proceed to the next step.
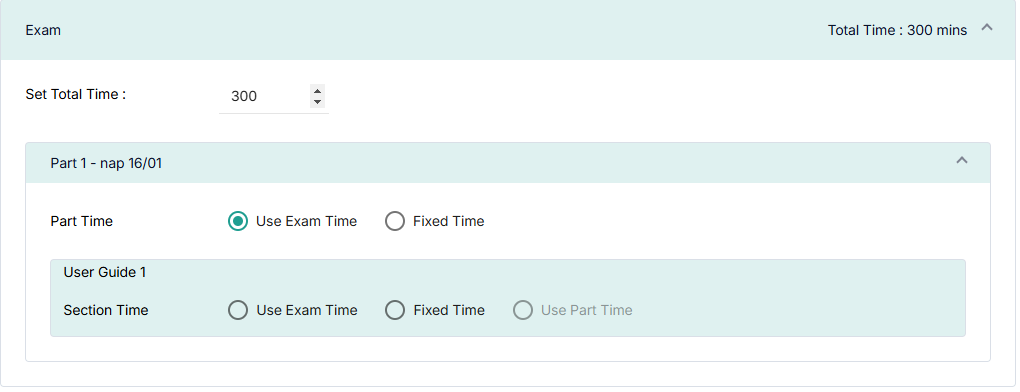
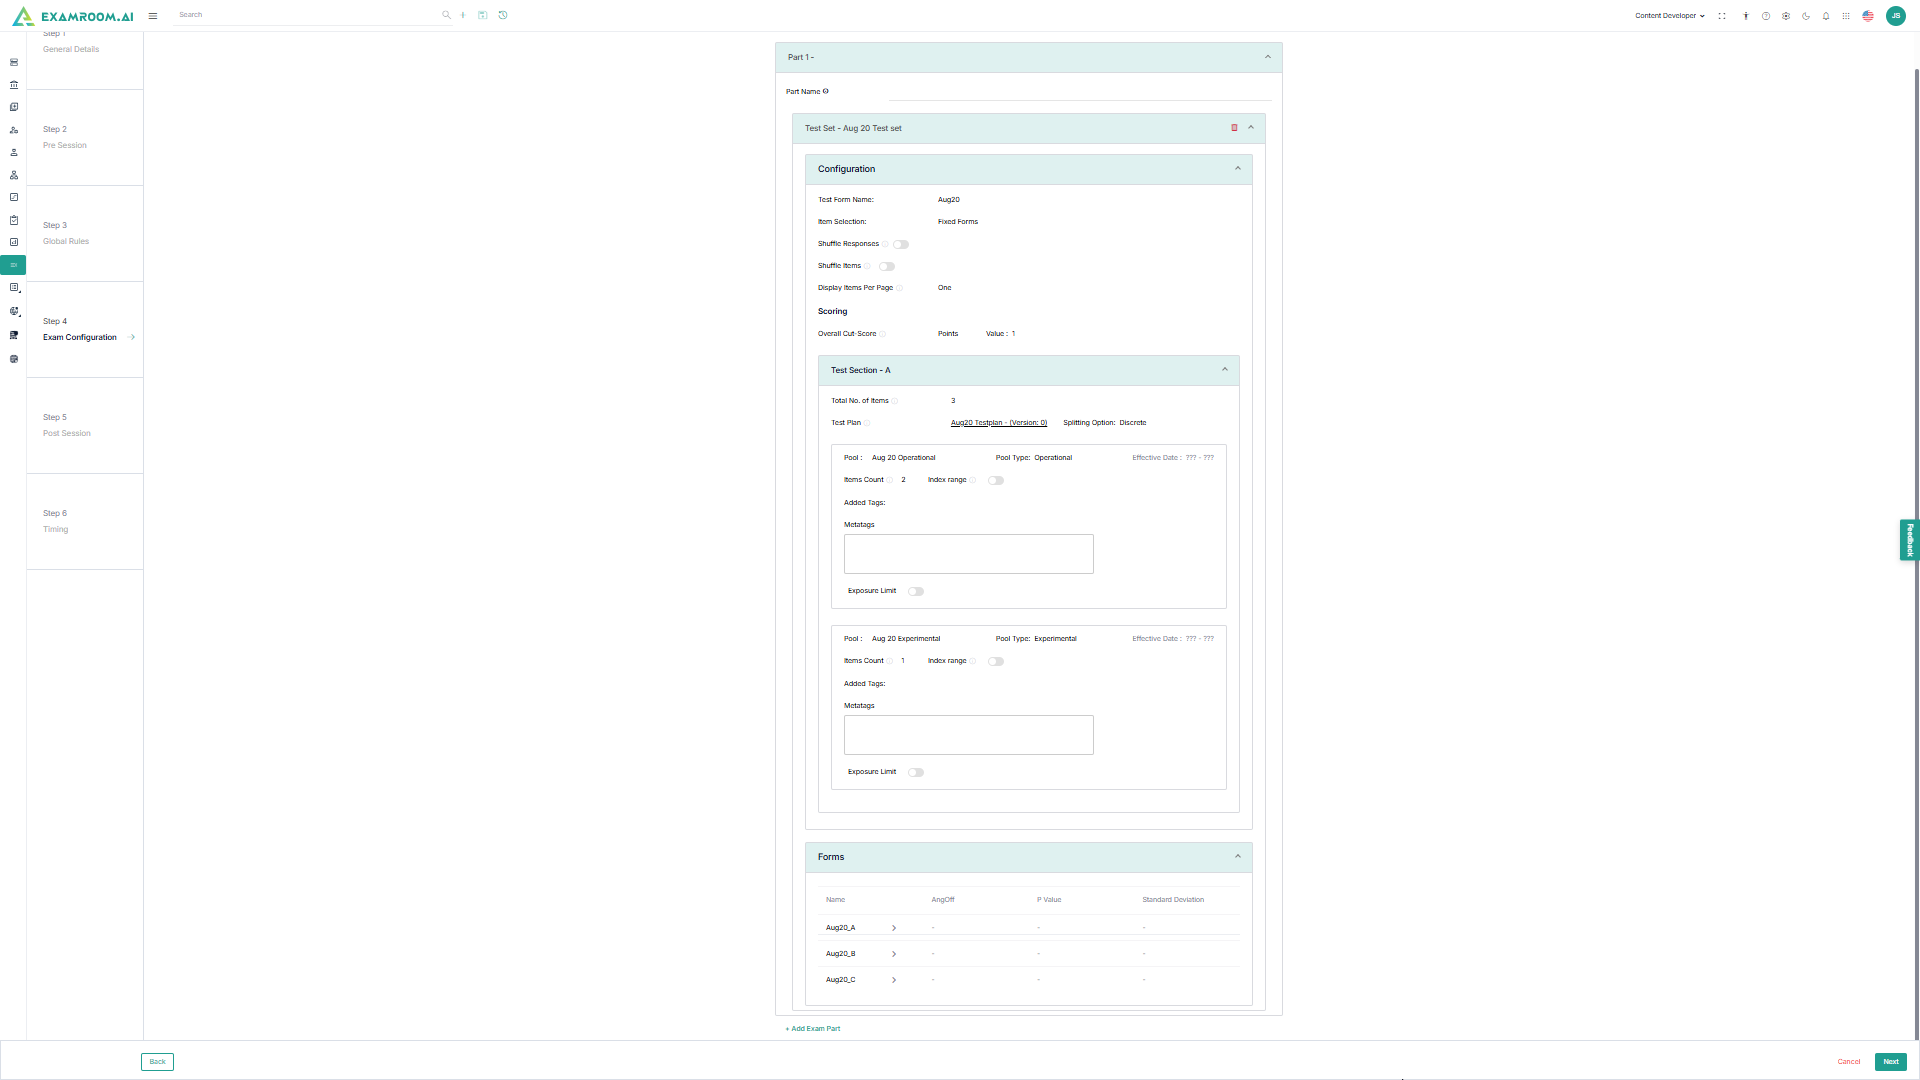
Step 4: Exam Configuration
- Enter the following Part Details.
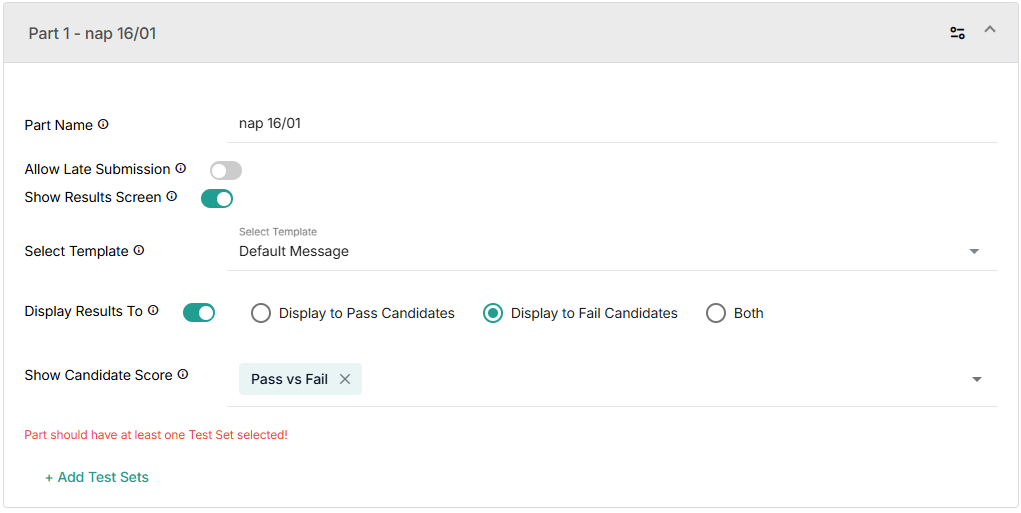
- Enter the Part Name.
- Click Allow Late Submission toggle button to enable candidates to submit answers after the exam time has expired.
- Click Show Result Screen toggle button to show result screen.
Note: If Show Result Screen is toggled to the Off position, then Select Template, Display Result To, Show Candidate Score fields are disabled. - Select Template from the dropdown menu.
- Click the Display Result To toggle button and use the radio buttons to choose how to display the result to the candidate: Display to Pass Candidate, Display to Fail Candidate, or Both.
- Select Show Candidate Score from the dropdown menu.
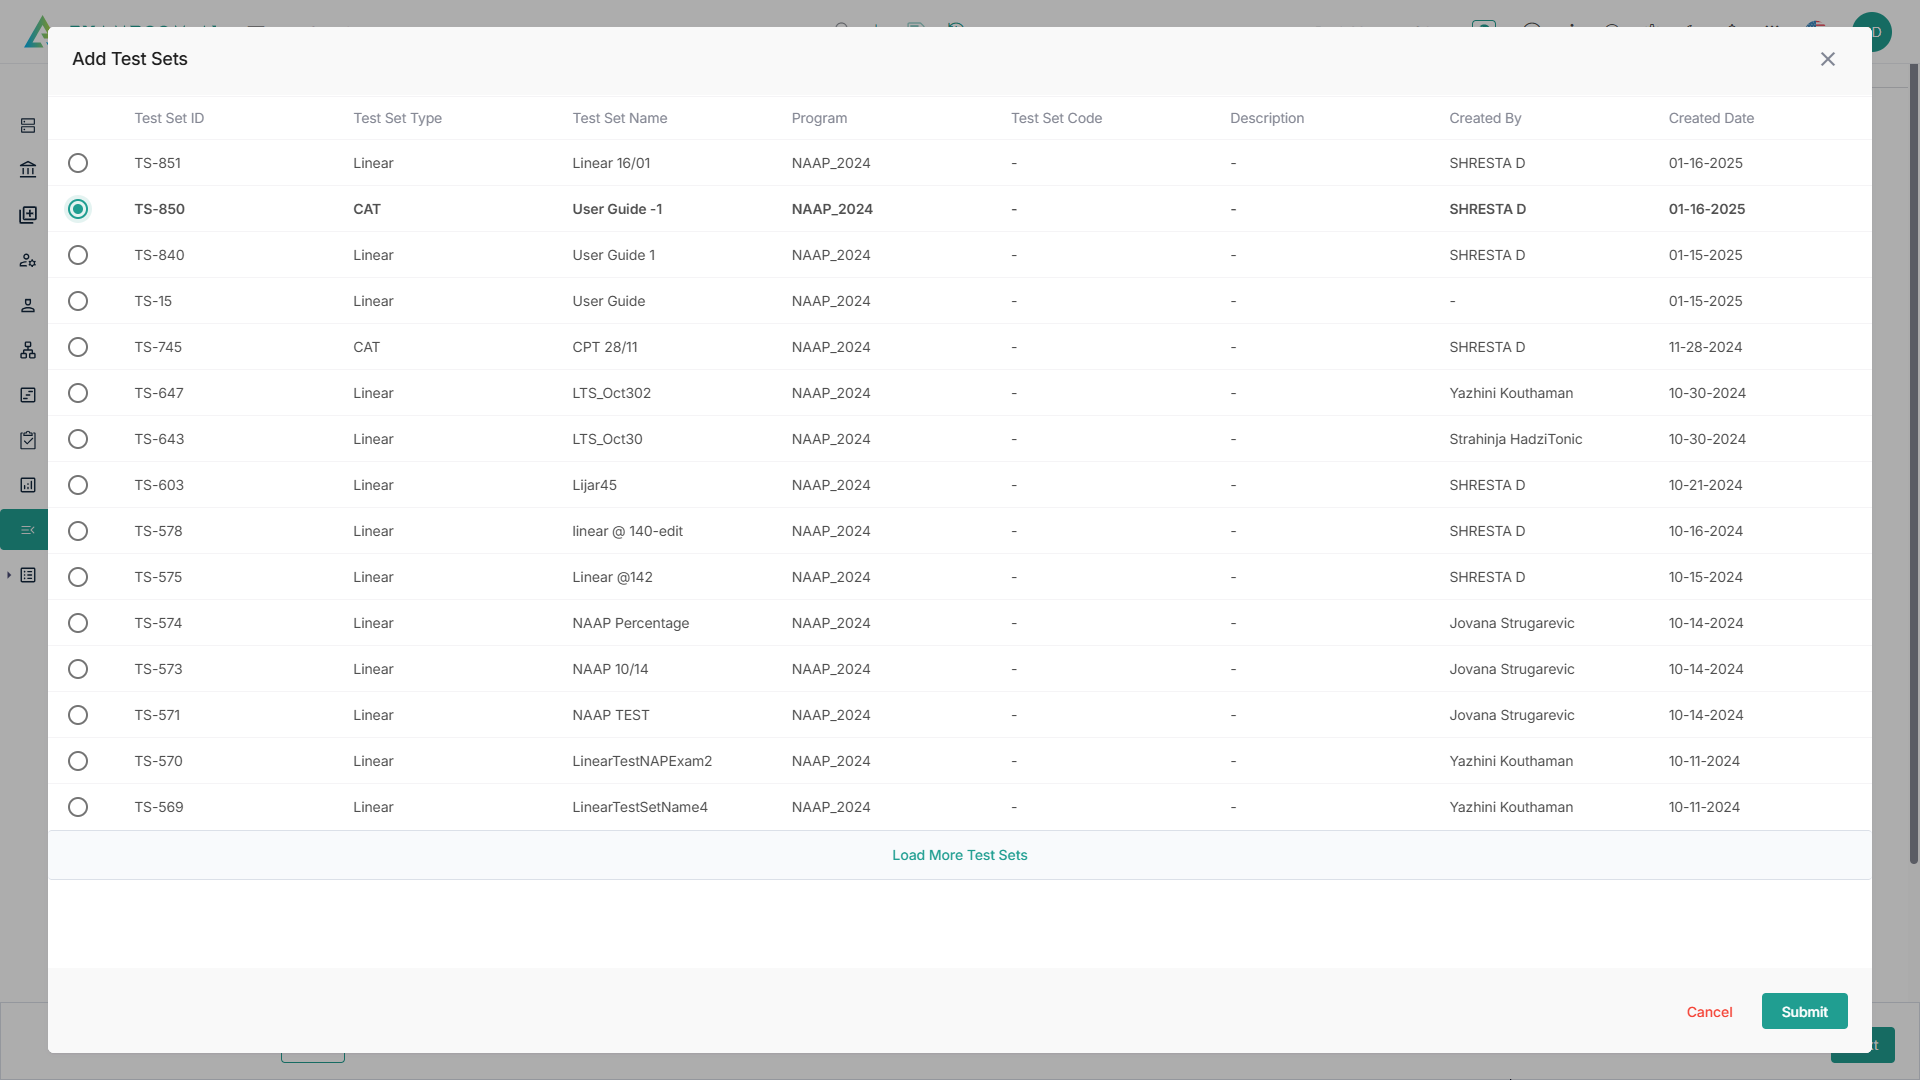
- Click Add Test Sets.
Note: Each Part should have at least one Test Set selected.
- Click the checkbox to select the Test Set and click Submit button.
- View the selected Test Set in the Part Details.
- Click the
Down icon to preview the test sets configuration.
- Click Add Exam Part to add more Exam parts.
- Click Next to move to the next step.
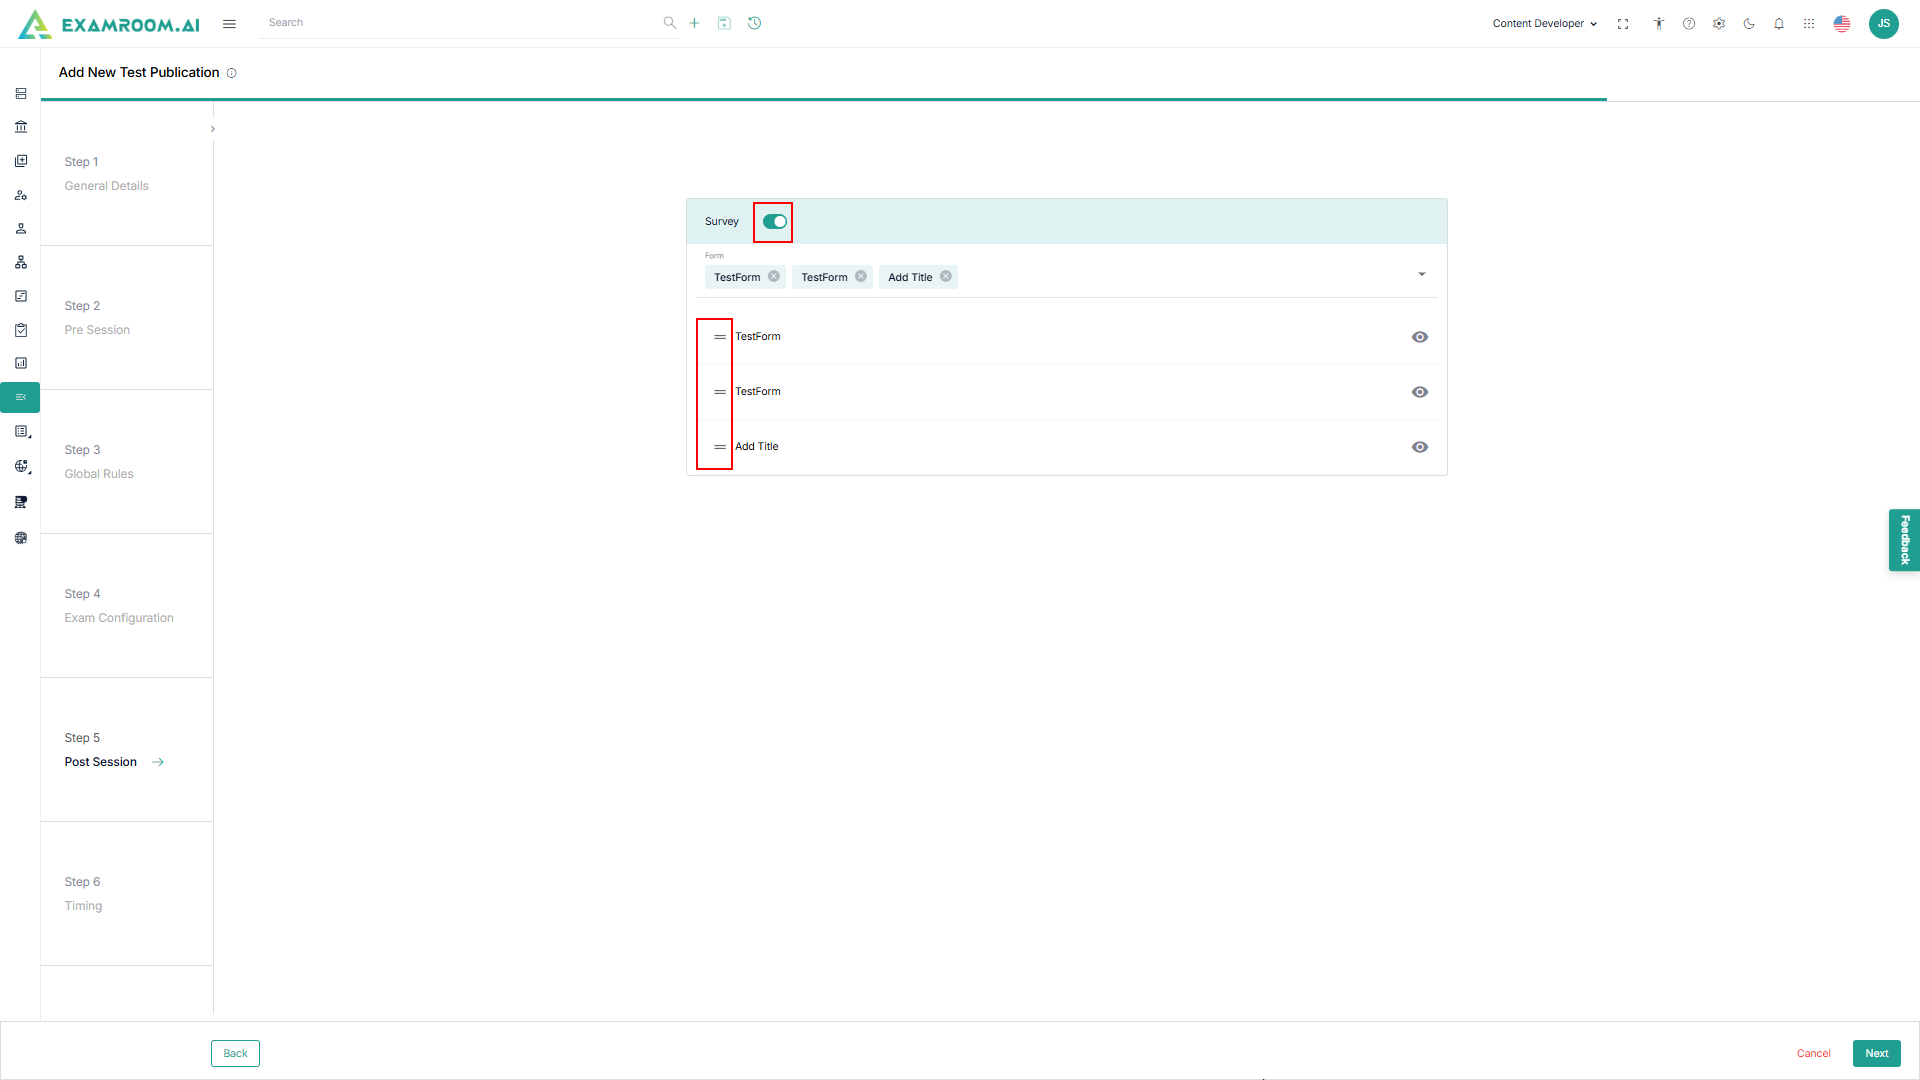
Step 5: Post Session
- Click the Survey toggle button to view the Form field.
- Select individual or multiple Form from the dropdown menu.
- View the selected Form by clicking on the
- Use the
- Click Next to proceed to the next step.
Step 6: Time configuration
Note: Configure the time for each section. If Pre session and Post session are included, allocate time accordingly.
- Allocate time for Pre Session by entering the time for Introduction, Demographic, and Demo Test session.
- Allocate time for Exam Session by entering the Set Total Time.
- Click Use Exam Time or Fixed radio button for Part Time to configure the Test sets time configuration.
Note: If Fixed is selected for part-time, you should enter the specific time for the part-time session. - Allocate time for Post Session by entering the time for Survey session.
- Click Submit to add new test publication.