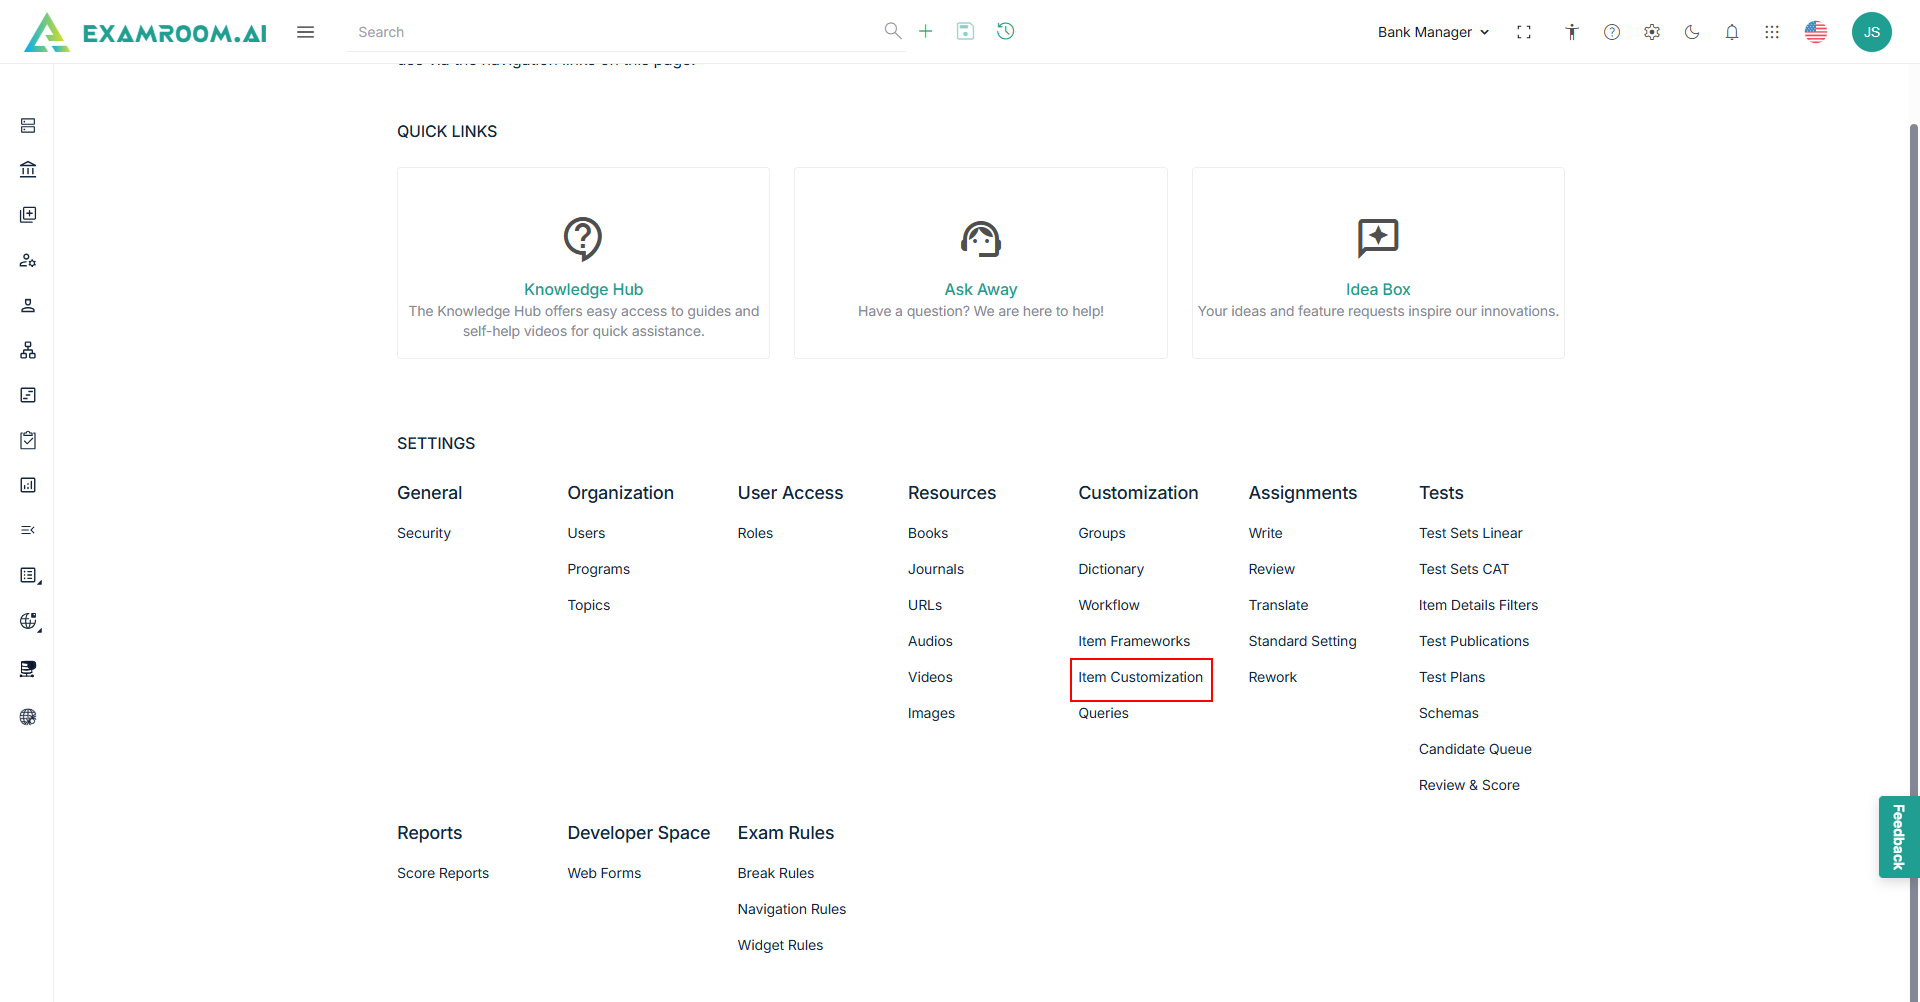
Item Customization
You can Customize the Stem, Exhibit title, Measuring Unit, and Status Code by using the item customization.
- Click the Settings icon and navigate through settings popup.
- Click Item Customization under the Customization section.
- The Item Customization page is displayed with Steam, Exhibit Title, Measuring Unit, and Status Code section.
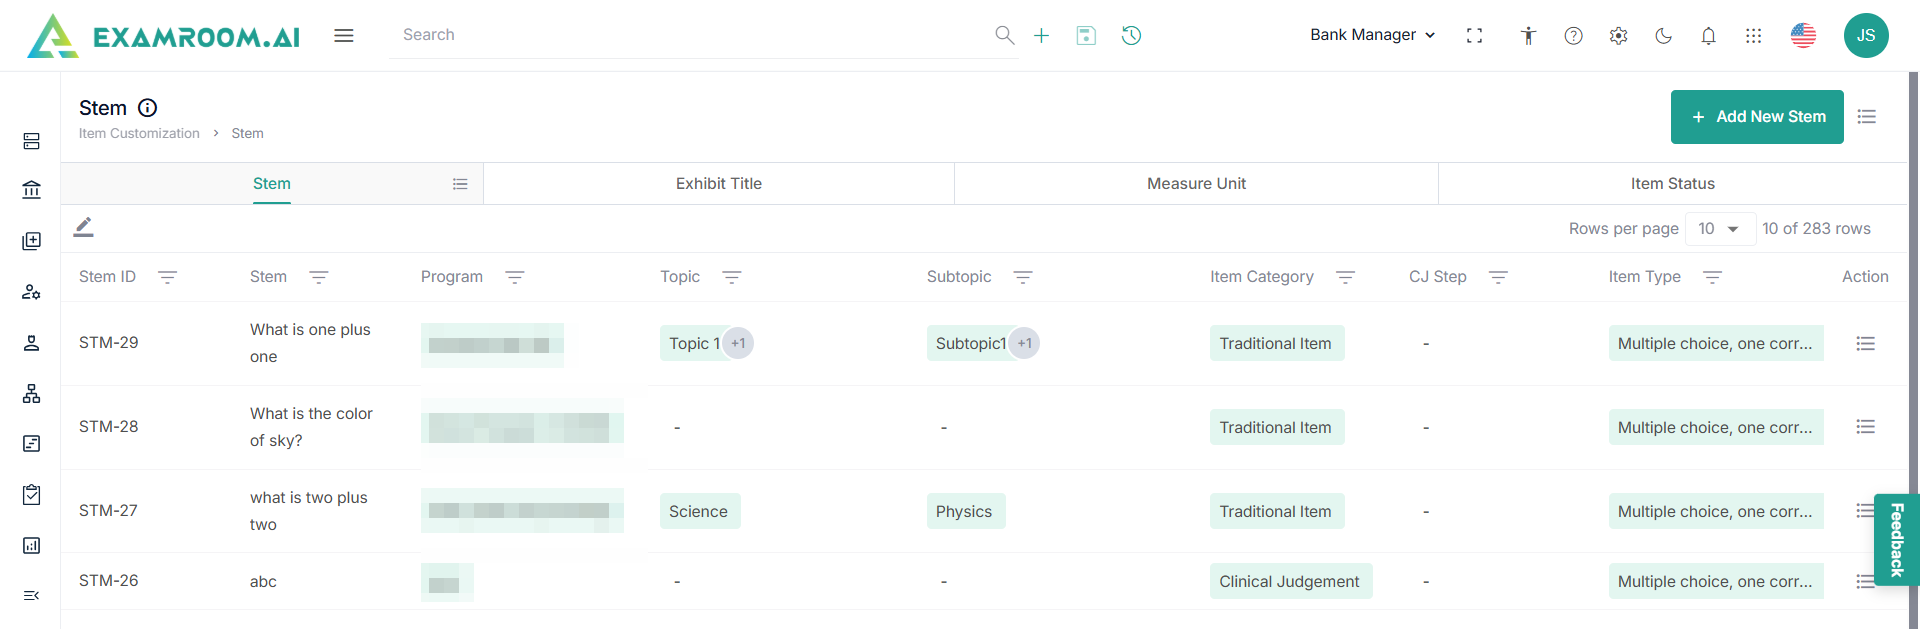
Customize Stem Header
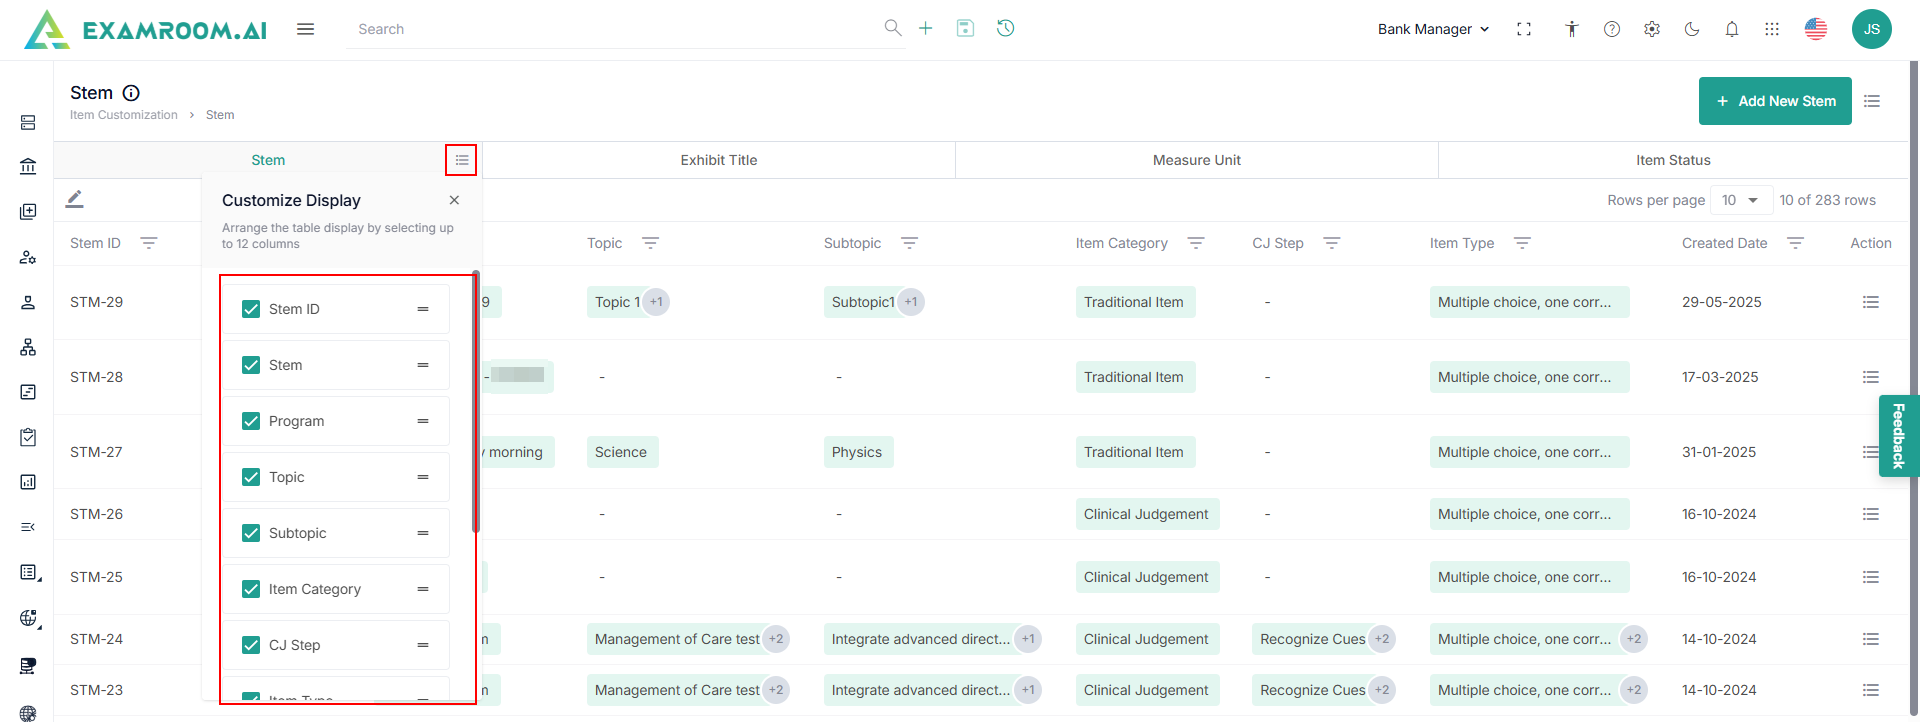
- Click the Hamburger Menu on the right of Stem, to view the Customize Display of the tab columns/headers.
Note: Rearrange any of the table headers to display specific column information as required. - The following are the table headers:
- Stem ID: Unique ID generated when a stem is created.
- Stem Name: Stem name of the stem ID created.
- Programs: Name of the program.
- Topic: View the selected topic of the stem.
- Subtopic: View the subtopic of the selected topic of the stem.
- Item Category: View the selected item category.
- CJ Step: View the selected Clinical Judgement step.
- Item Type: View the selected item type.
- Created Date: Date when the stem was created.
- Created By: Name of the person who created the stem.
- Modified Date: Date when the stem was modified.
- Modified By: Name of the person who modified the stem.
- Action: A choice to Edit stem and Delete.
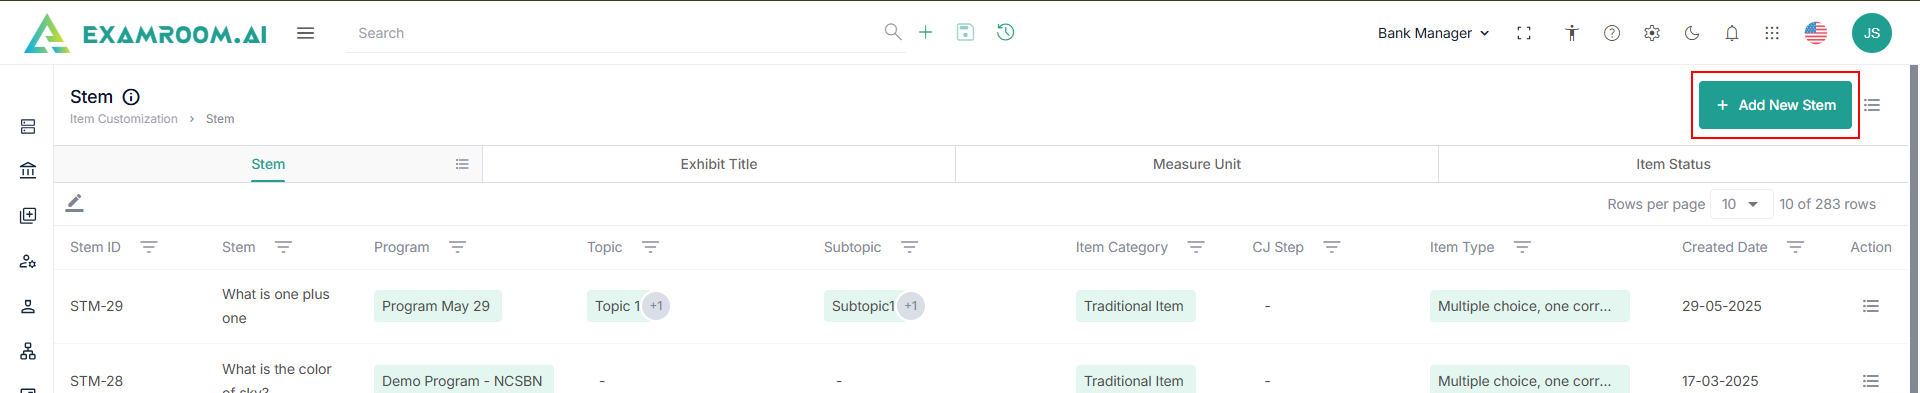
Add New Stem
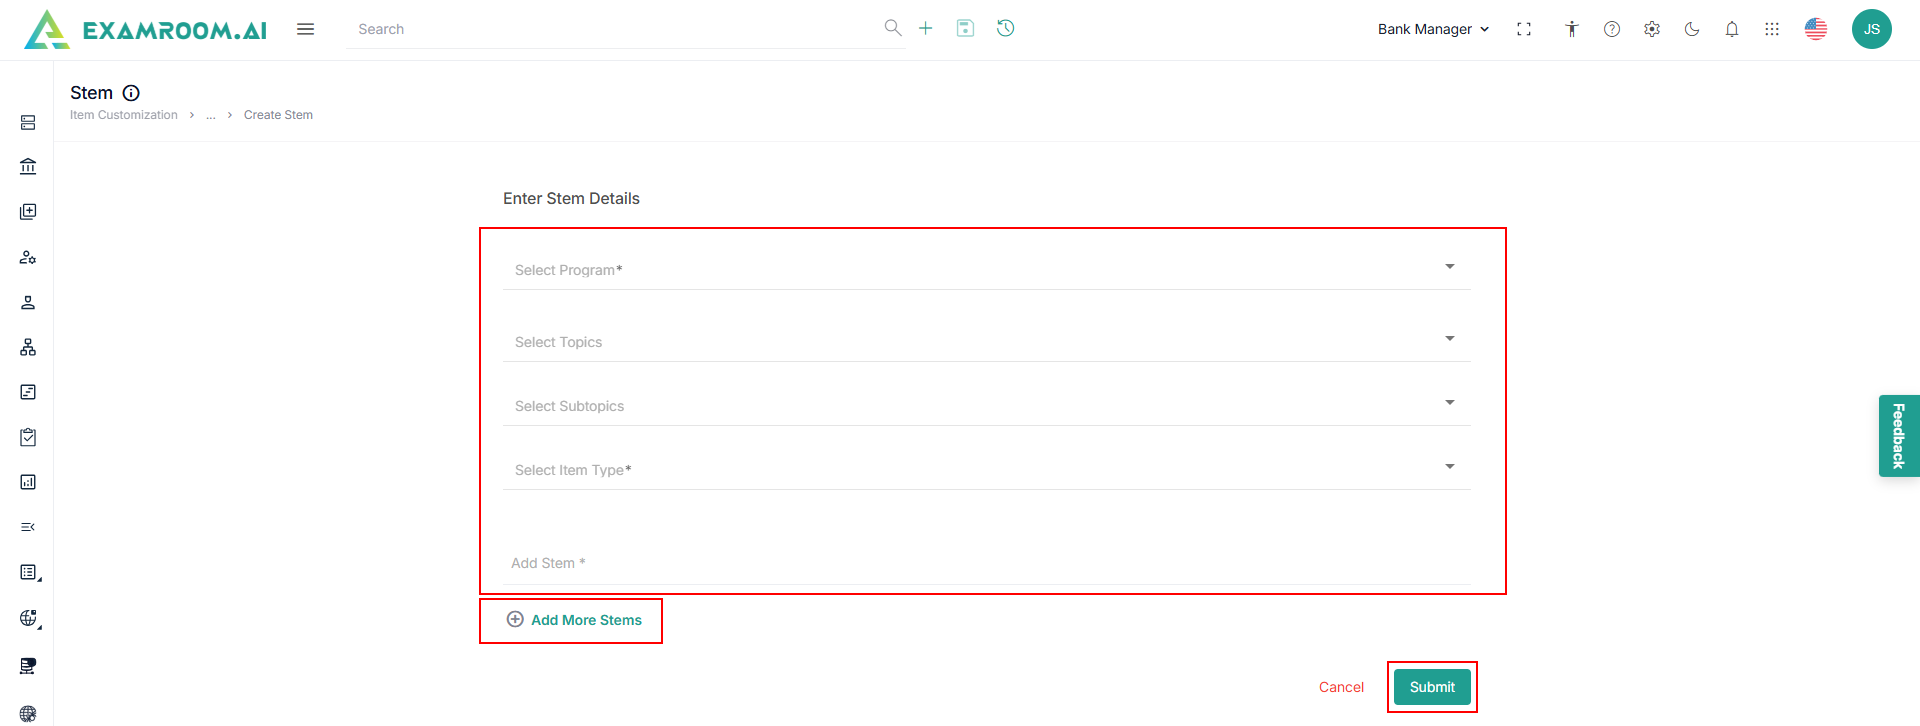
To add a new stem, follow these steps.
- Click Add New Stem.
- Enter the following Stem details.
- Select the Program from the dropdown.
- Based on the selected program choose the topics and subtopics.
- Select Item Category.
Note: If Clinical Judgement is selected from the item category, then you need to select clinical judgement step from the dropdown. - Select Item Type.
- Enter Add Stem Description.
- Click Add More Stem to add more stem details.
- Click Submit to create new stem.
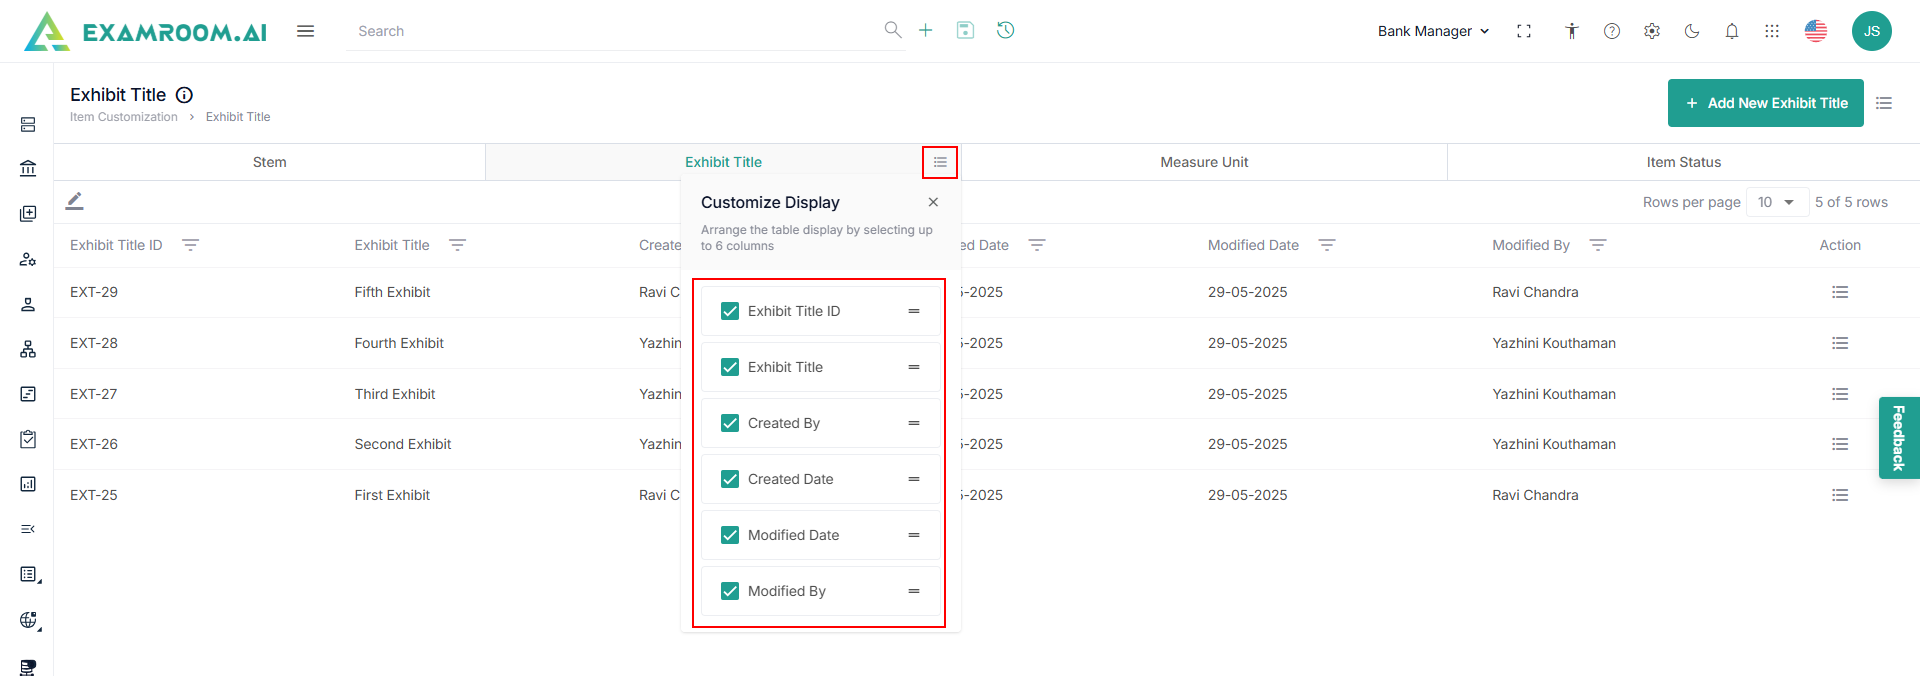
Customize Exhibit Title header
- Click the Hamburger Menu at the right of Exhibit Title, to view the Customize Display of the tab columns/headers.
Note: Rearrange any of the table headers to display specific column information as required. - The following are the table headers:
- Exhibit Title ID: Unique ID generated when an exhibit title is created.
- Exhibit Title: Exhibit title name of the exhibit title ID created.
- Created Date: Date when the exhibit title was created.
- Created By: Name of the person who created the exhibit title.
- Modified Date: Date when the exhibit title was modified.
- Modified By: Name of the person who modified the exhibit title.
- Action: A choice to Edit exhibit title and Delete.
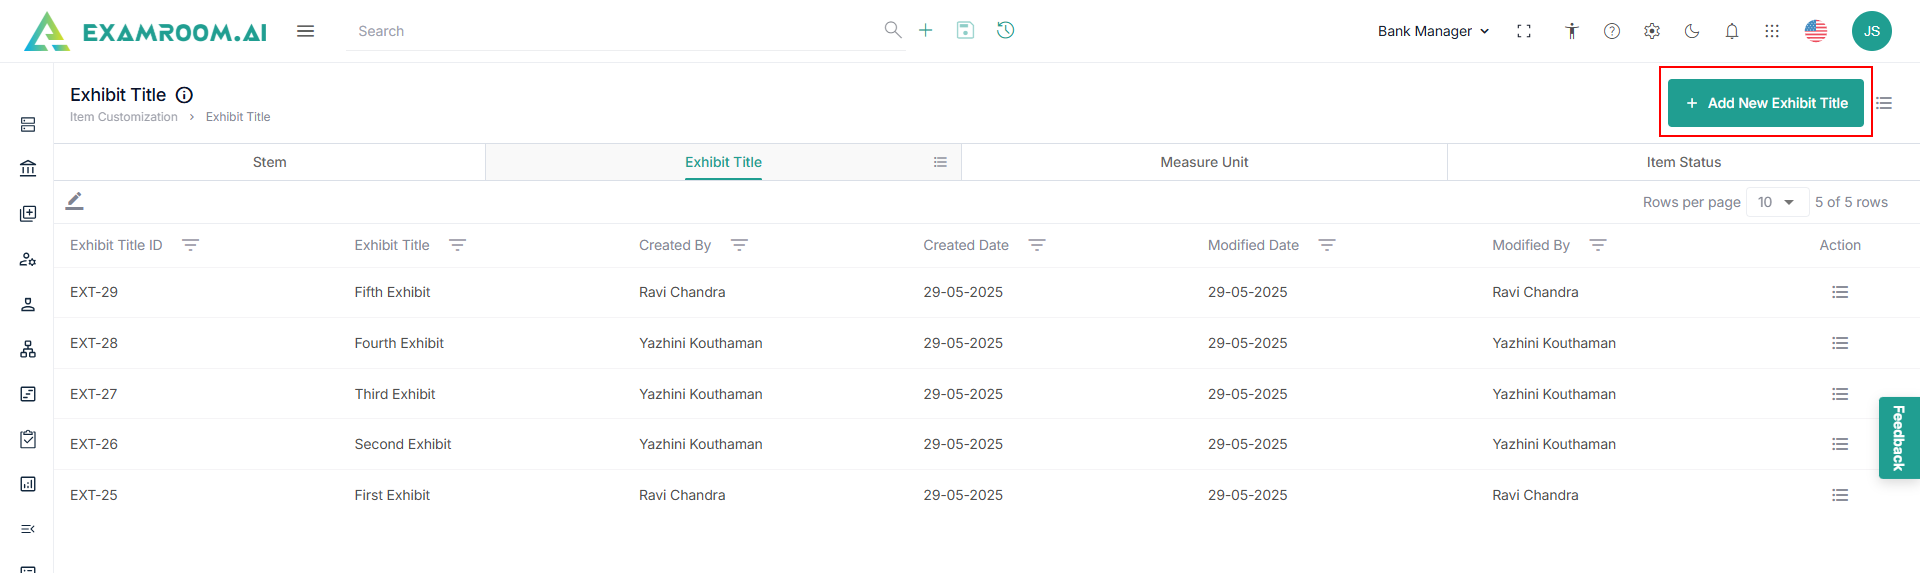
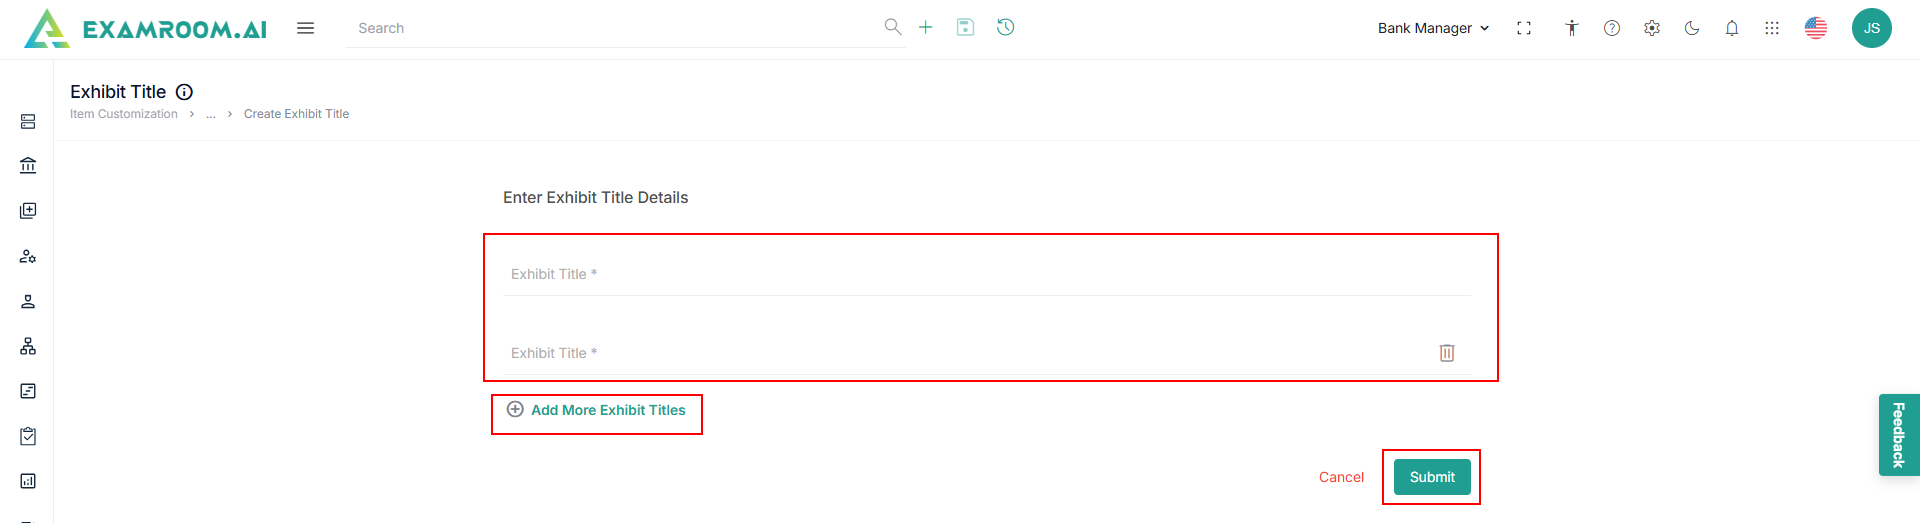
Add New Exhibit Title
To add a new exhibit title, follow these steps.
- Click Exhibit Title header on the Item Customization page.
- Click Add New Exhibit Title.
- Enter Exhibit Title under exhibit title details section.
- Click Add More Exhibit Title to add number of exhibit title.
- Click Submit to create new exhibit title.
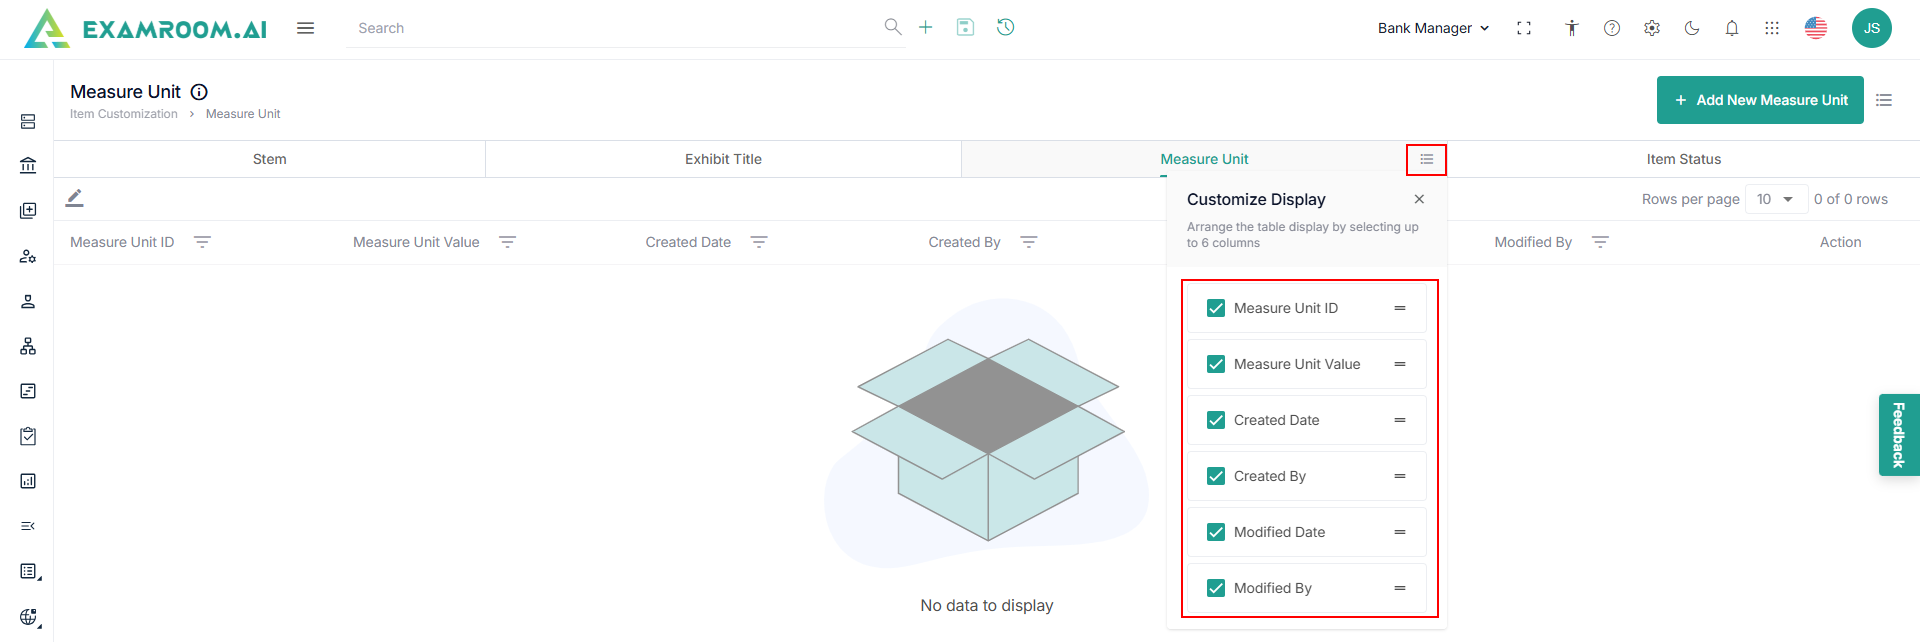
Customize Measure Unit Header
- Click the Hamburger Menu at the right of Measure Unit, to view the Customize Display of the tab columns/headers.
Note: Rearrange any of the table headers to display specific column information as required. - The following are the table headers:
- Measure Unit ID: Unique ID generated when a measure unit is created.
- Measure Unit Value: Measure Unit Value of the measure unit created.
- Created Date: Date when the Measure unit was created.
- Created By: Name of the person who created the measure unit.
- Modified Date: Date when the measure unit was modified.
- Modified By: Name of the person who modified the measure unit.
- Action: A choice to Edit measure unit and Delete.
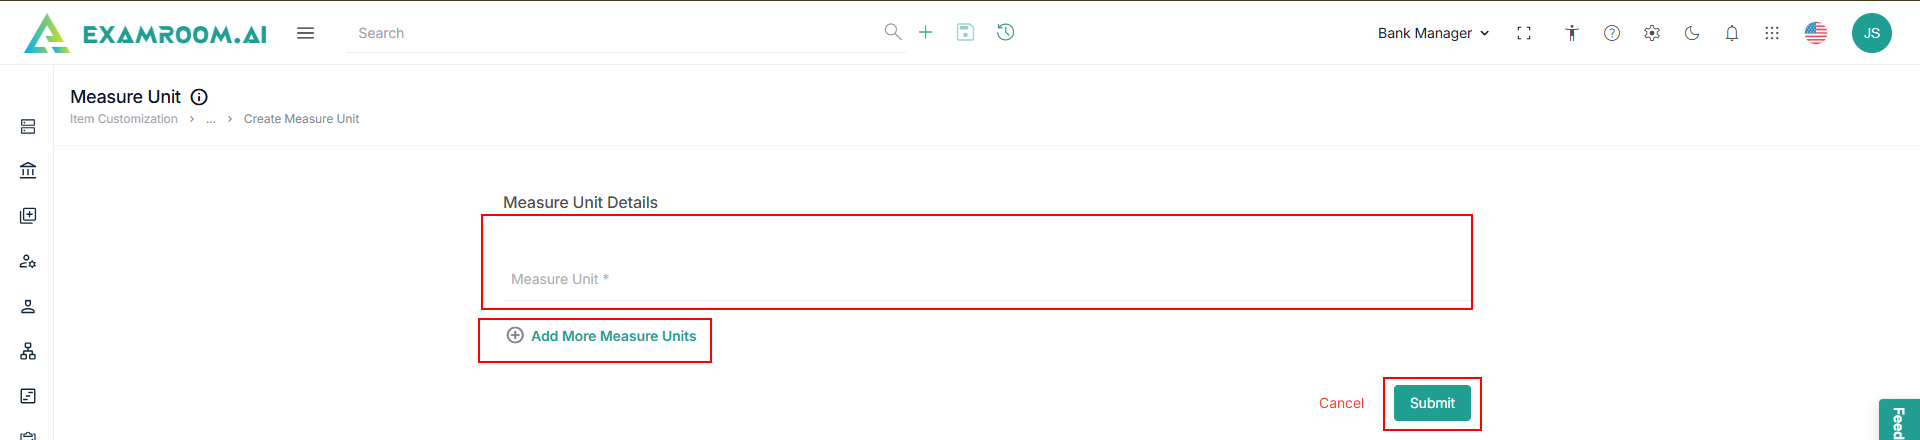
Add New Measure Unit
To add a new measure unit, follow these steps.
- Click Measure Unit header on the Item Customization page.
- Click Add New Measure Unit.
- Enter Measure Unit under Measure Unit Details section.
- Click Add More Measure Unit to add more measure unit.
- Click Submit to create a new measure unit.

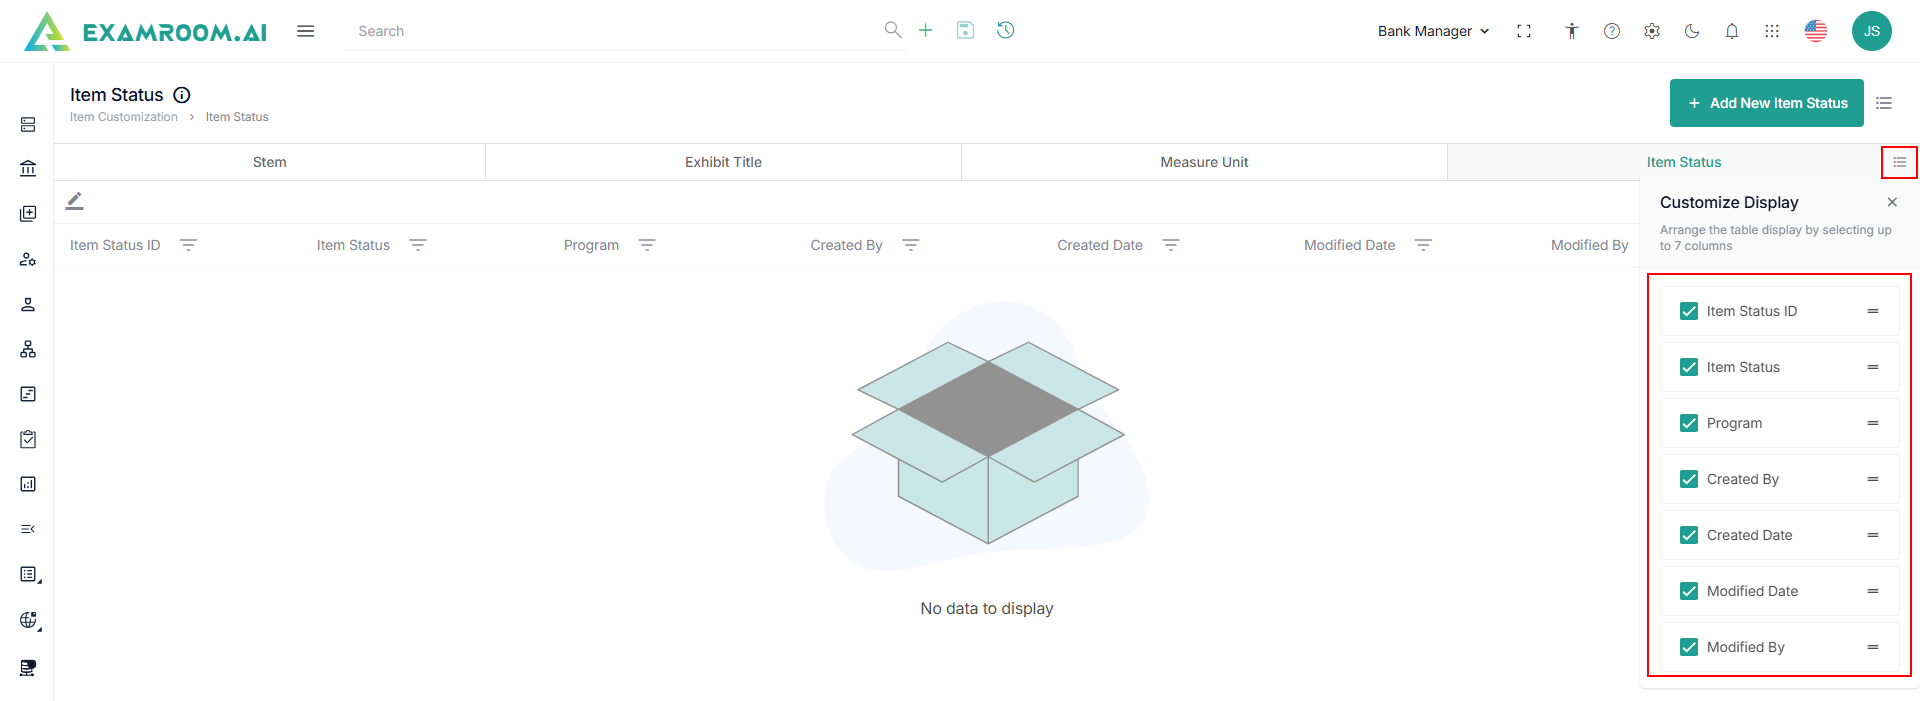
Customize Status Code Header
- Click the Hamburger Menu at the right of Status Code, to view the Customize Display of the tab columns/headers.
Note: Rearrange any of the table headers to display specific column information as required. - The following are the table headers:
- Status Code ID: Unique ID generated when a status code is created.
- Status Code: Status code name of the status code created.
- Programs: Name of the program.
- Created Date: Date when the status code was created.
- Created By: Name of the person who created the status code.
- Modified Date: Date when the status code was modified.
- Modified By: Name of the person who modified the status code.
- Action: A choice to Edit measure unit and Delete.
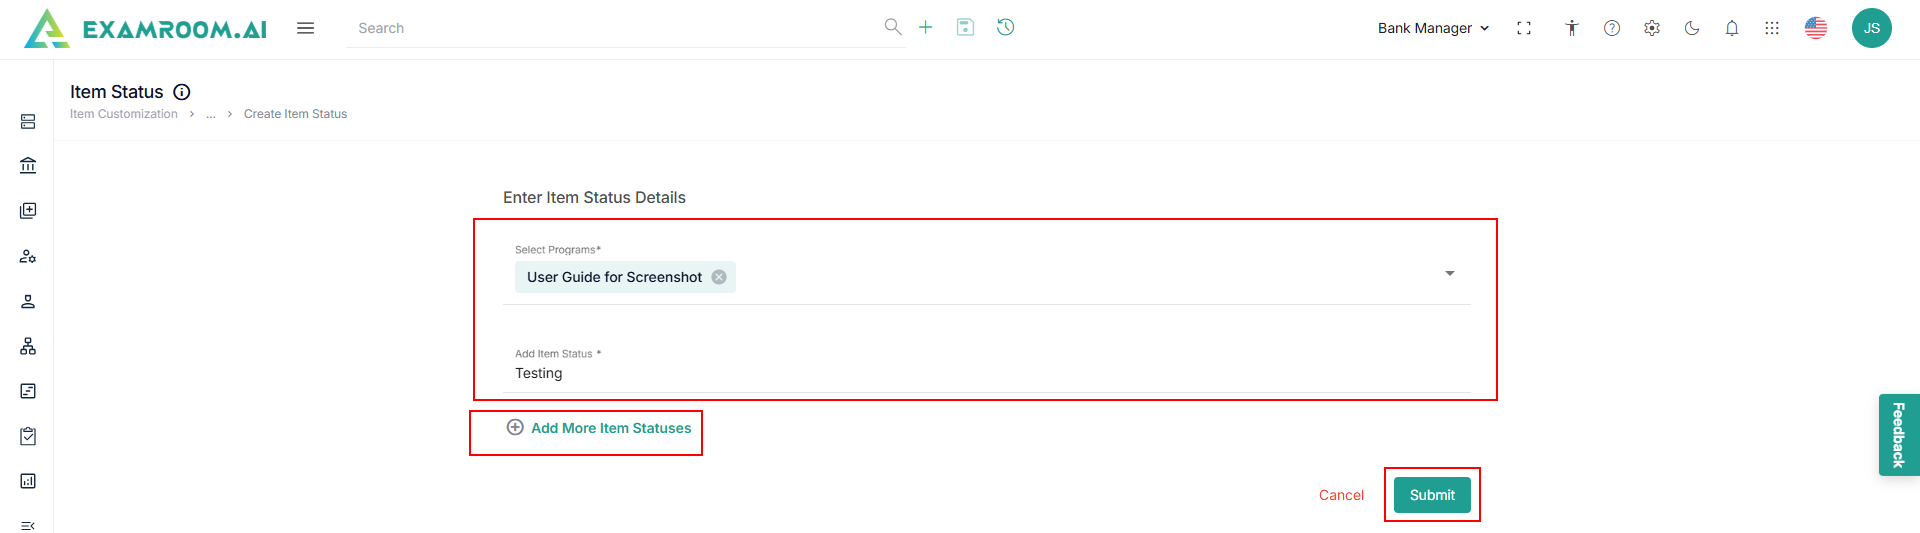
Add New Status Code
To add a new status code, follow these steps.
- Click Status Code header on the Item Customization page.
- Click Add New Status Code.
- Select the Program under status code details section.
- Enter the Status code in the Add Status Code field.
- Click Add More Status Codes to add more status codes.
- Click Submit to create a new status code.