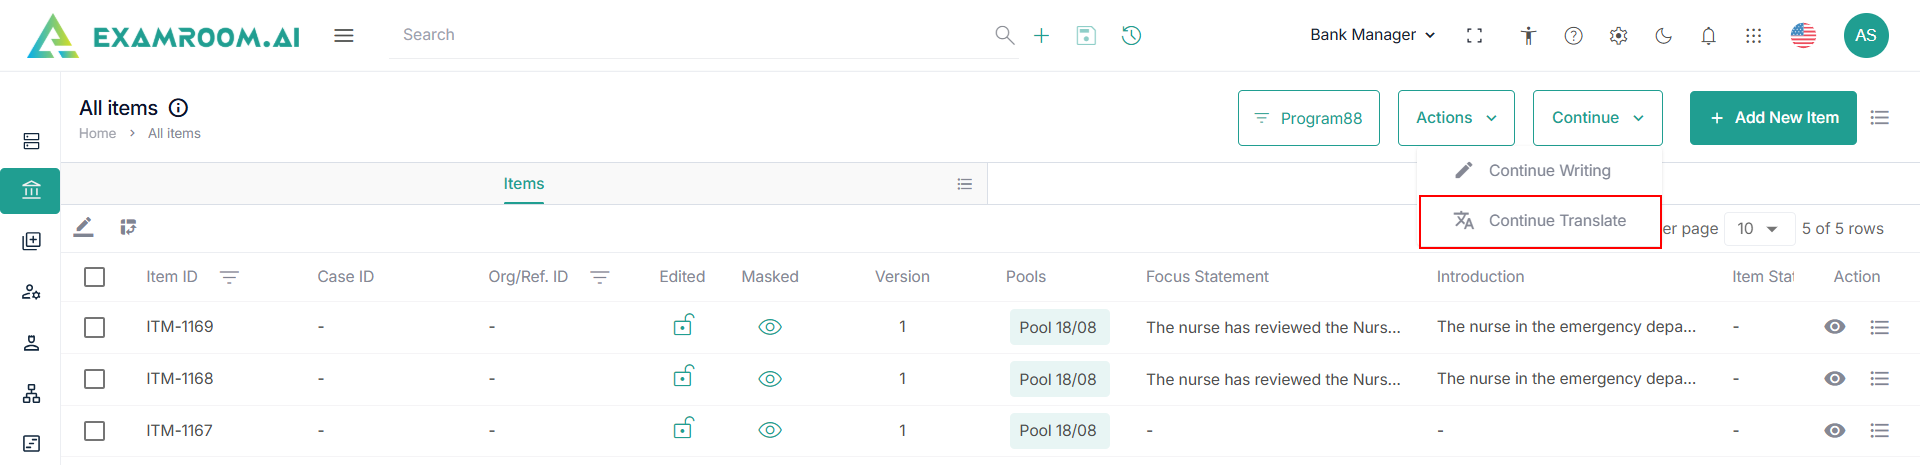
Continue
- On the Items page, navigate to the top right corner and click the dropdown Continue.
- Select Continue Writing to continue the item writing or Continue Translate to continue the translation of an item.
Note: If the user cancels an item before submitting it, the system will display a red locker icon where the cancelled item will be placed. The user can then choose to continue with the item by clicking the "Continue" button.

Continue Writing
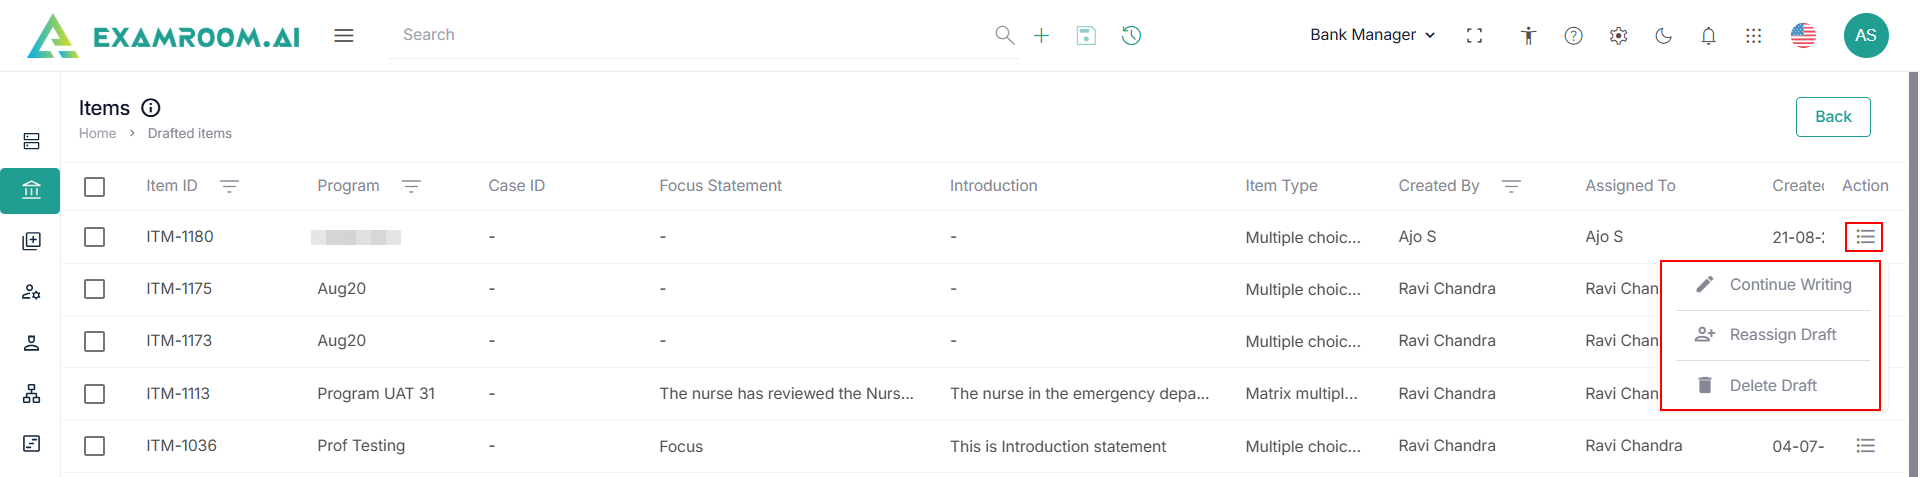
- Select Continue Writing to view the drafted Items.
- Under the Action table column, click the Hamburger Menu.
- Click the Continue Writing to view and continue edit Item.
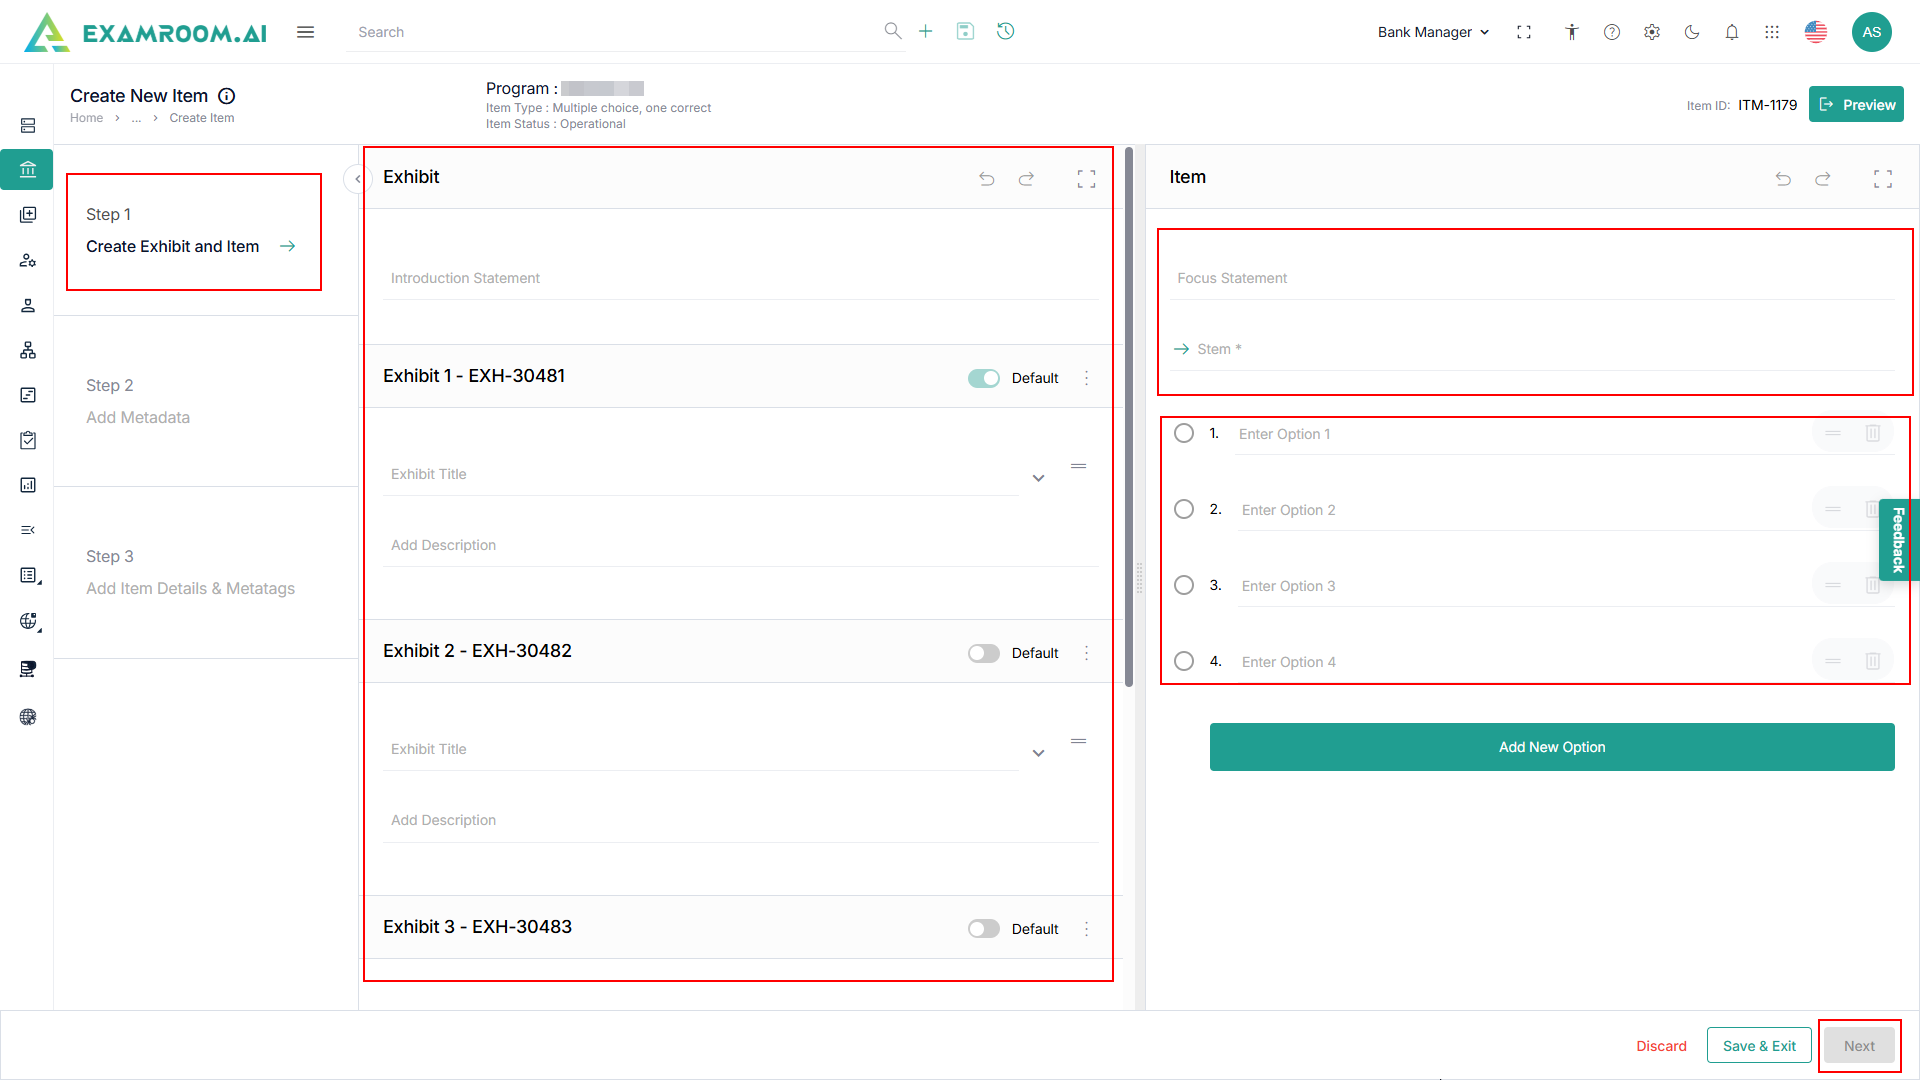
- Click Step 1 - Create Exhibit Items and provide the information for:
- Exhibit – Introduction Statement.
- You can add more statements in Exhibit 1, Exhibit 2, and Exhibit 3 by entering the Exhibit Title, Choosing Exhibit Table, and Add Description.
- Click the toggle button to make the Exhibit as default.
- Note: You have the option to Customize the items. For item customization and item framework, view the Item Customization and Item Framework sections.
- Click Add Another to add more exhibits.
- Note: Add Another option is provided only if the number of exhibits is pre-set in the Item Framework module and the user still does not meet the predefined number of exhibits.
- In the Item section, enter the Focus Statement with Stem (actual question) information.
- Enter the options of the stem based on the item types.
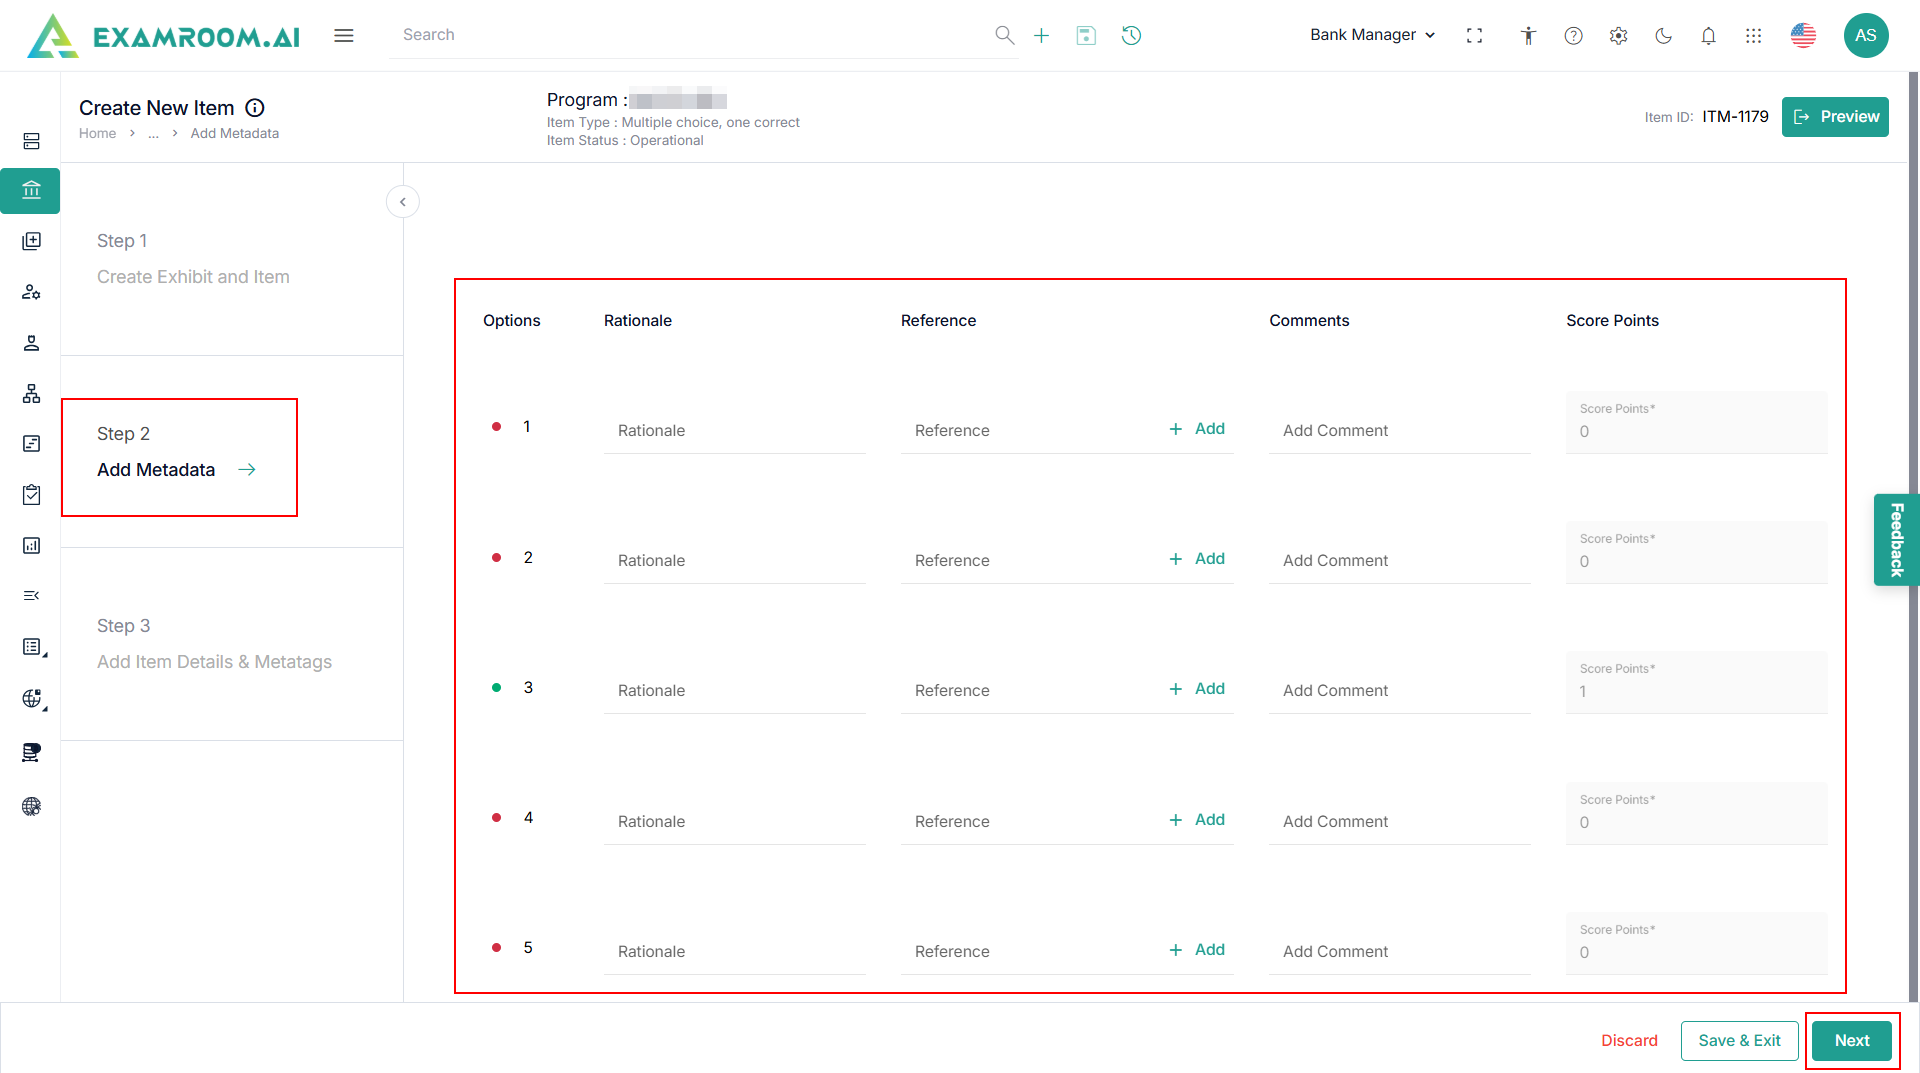
- Click Next or Step 2 – Add Metadata.
- The following is the information for Metadata:
- Options
- Rationale
- Reference
- Comments
- Score Points
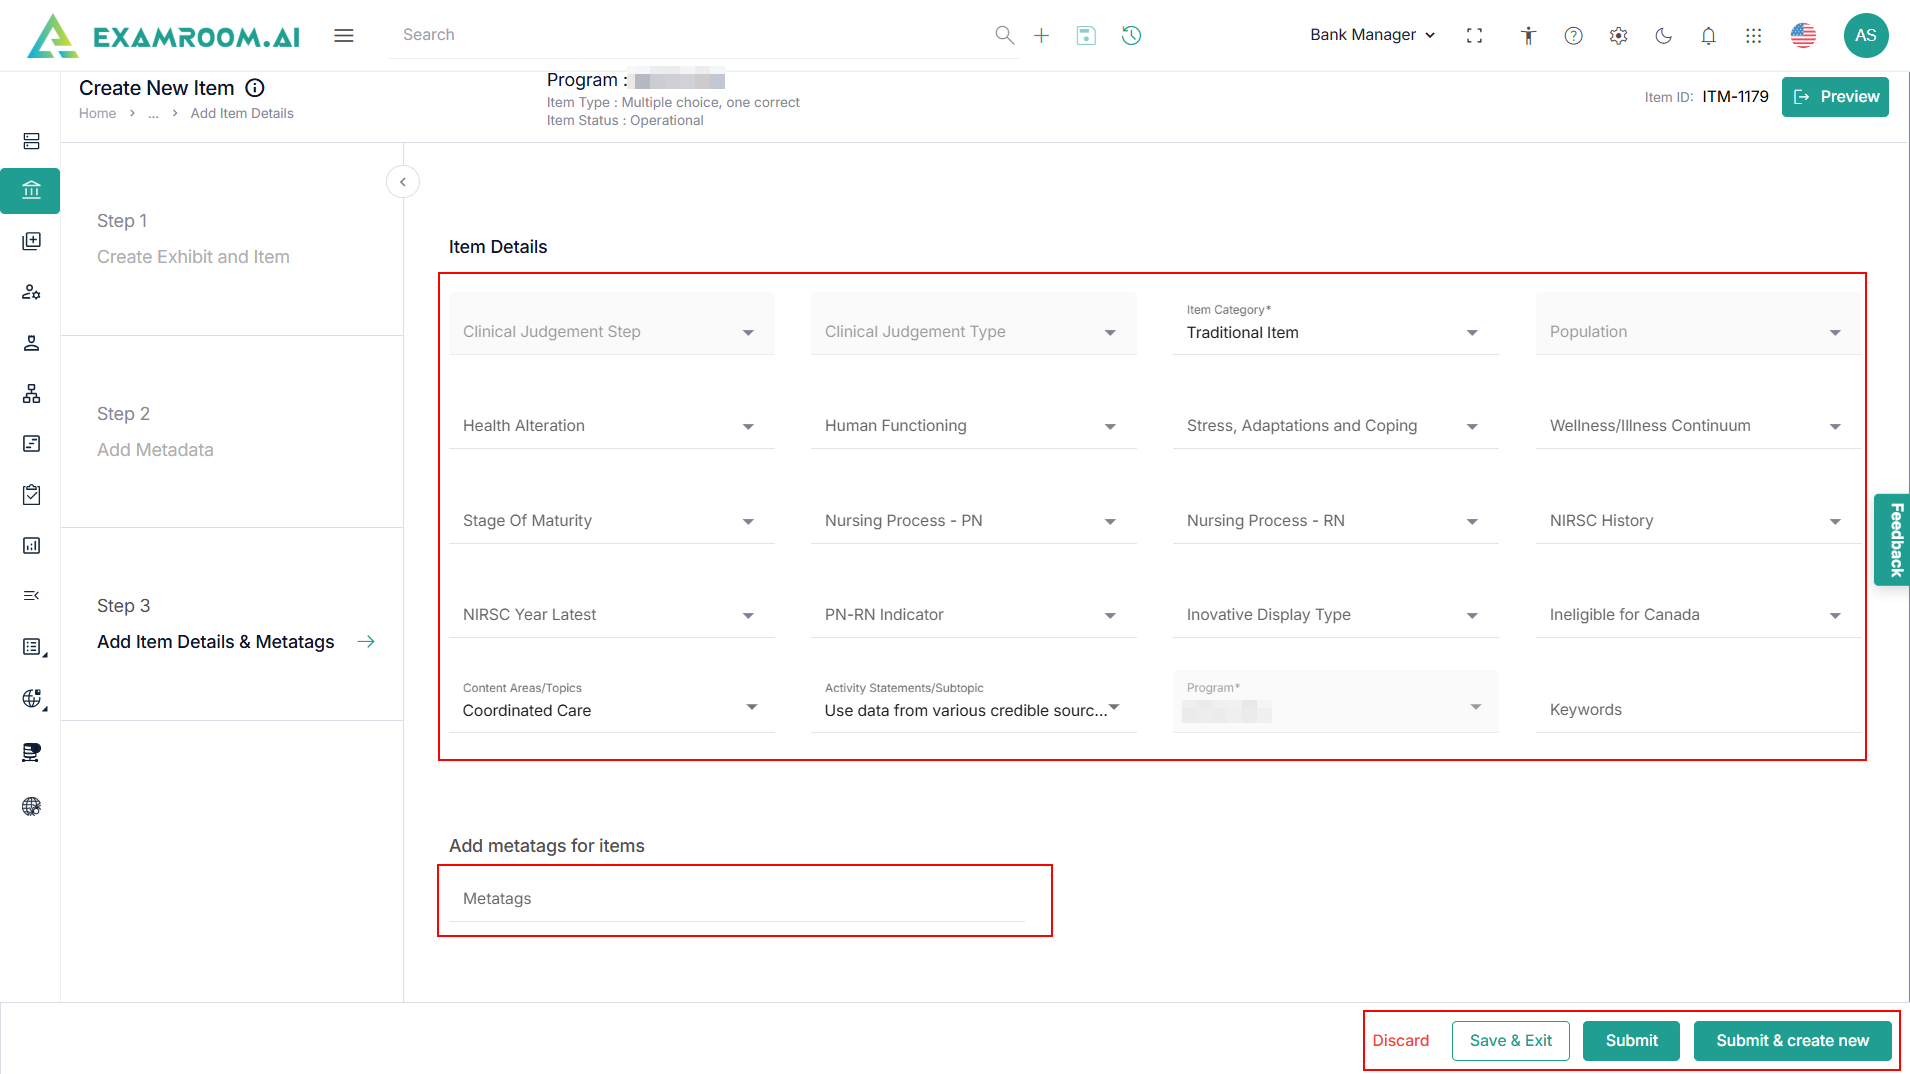
- Click Next or Step 3 – Add Item Details & Metatags.
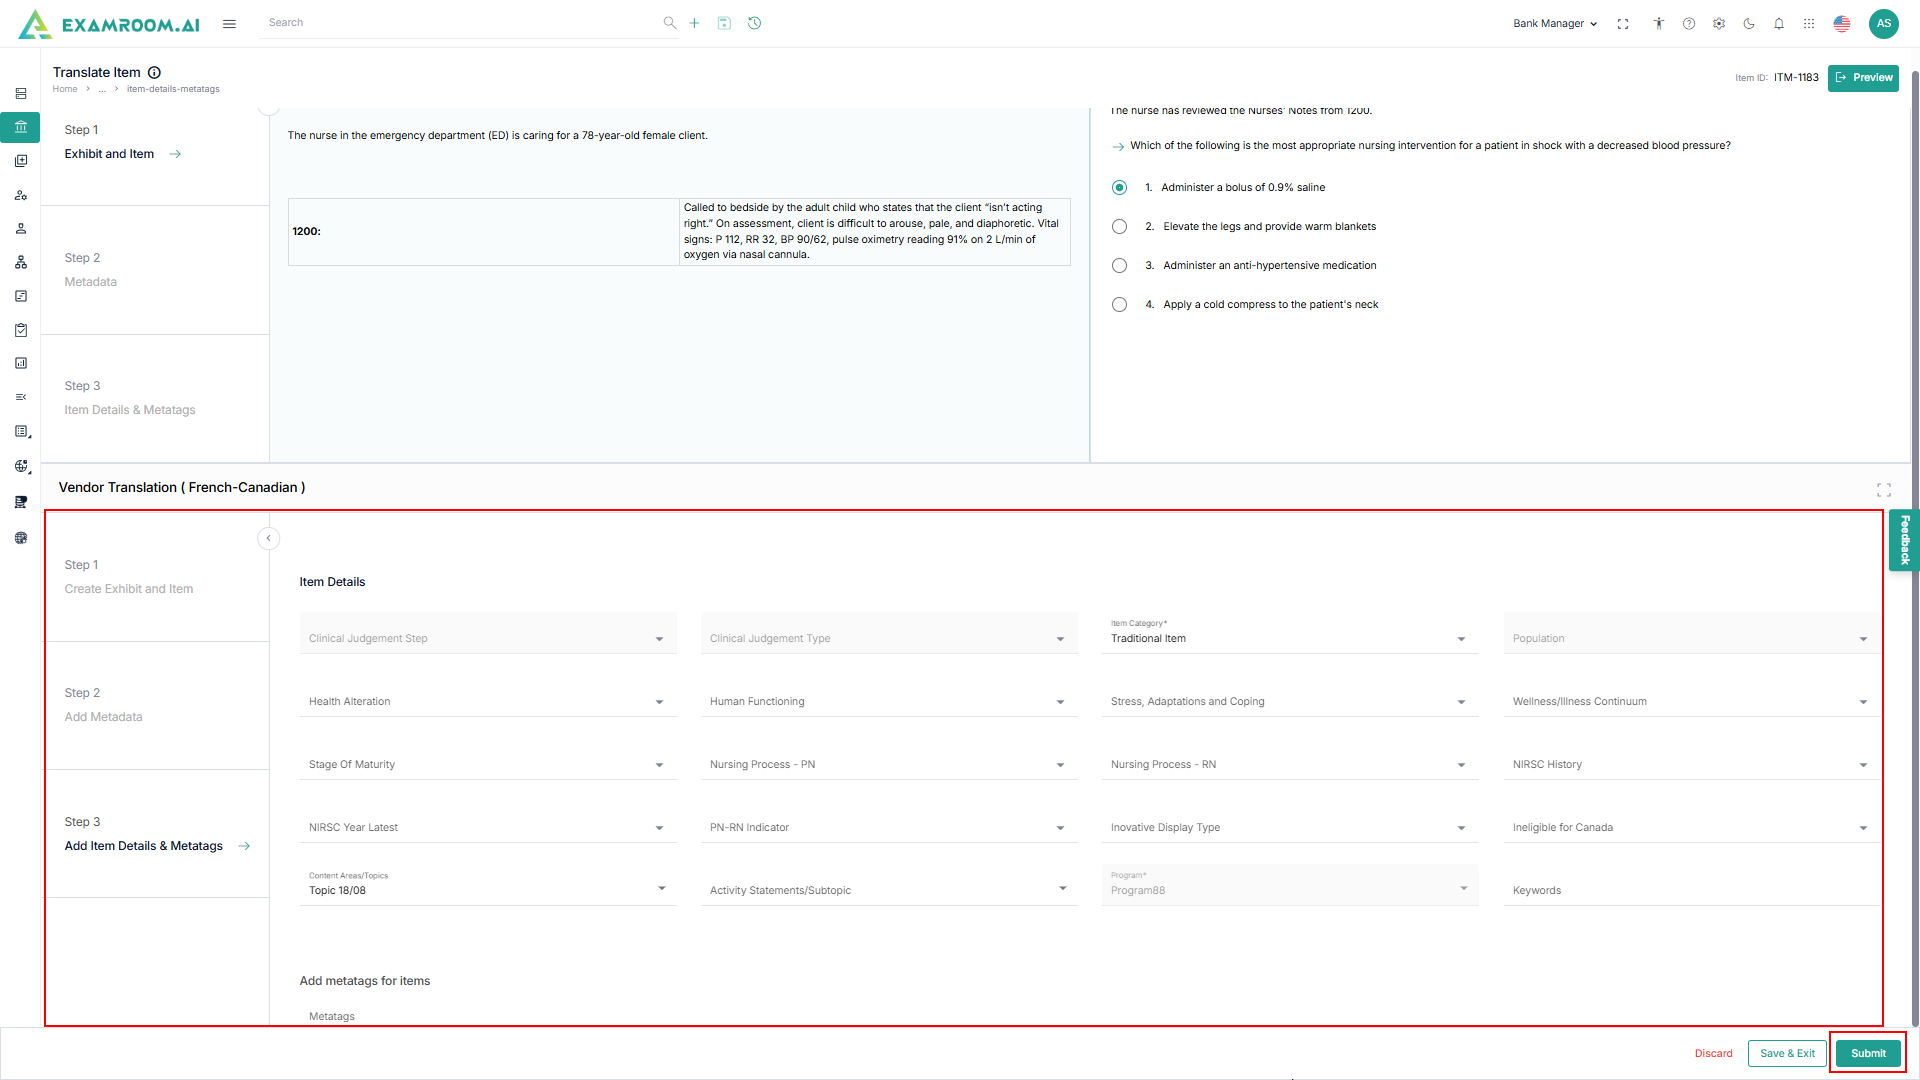
- Enter the necessary details in Item Details and Add Metatags for Items sections.
- Click Submit to view the edited item in item list.
Continue Translate
- Select Continue Translate to view the drafted items.
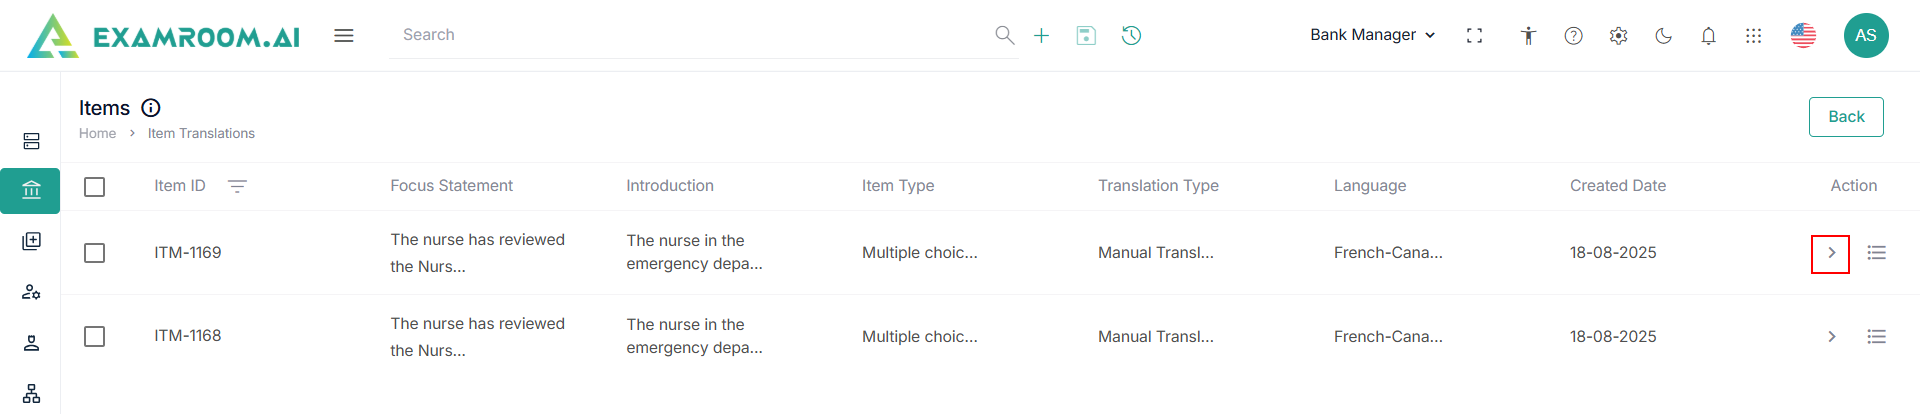
- Under the Action table header, select the Arrow button to continue to translate or the Hamburger menu and click the delete icon to discard the draft.
- Click the Arrow to view the Edit Translate Item.
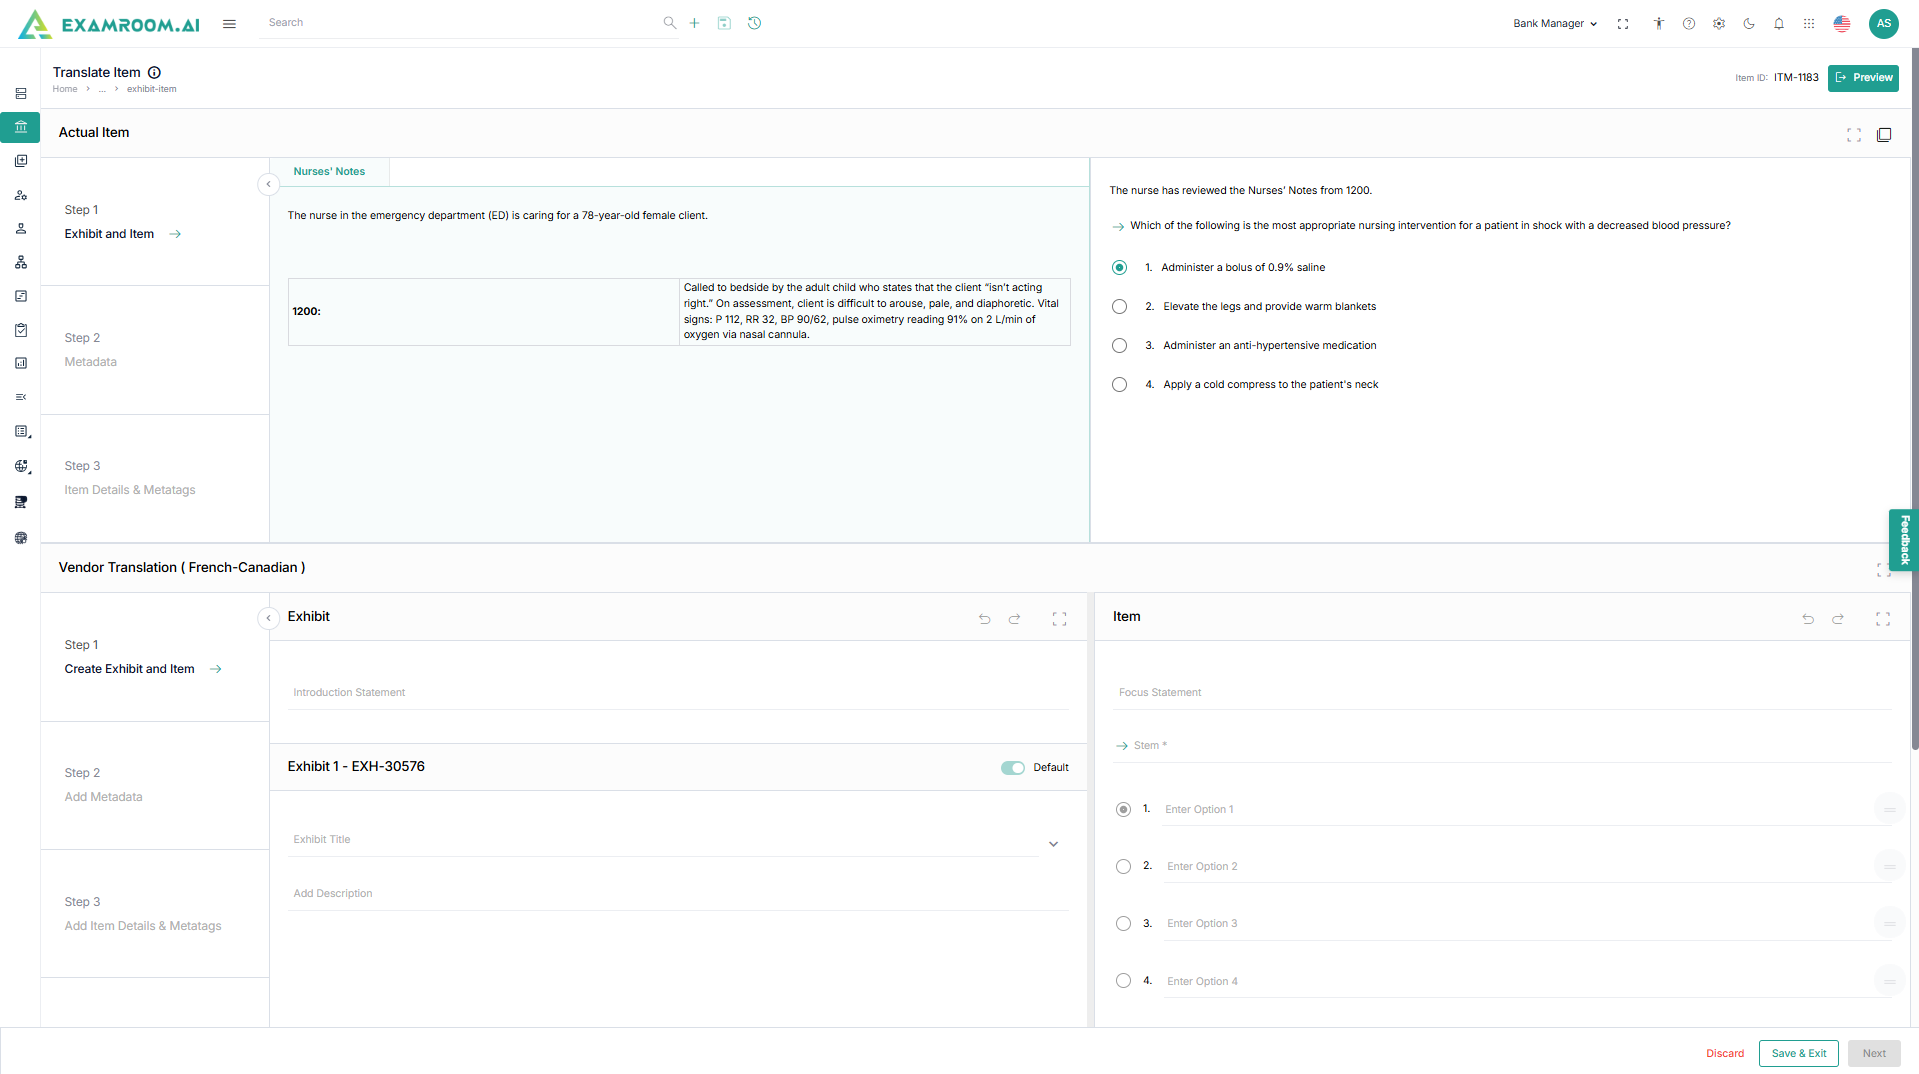
- The original item is displayed at the top of the screen under Actual Item.
- Under Vendor Translation section you create the translated version.
Step 1 – Create Exhibit and Item
Exhibit
- Enter the translated Introduction Statement.
- Provide a translated Exhibit Title and Description.
- Each exhibit is assigned a unique ID.
Item
- Translate the Focus Statement (the main question stem).
- Translate and enter the answer options (Option 1, Option 2, Option 3, etc.).
Step 2 – Add Metadata
- Add metadata specific to the translation such as:
- Options: View the provided answer.
- Rationale: More detailed information for each answer option.
- Reference: Where the answer is referred from (book, journal, or URL’s)
- Comments: optional comments left by internal SMEs for better communication on each item.
- Score Points: Entering score points for each answer option given.

Step 3 – Add Item Details & Metatags
- You can translate the items details and metatags in this section.
- Click Submit to save the translated item.
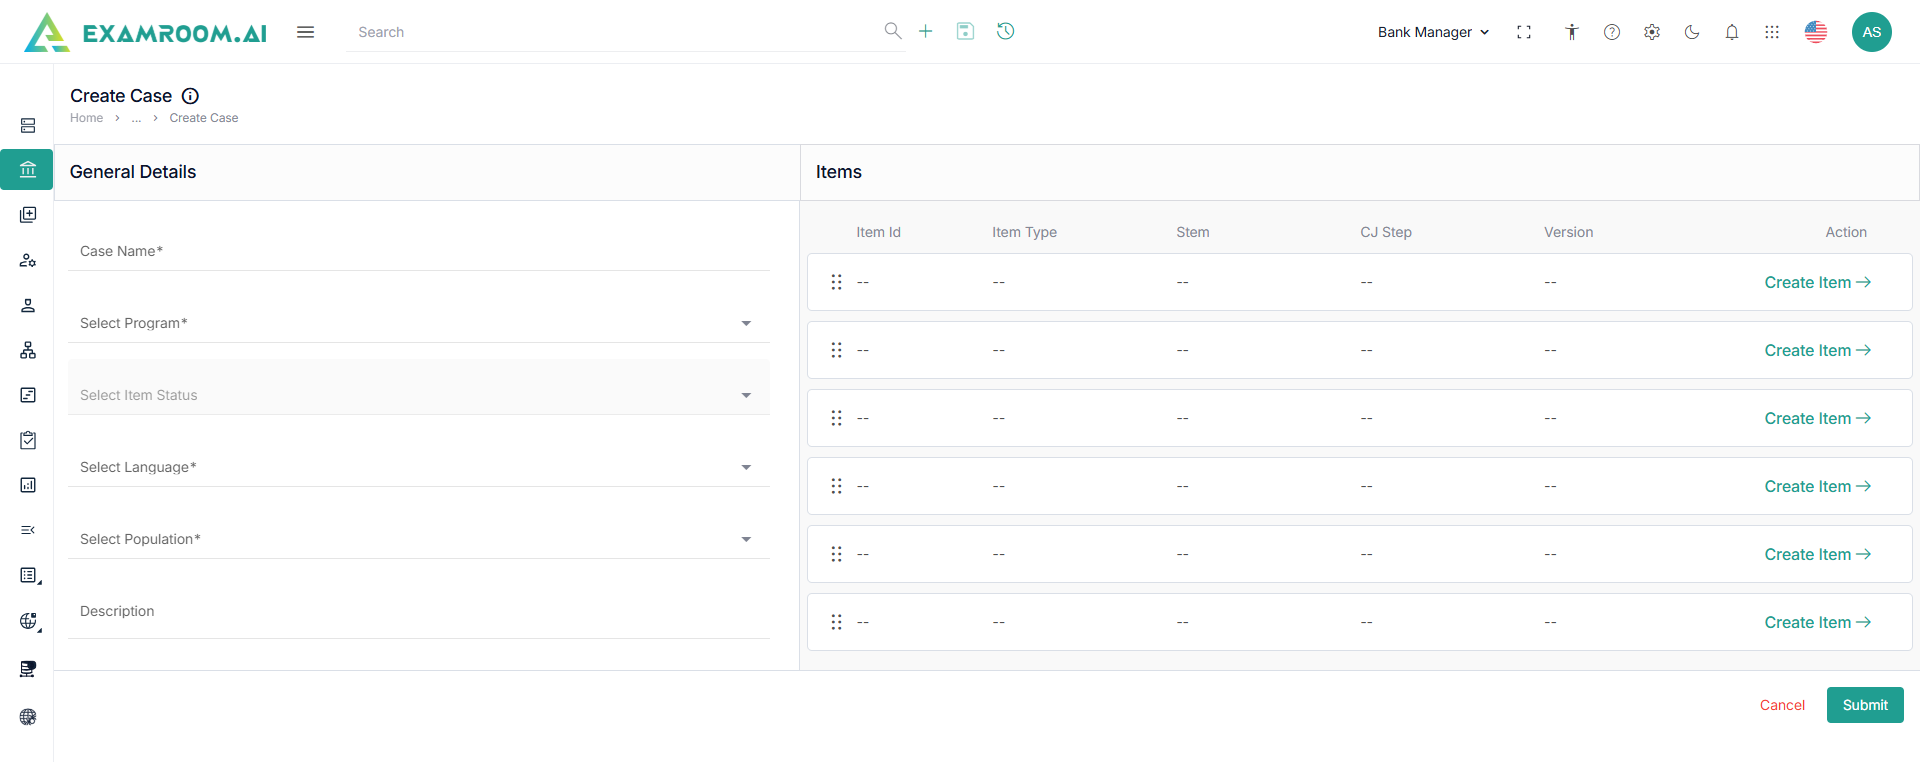
Add New Cases
- Click Cases header from the Item Cases page.
- Click Add New Case at the top right corner of the page.
- Enter Case Name, Description and select Program, population from the dropdown under General Details section.
- Click Create Item under Items section to create an item.
Note: Six items should be added in a case. You need to add each item individually. - For adding new items, follow Steps 2 to 11 in the Add New Item.
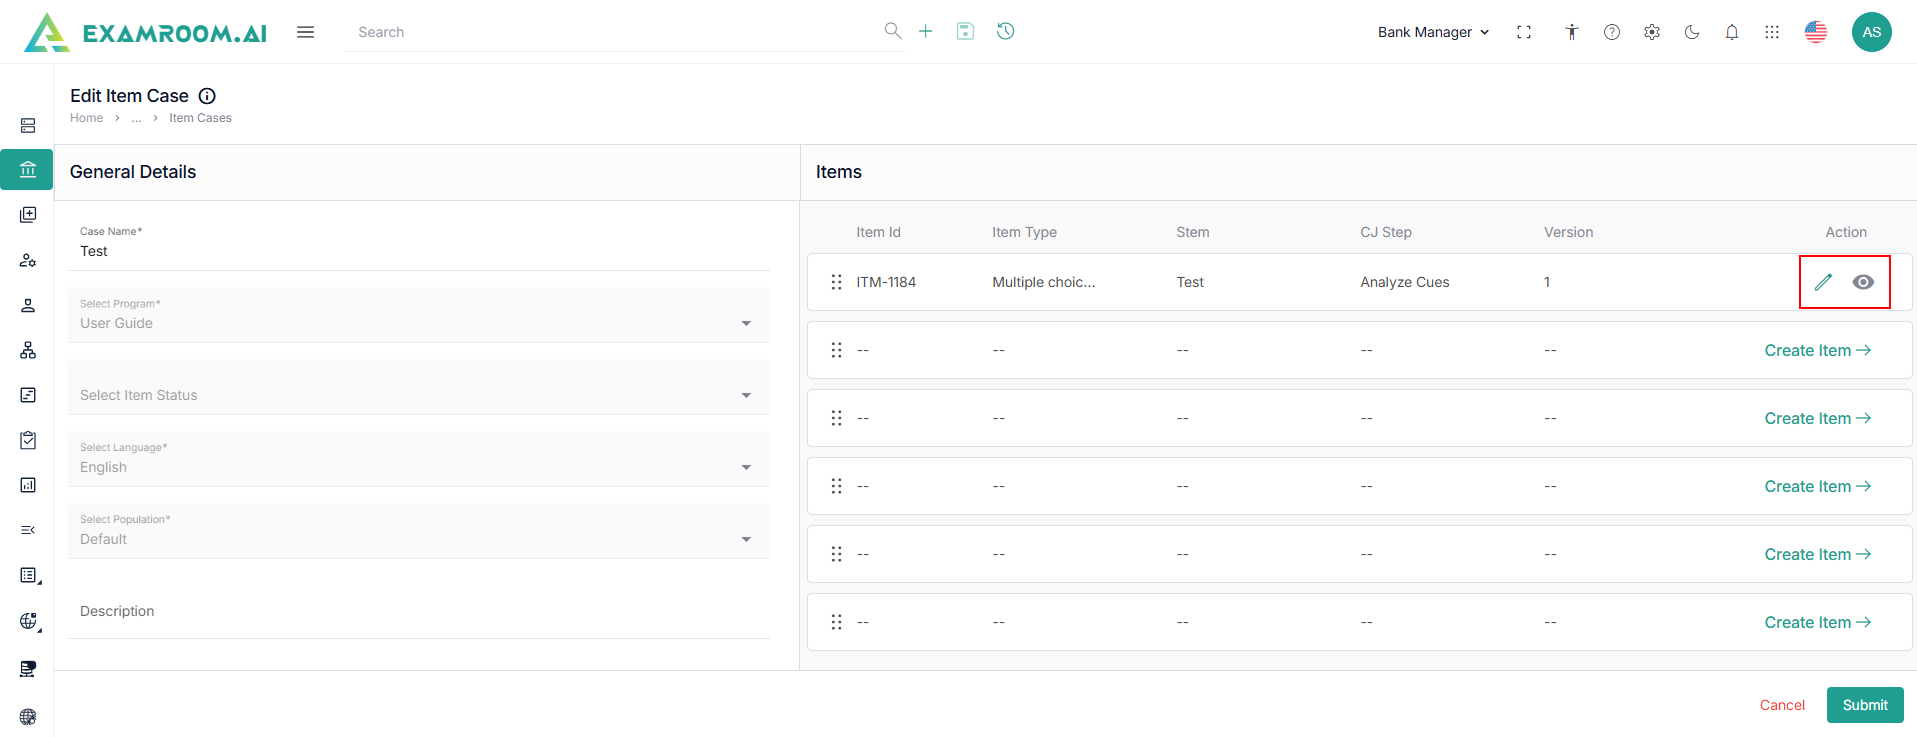
- Click Edit icon to edit the added item.
- Click View icon to view the added item.
- Add the remaining items and Click Submit to view the added case in the list.