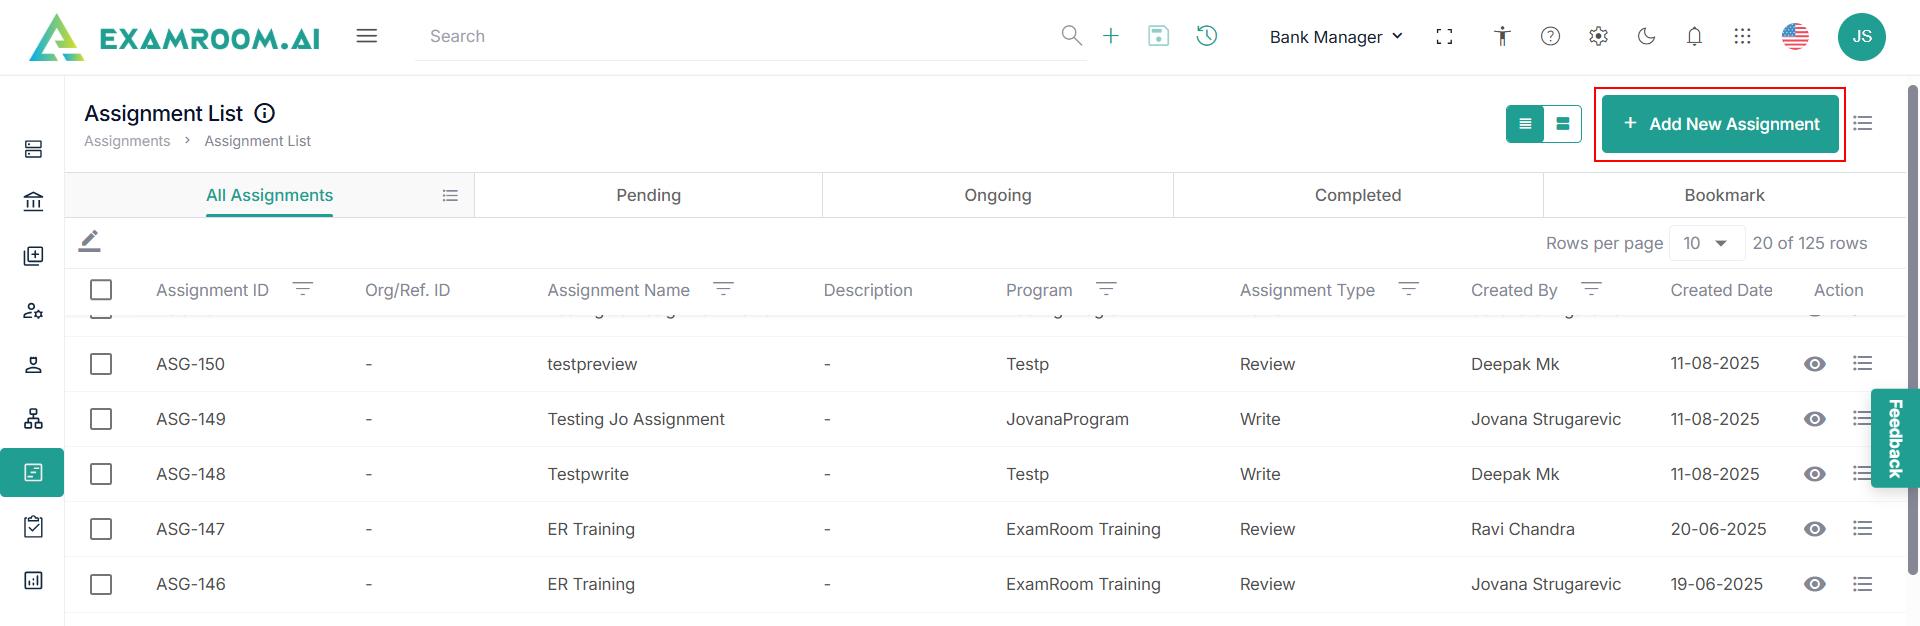
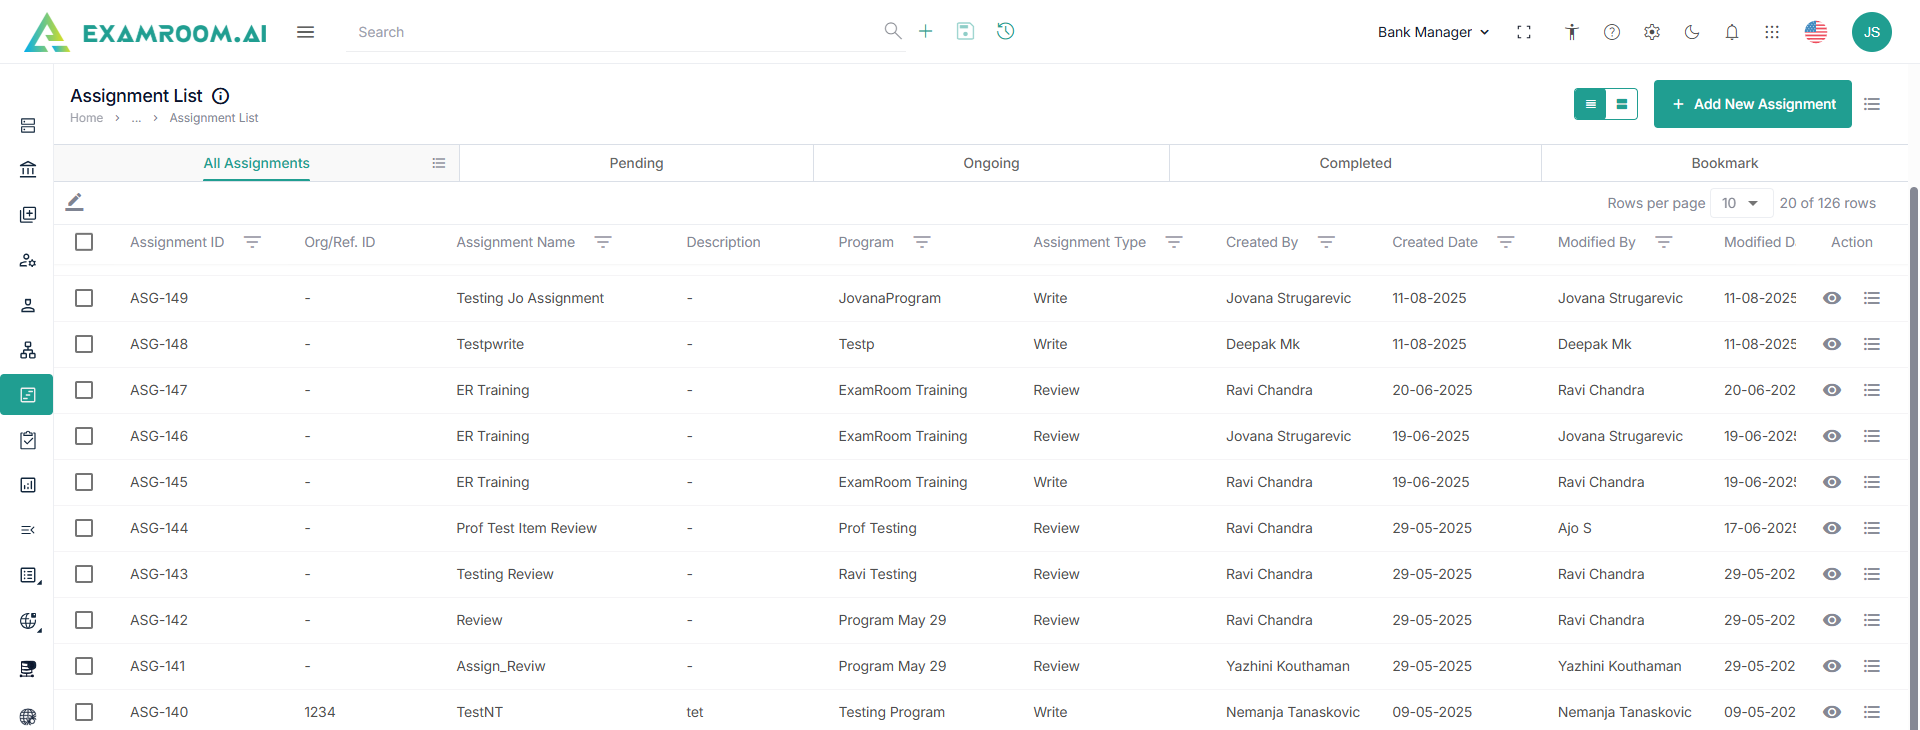
Add New Assignment
- Click Add New Assignment to add a new assignment.
- The Create Assignment information page is displayed with Write, Review, Translate, and Rework options.
Write
To create a new assignment for write items, follow these steps.
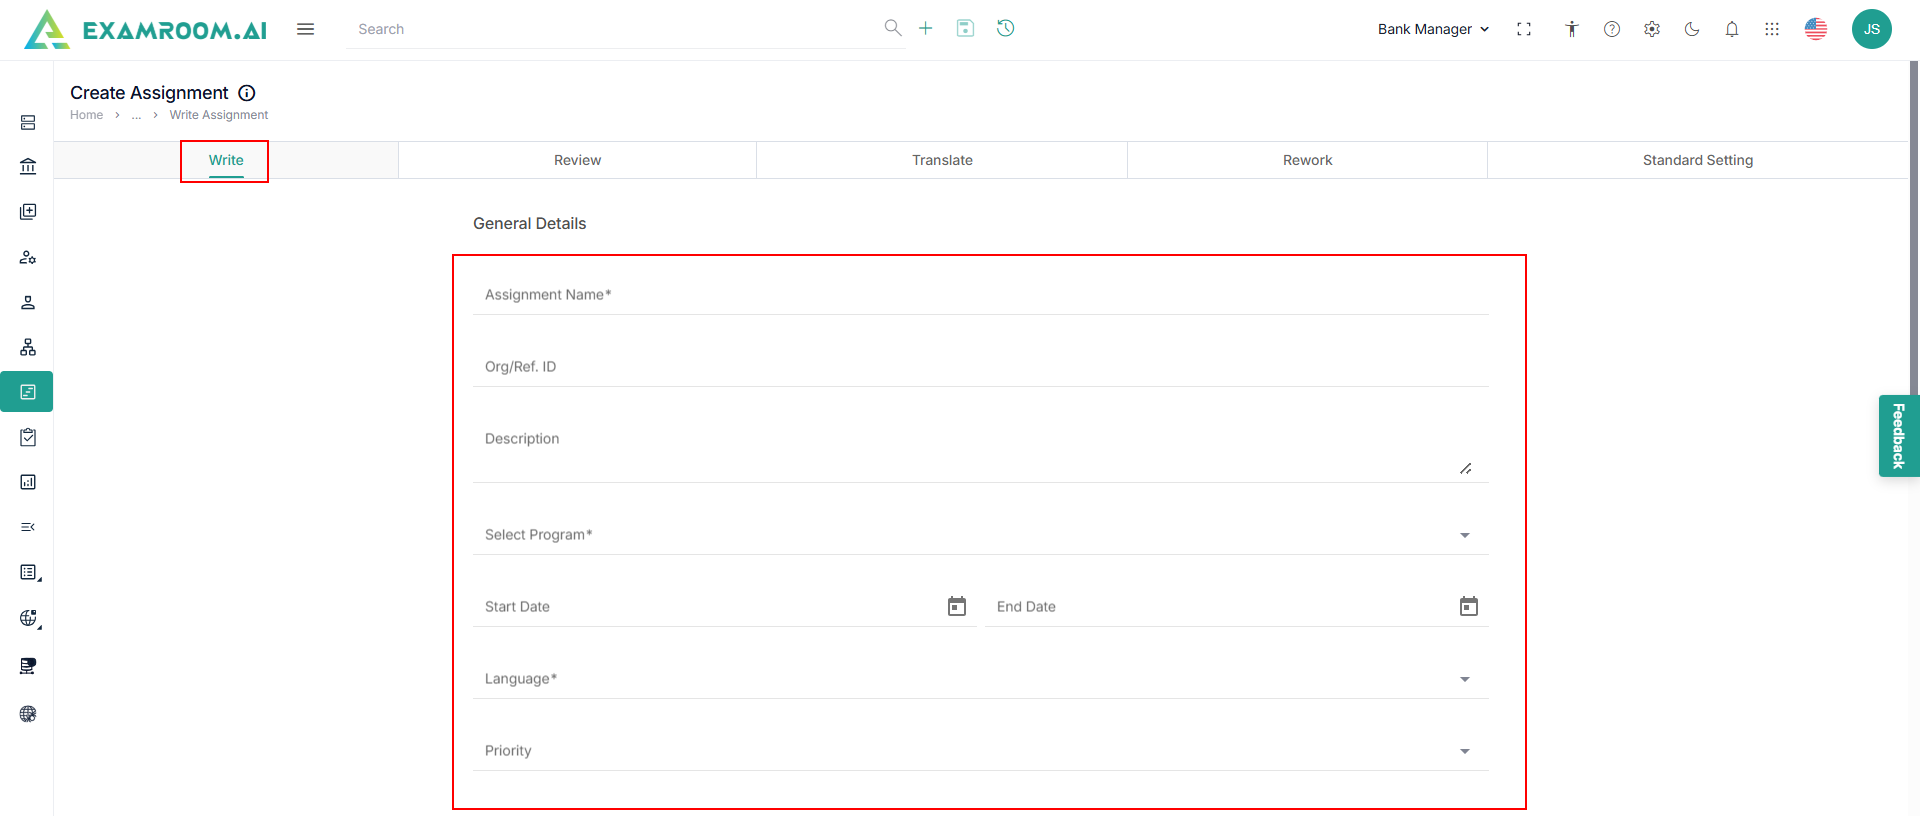
- Select Write tab to create a write assignment.
- Enter the required information in General Details and Add Assignment Details.
- Provide the following details in the General Details section.
- Enter the Assignment Name, Org/Ref ID, and Description.
- Select Program, Start and End Date, Language, and Priority.
- View Assignment Details section.
- Enter the following details in the Assignment Details section.
- Select the Topic, Subtopic, Item Type, No. of Items, Role, and User.
- Click Add Assignment Details to add more assignment details.
- Click Submit, and a success message – “Assignment successfully created” is displayed.
Note: When submitted, the assignment for Write will be reflected in the Task module for the Role and User assigned to it.

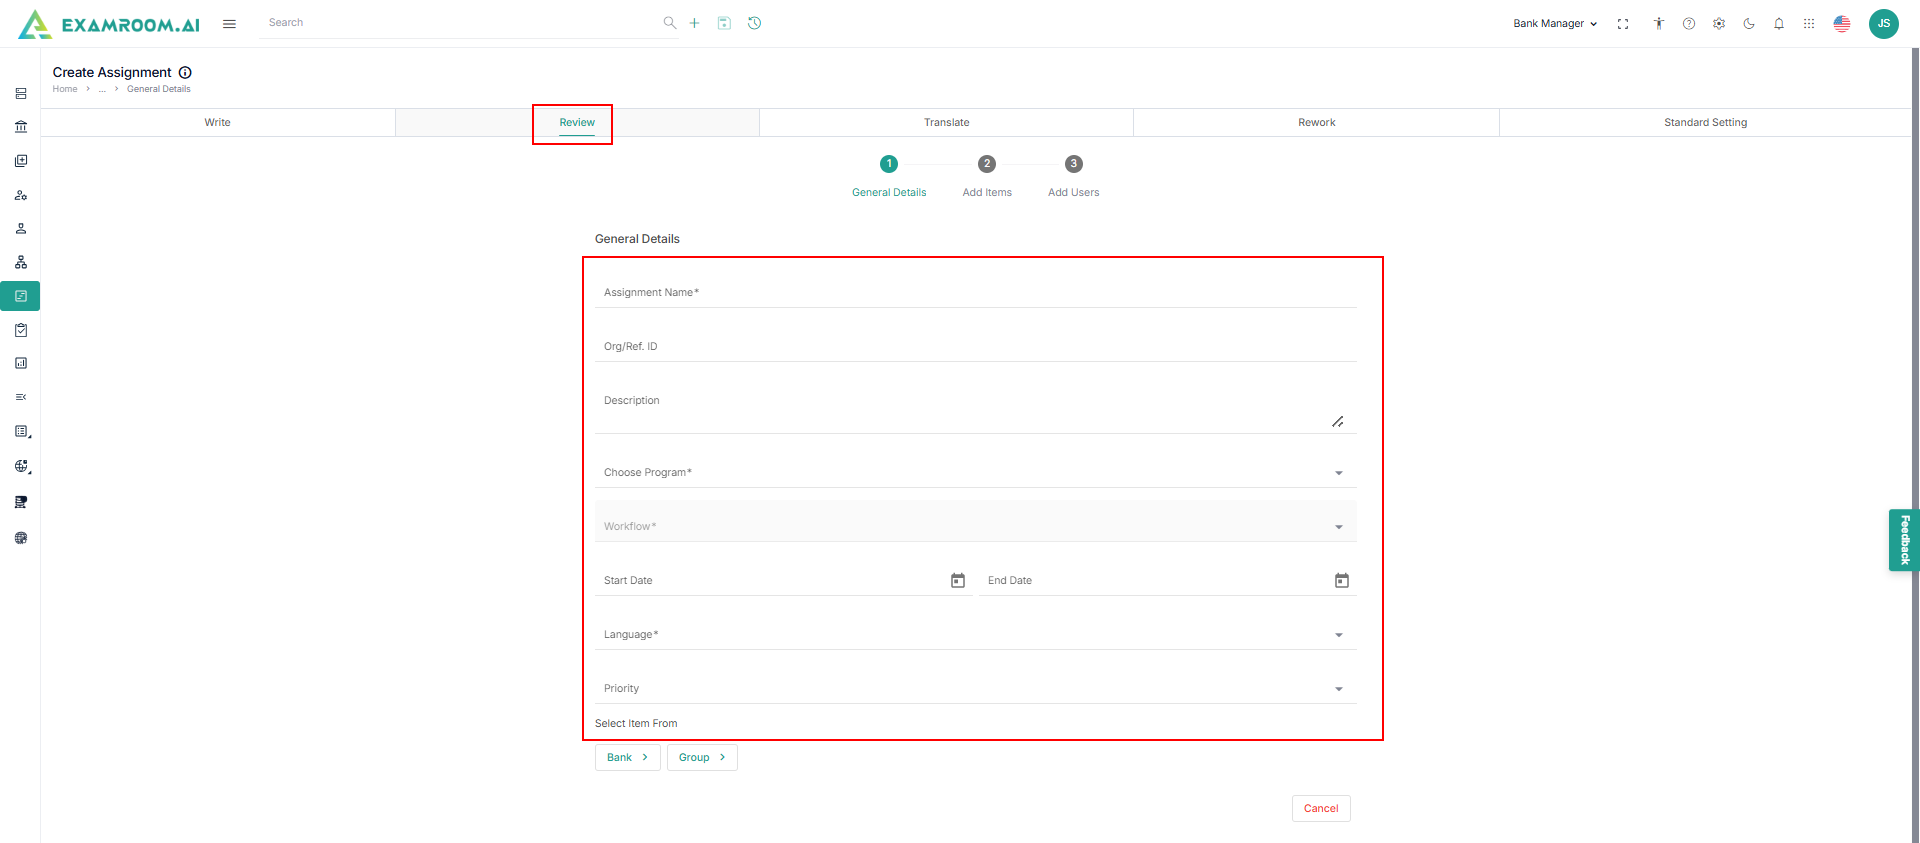
Review
To create a new assignment for review items, follow these steps.
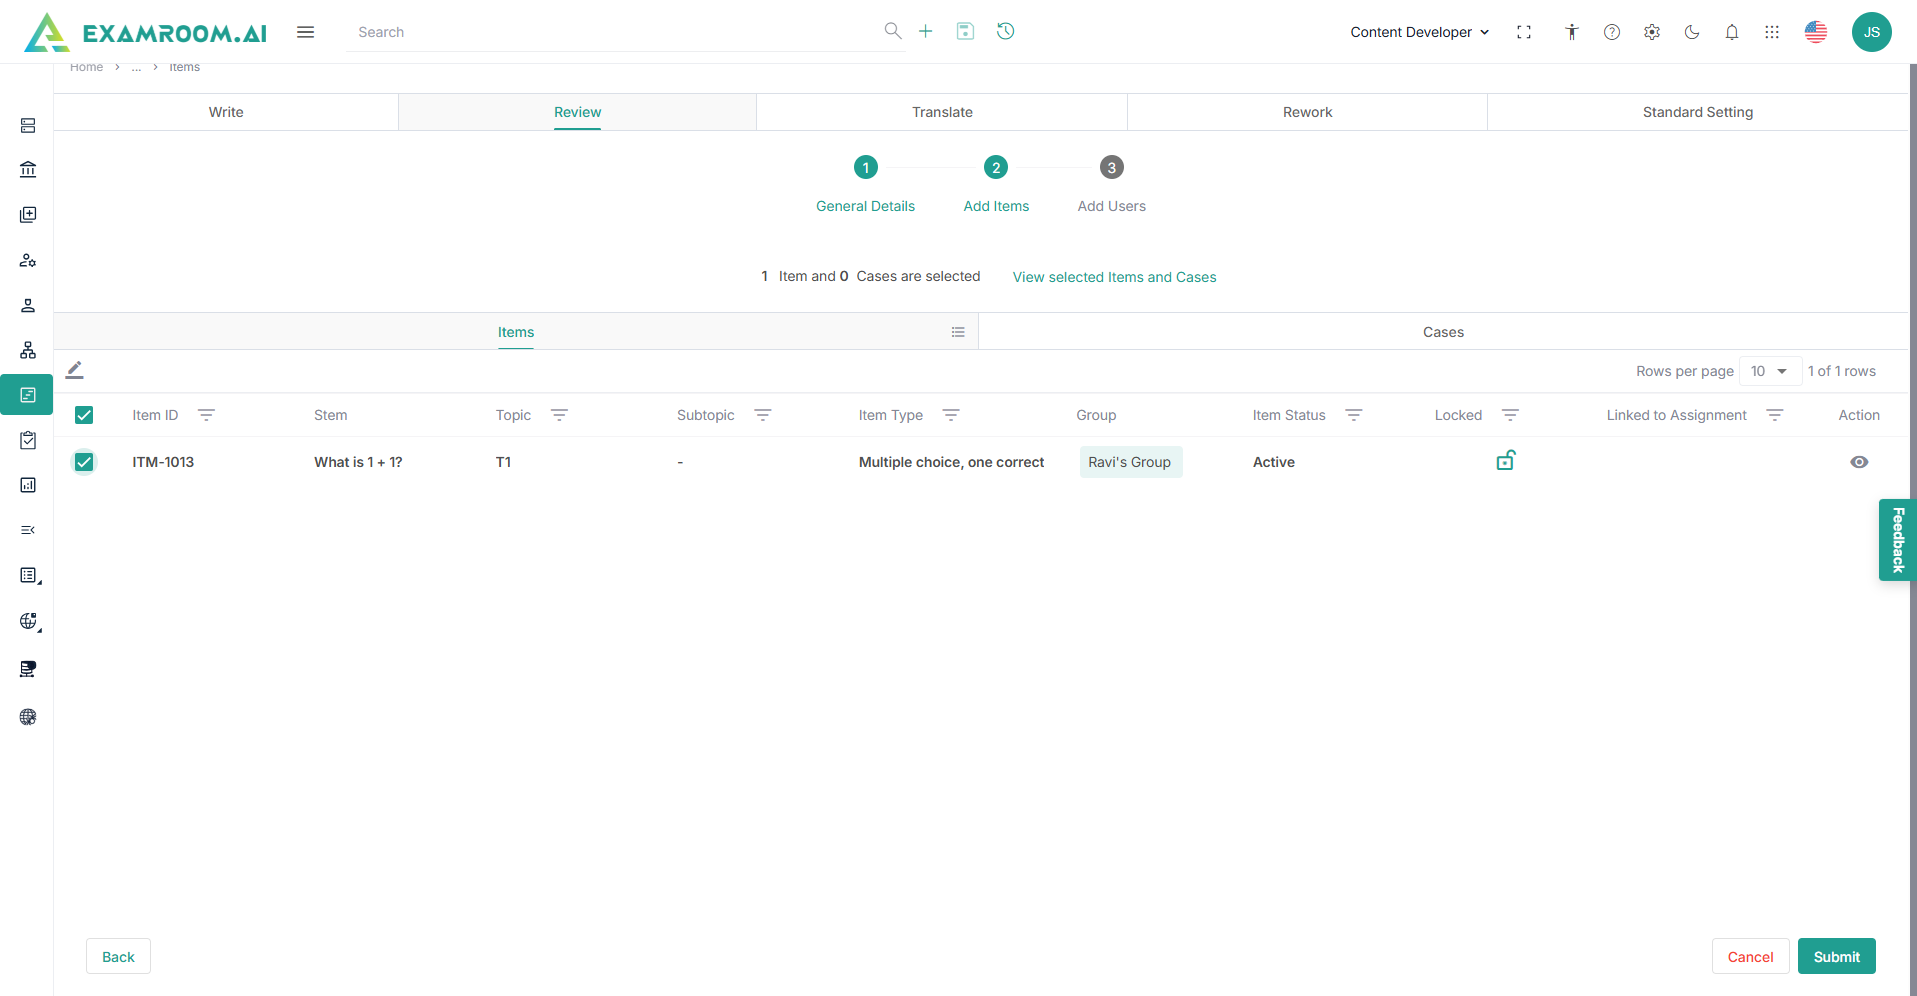
- Click Review.
- The essential data for the General Details, Add Items, and Add User Information pages are shown in consecutive order.
- Provide the general details and click Bank or Group to select an item.
Note: The user should add items to the bank or create a group of items for the selected program to display them in the item list. For Group creation, refer to the Group Creation. - Select an Item and click Submit.
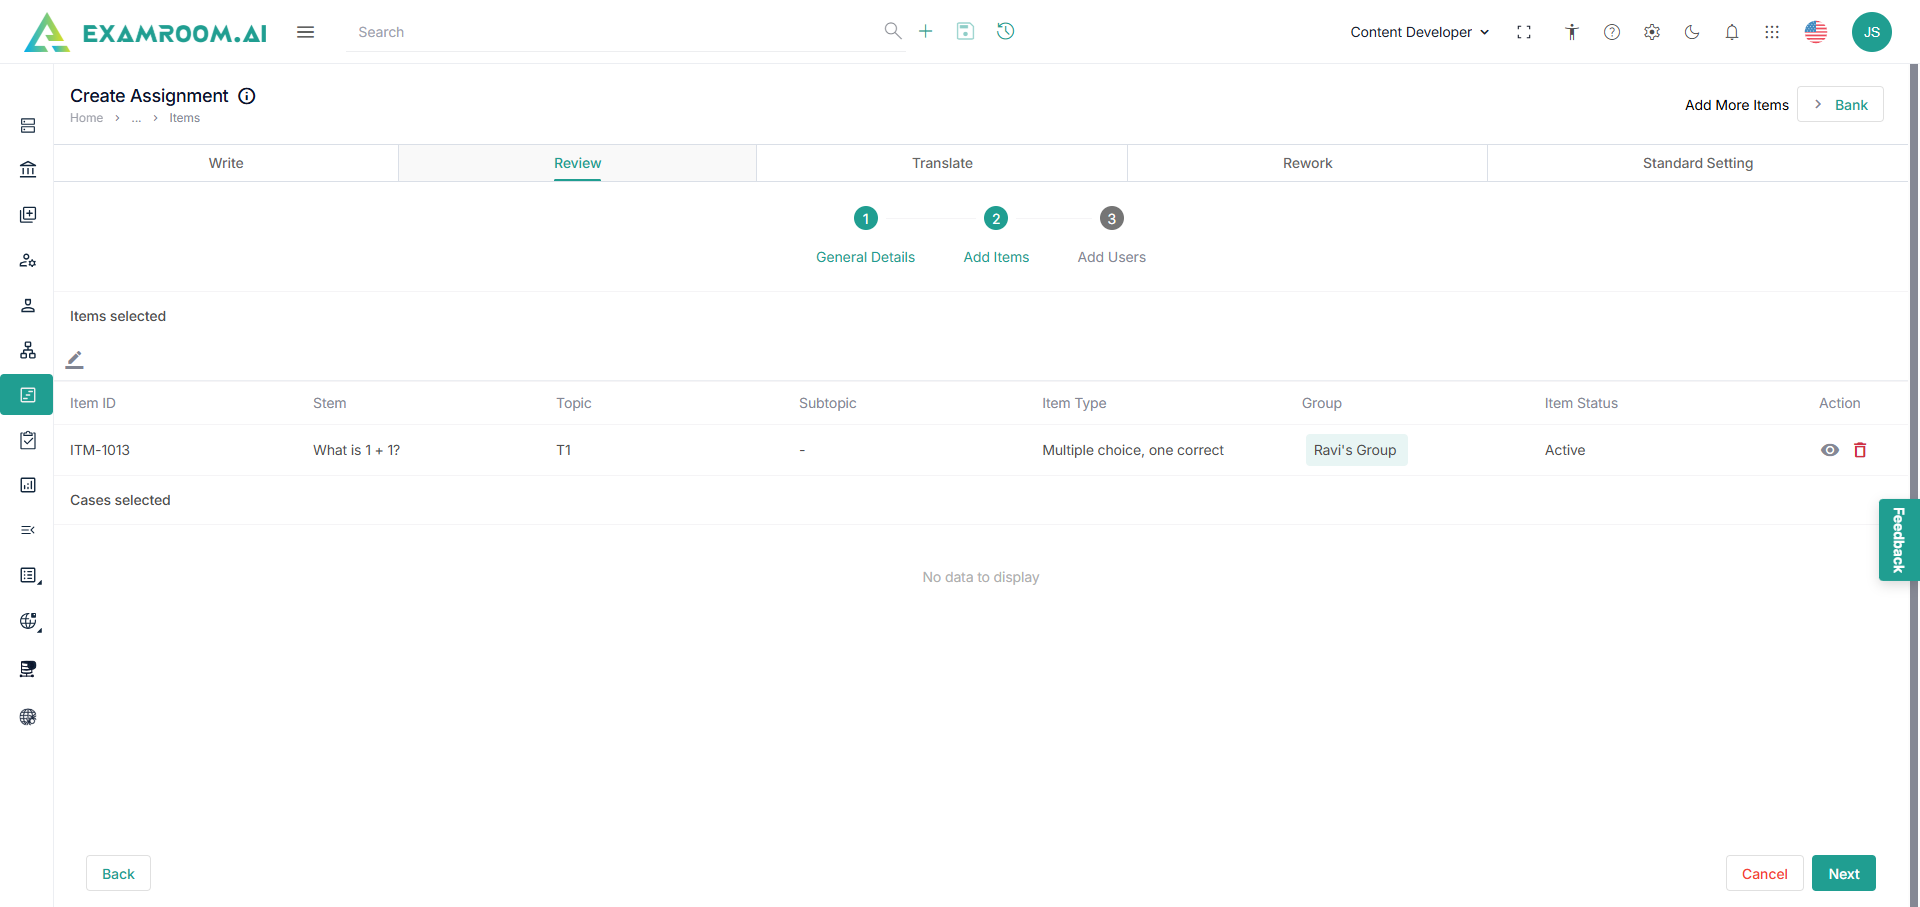
- The selected item is displayed. Click the View icon to view the item details or the Bin icon to delete the Item.
- Click Next to add the users.
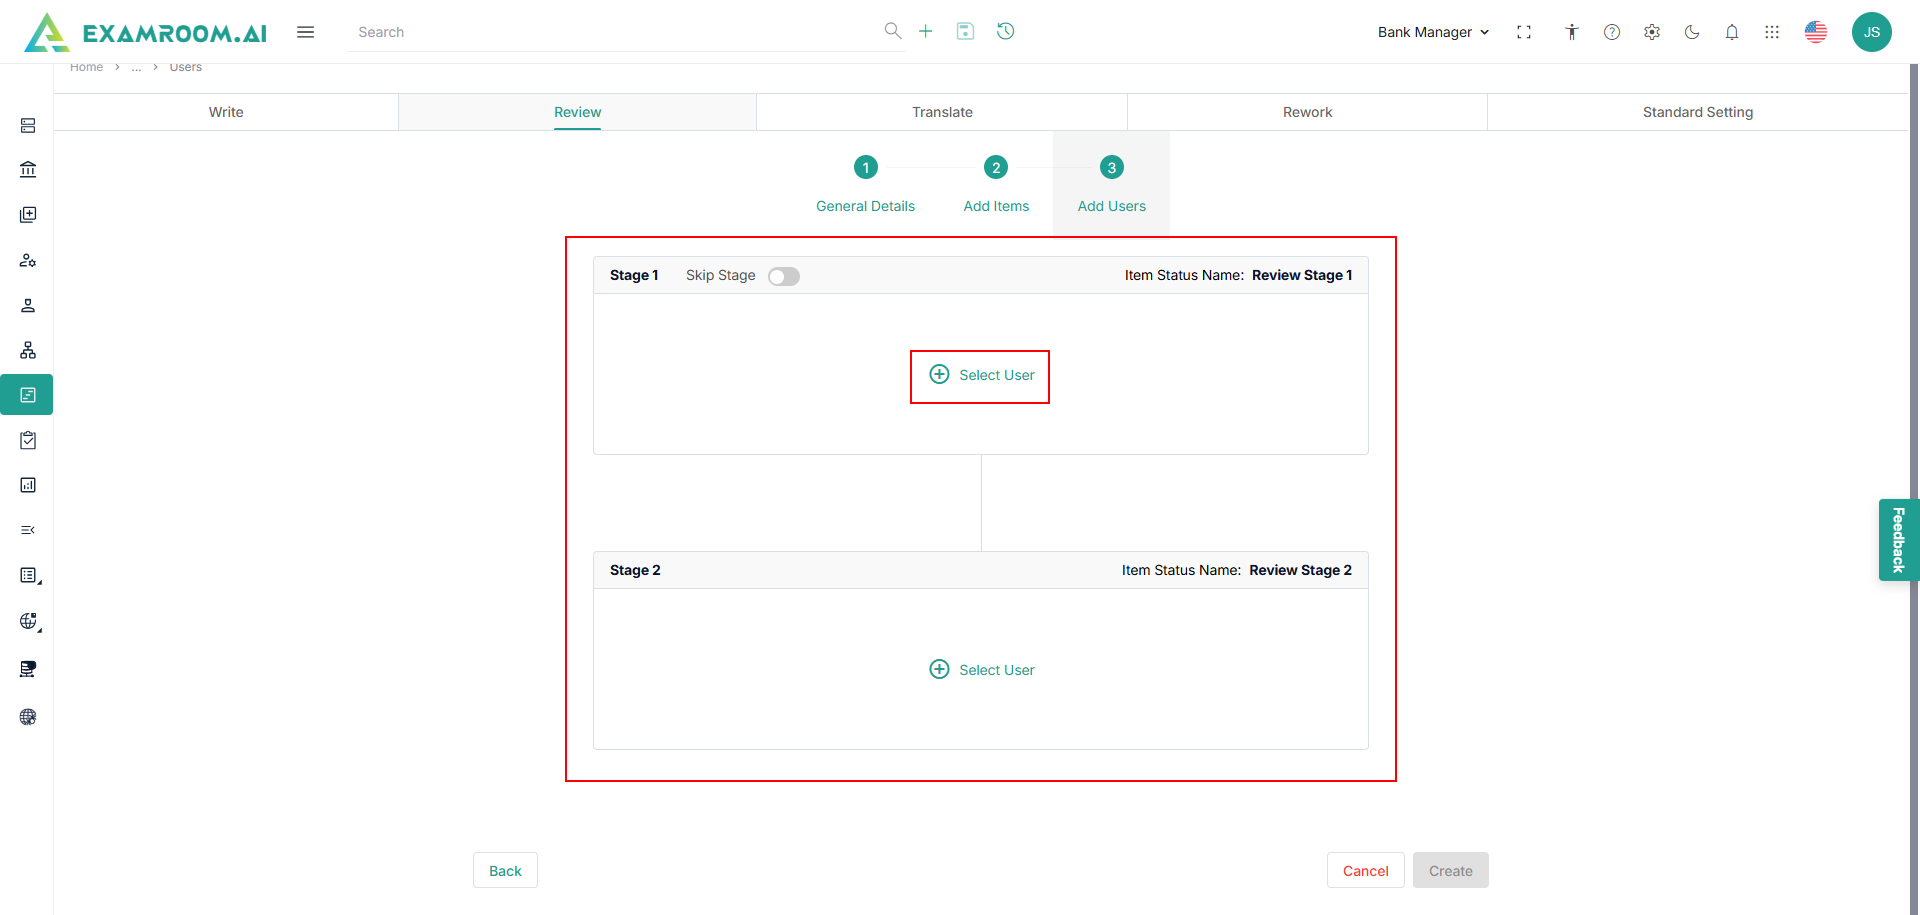
- View the workflow stages and click Select User to add user based on each stage.
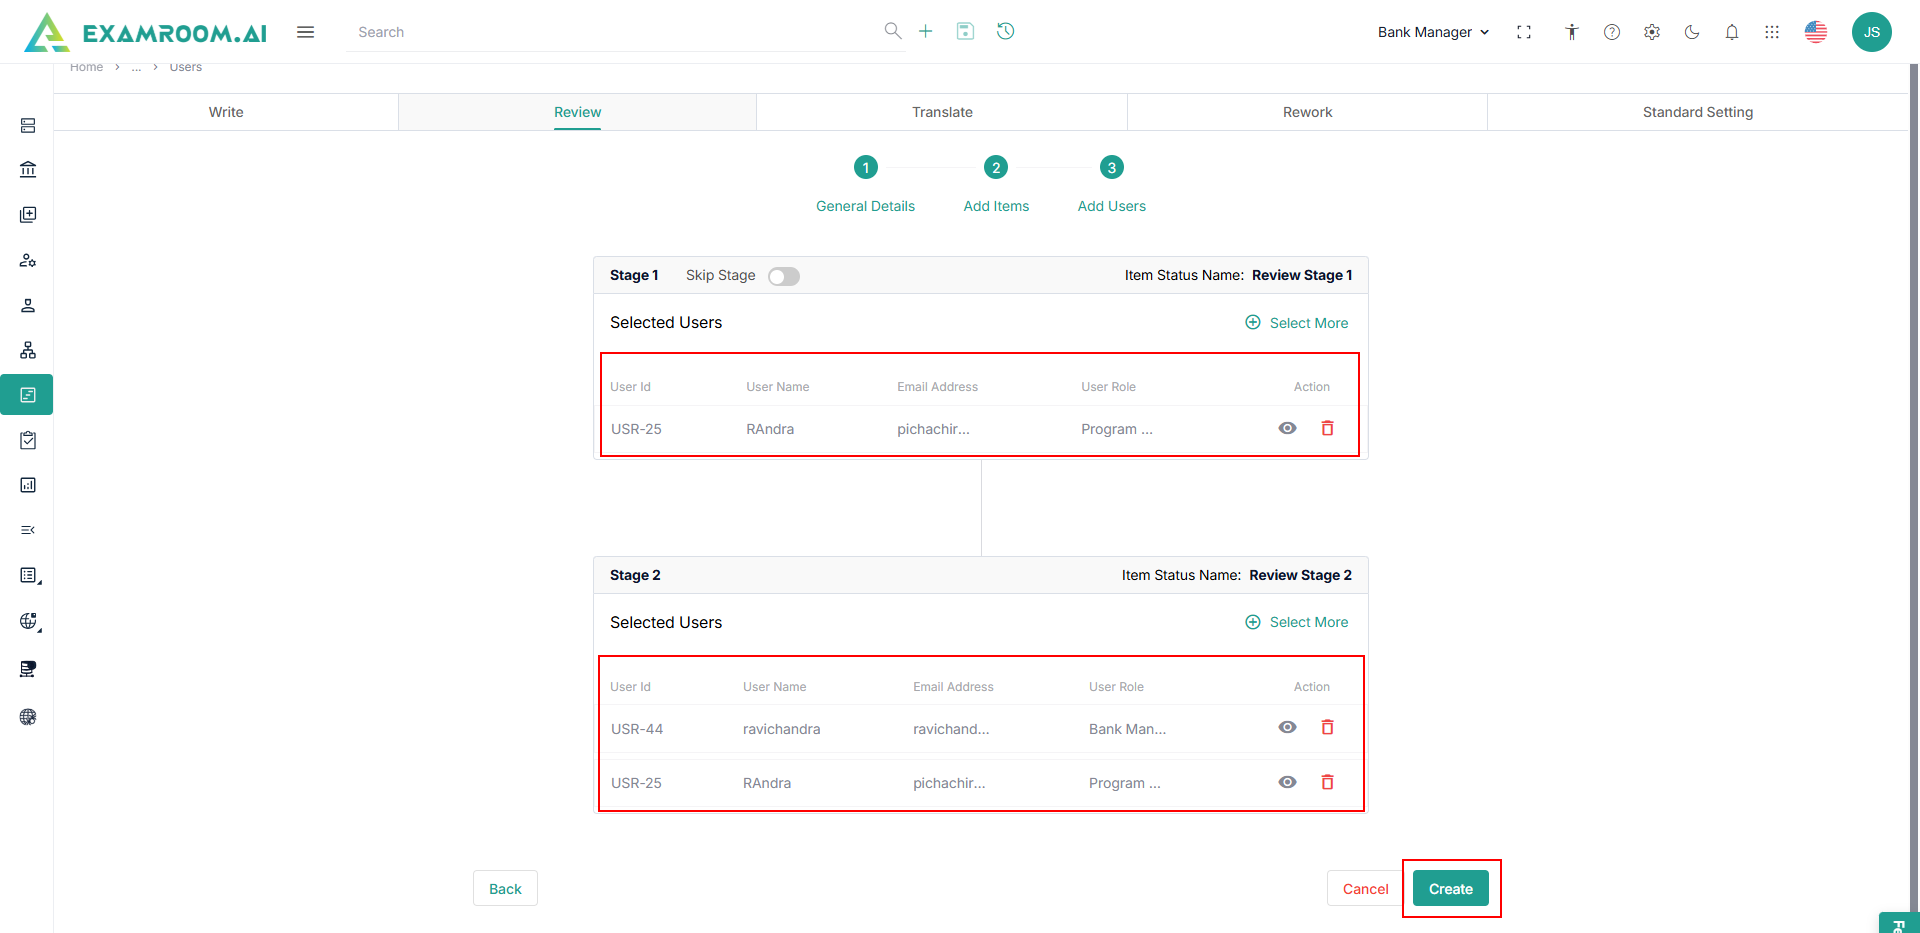
- Select a User and click Submit.
- Selected User information is displayed.
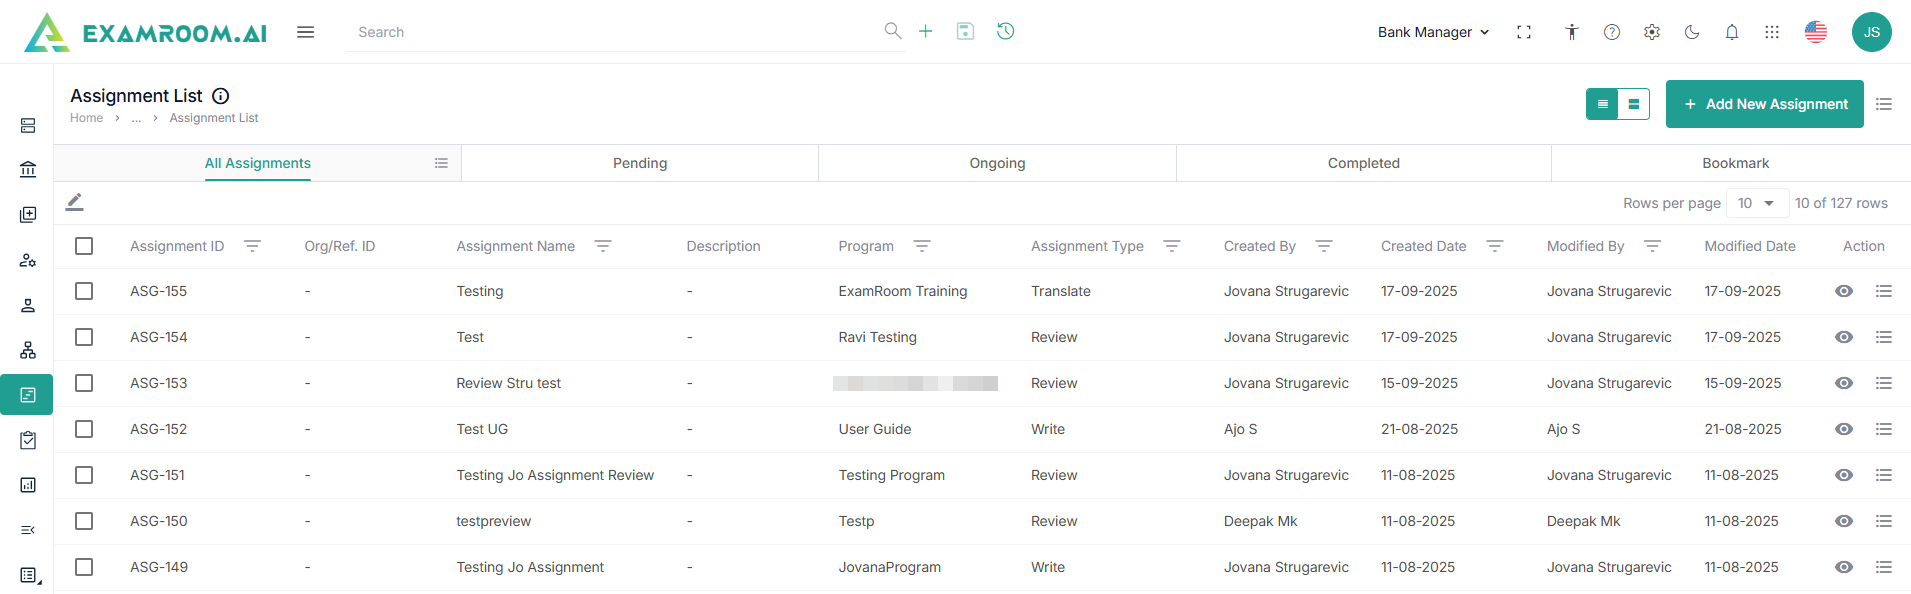
- Click Create to view the assignment in the All Assignments list.

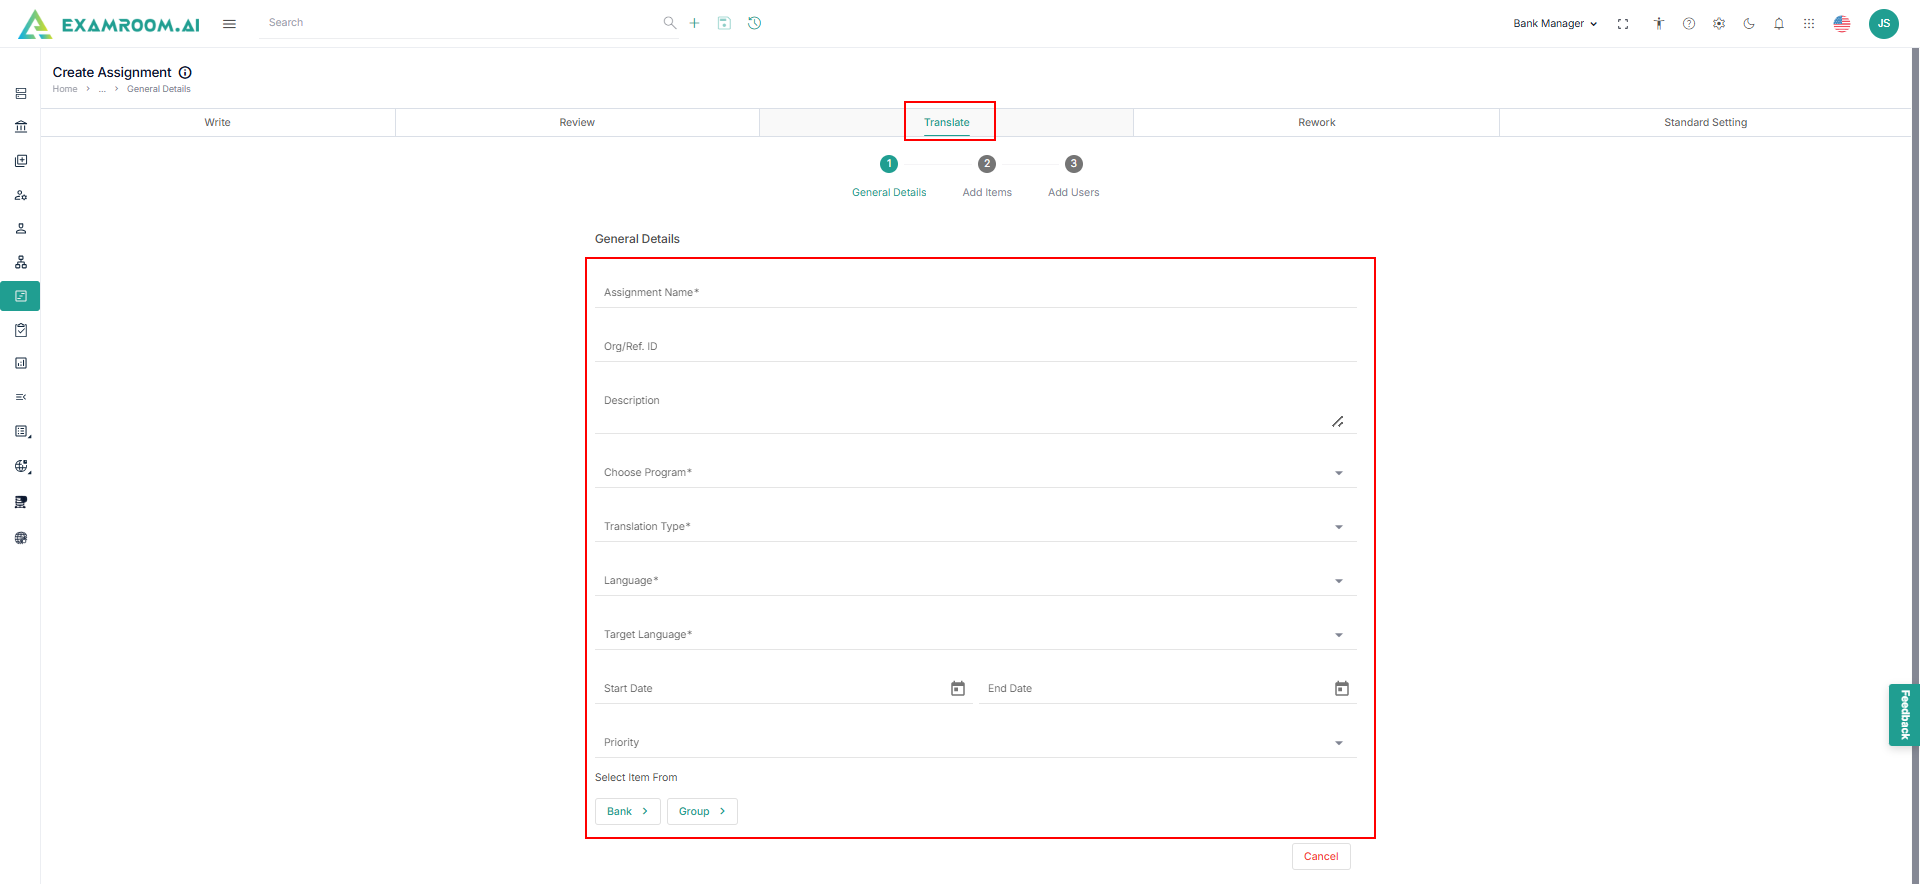
Translate
To create a new assignment for translate items, follow these steps.
- Click Translate.
- The essential data for the General Details, Add Items, and Add User Information pages are shown in consecutive order.
- Provide the general details and select Translation type as follows:
- Manual Translation
- Trados Translation
- AI Translation
Note: If "Manual Translation" is selected, an additional field labeled "Workflow" should be displayed, allowing you to select a workflow from the dropdown menu.
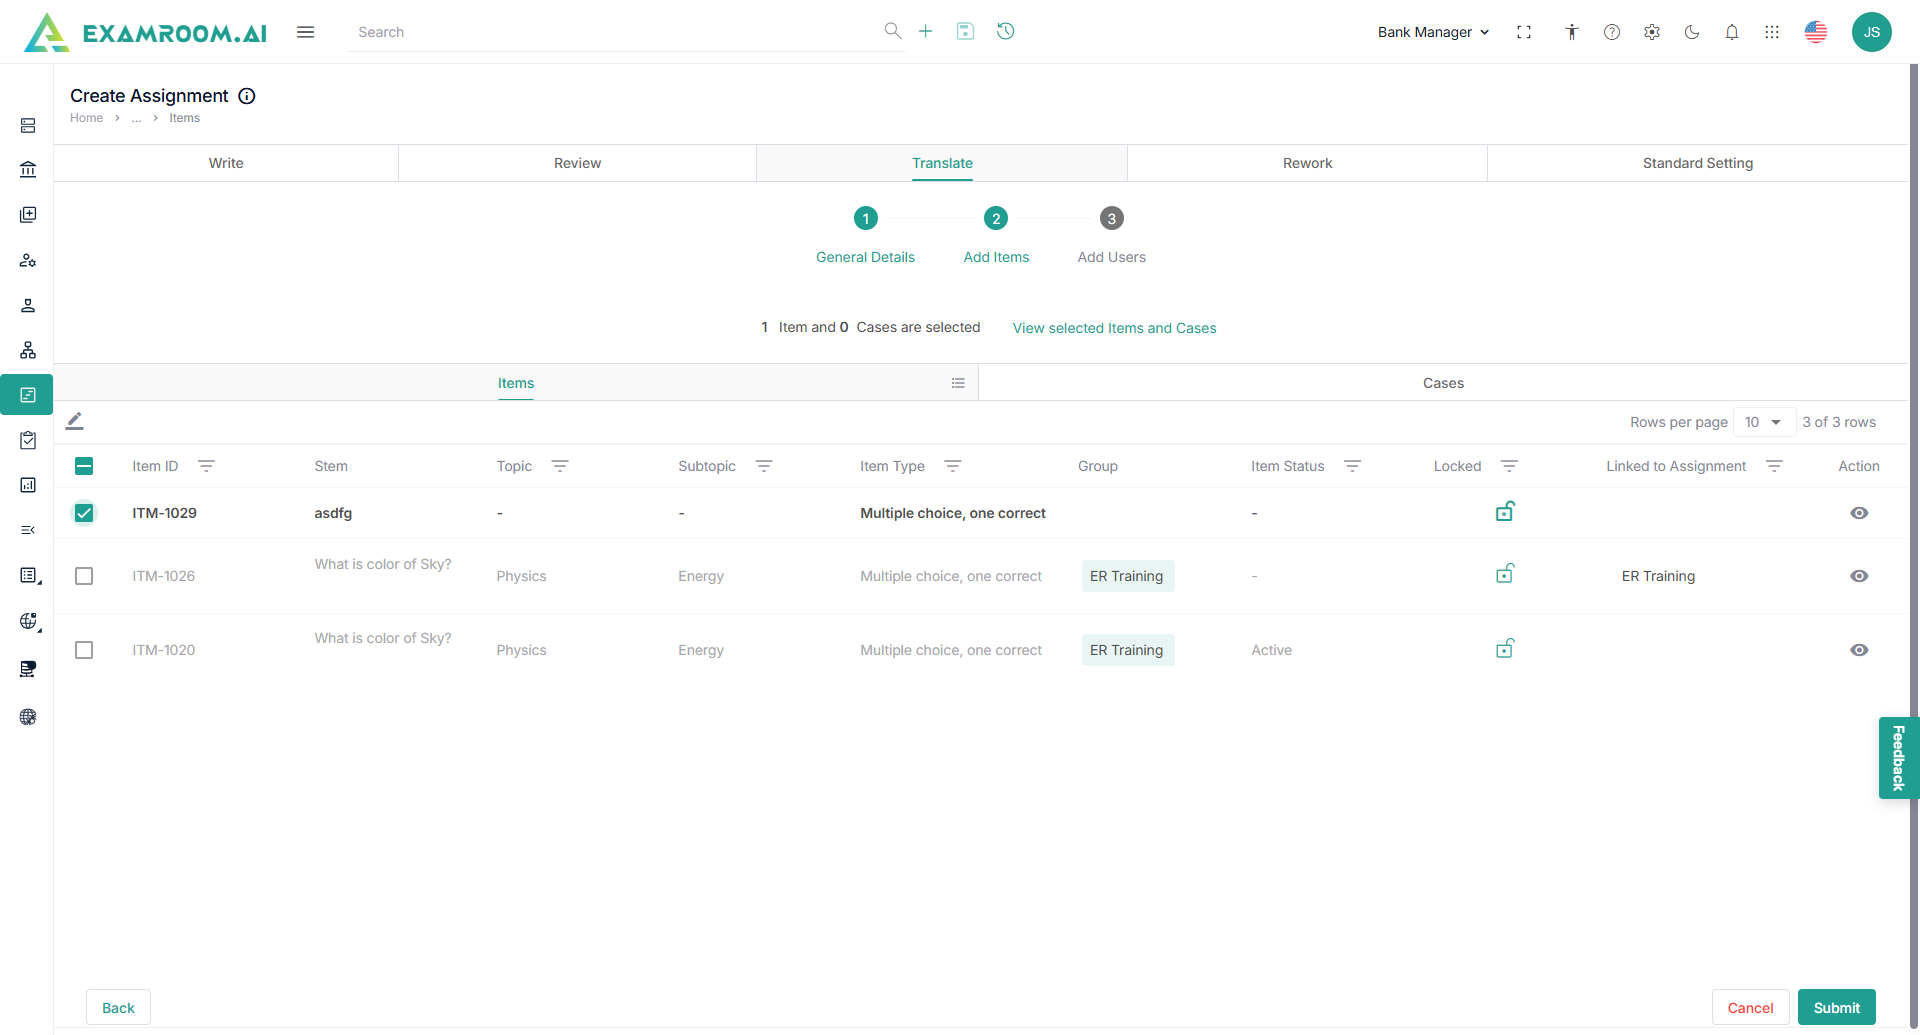
- Click Bank or Group to select an item.
- Select an Item and click Submit.
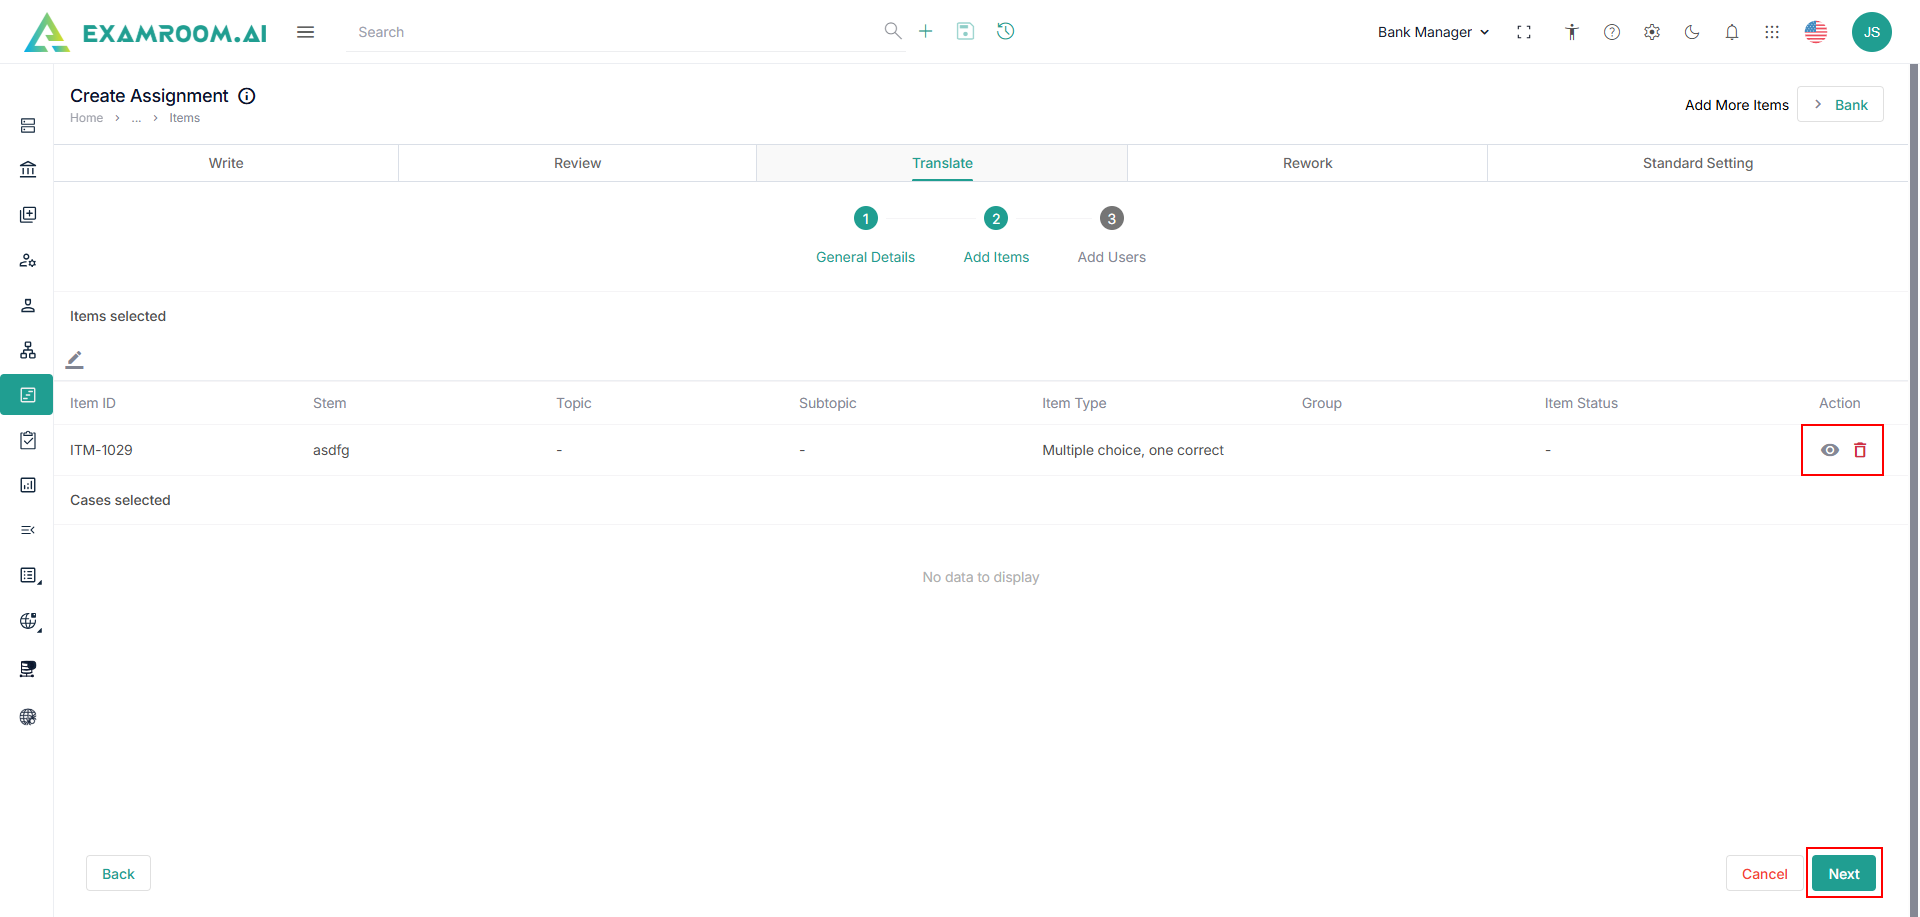
- The selected Item is displayed. Click the View icon to view the item details or the Bin icon to delete the item.
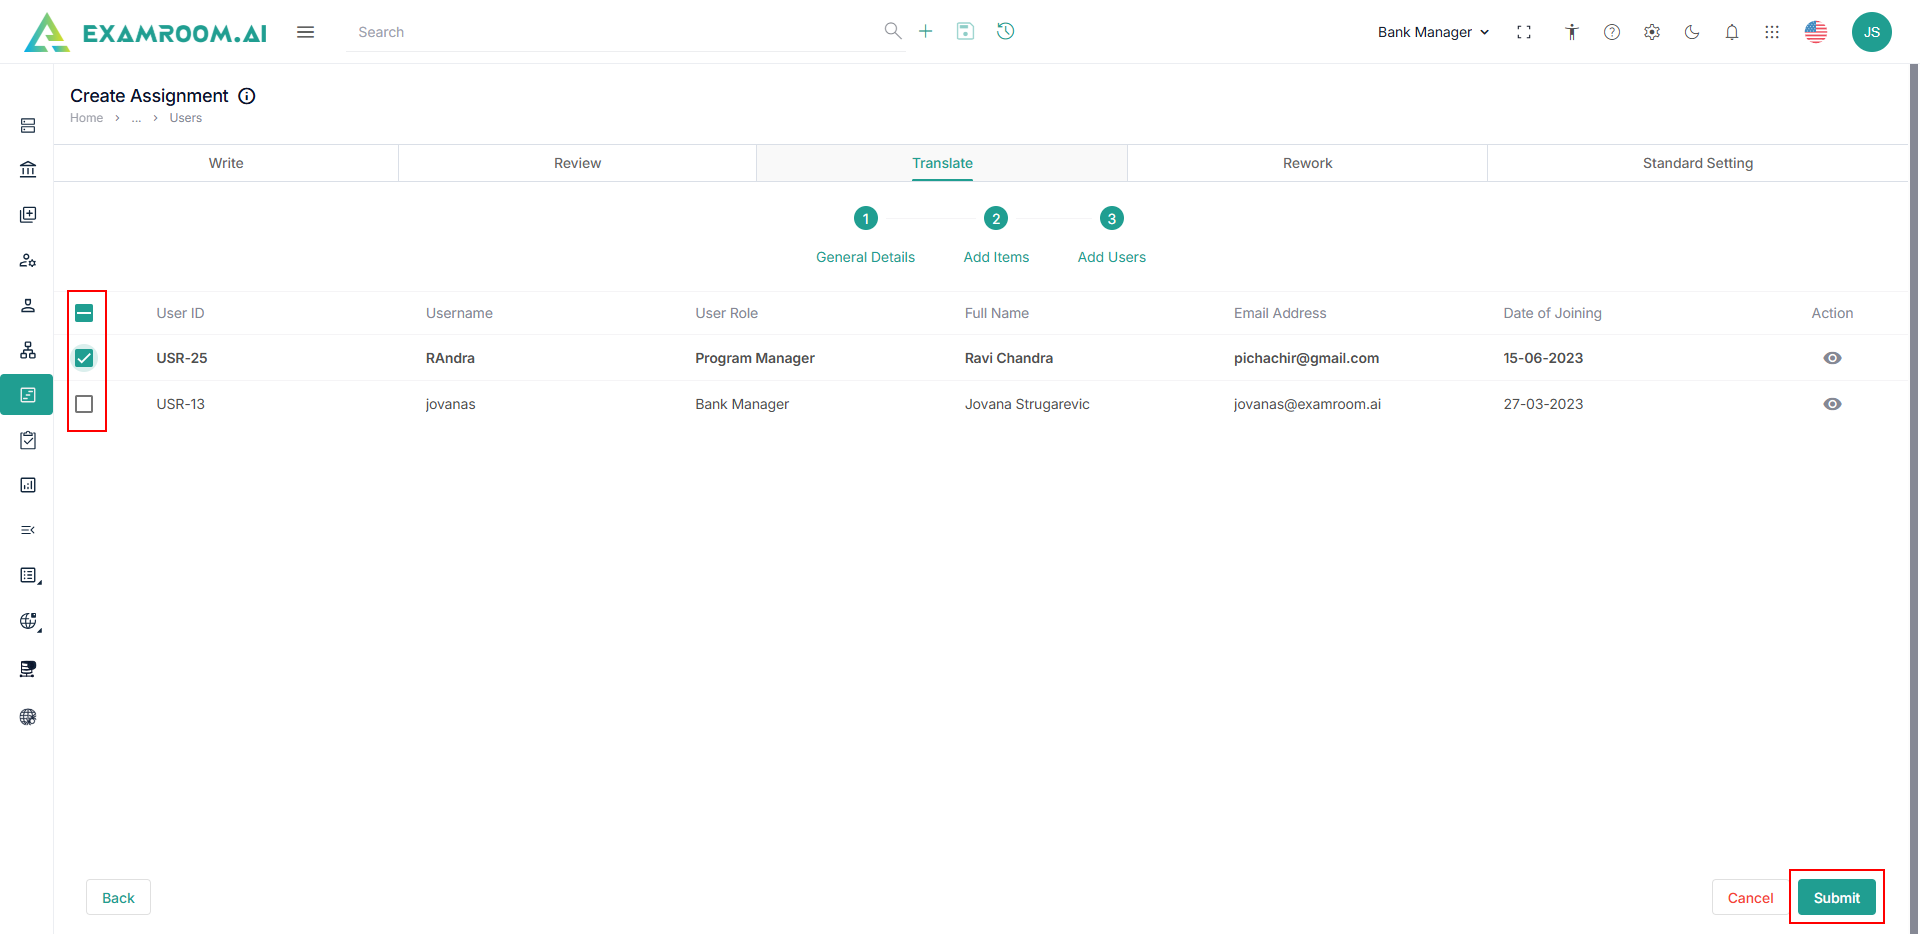
- Click Next to add the User.
- Select a User and click Submit.
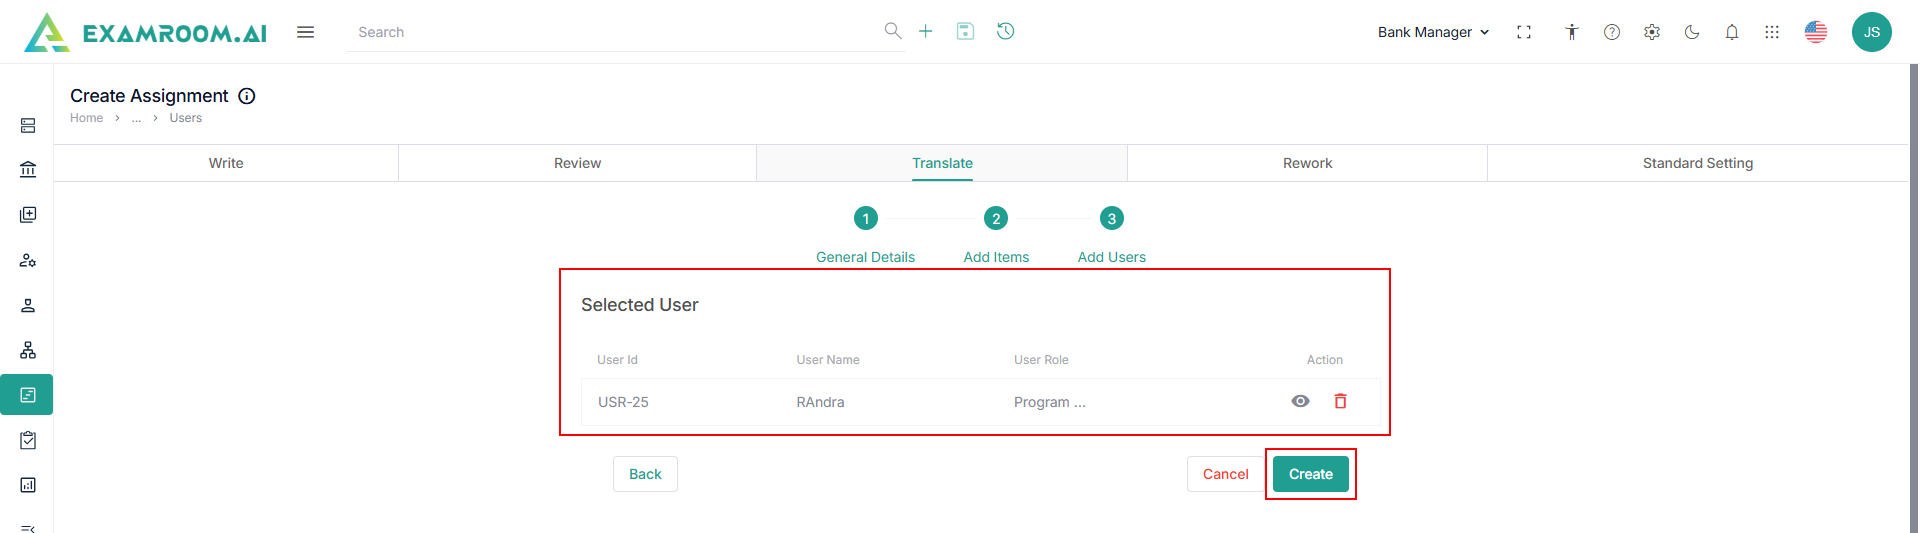
- Selected User information is displayed.
- Click Create to view the assignment in the All Assignments list.
Rework
Follow the same steps found in the Translate.
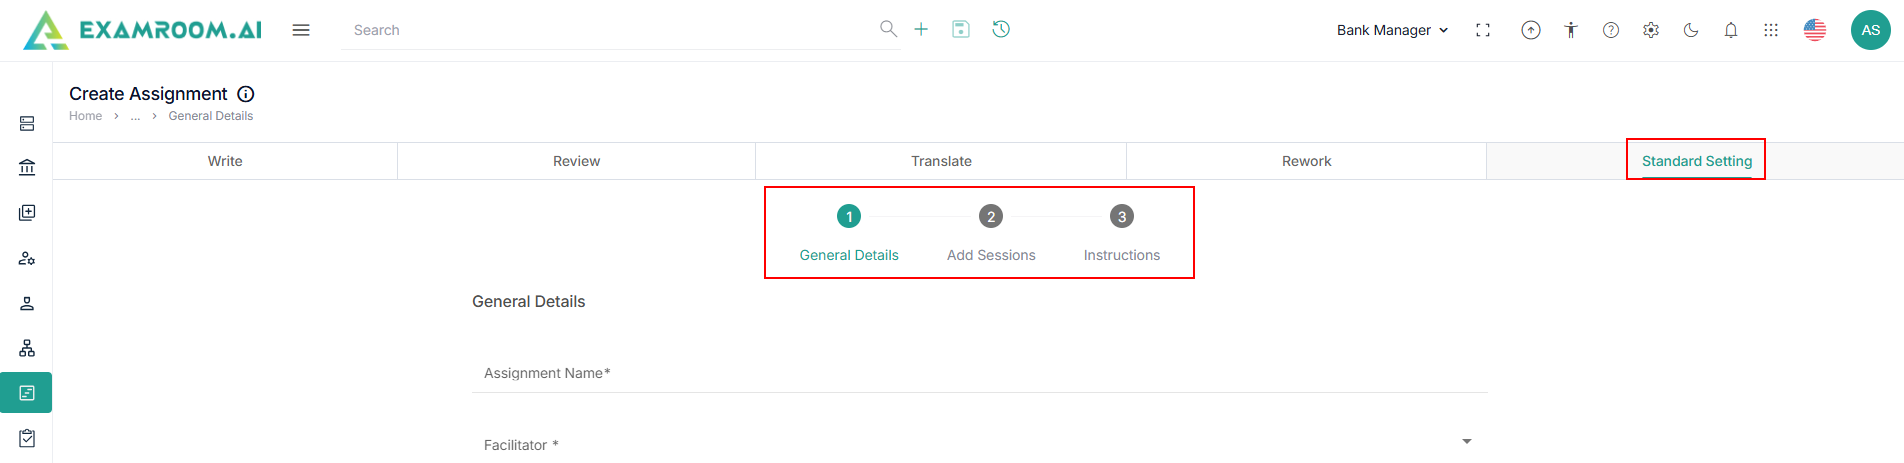
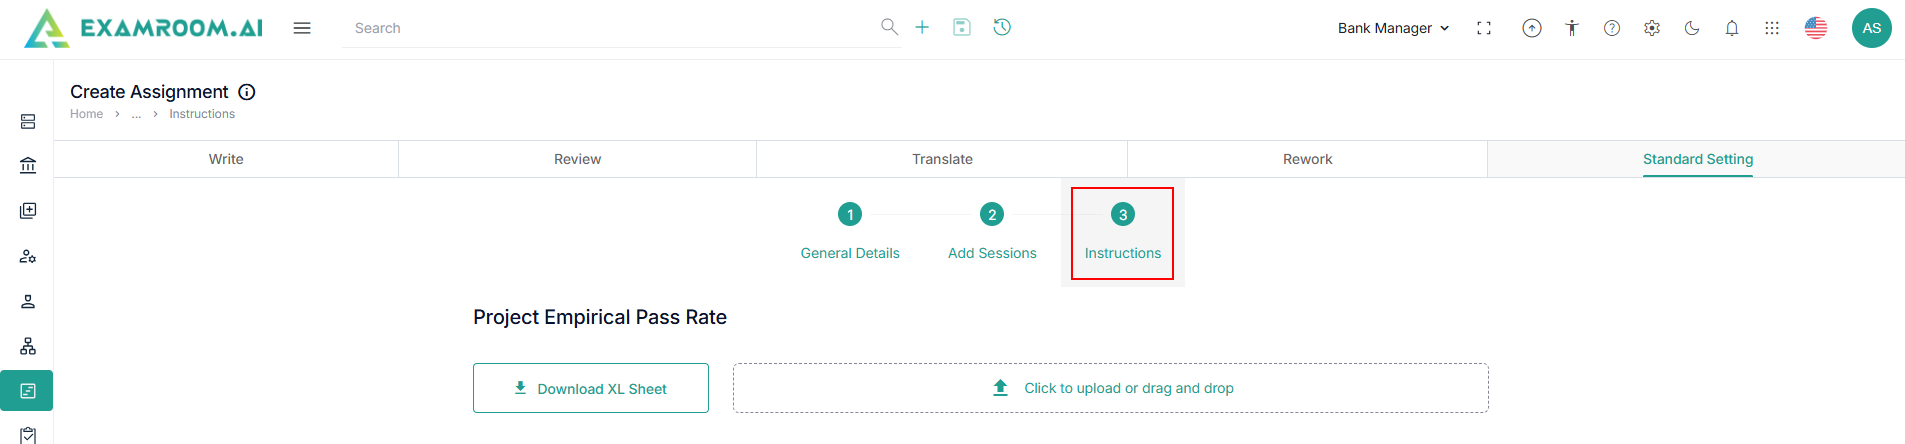
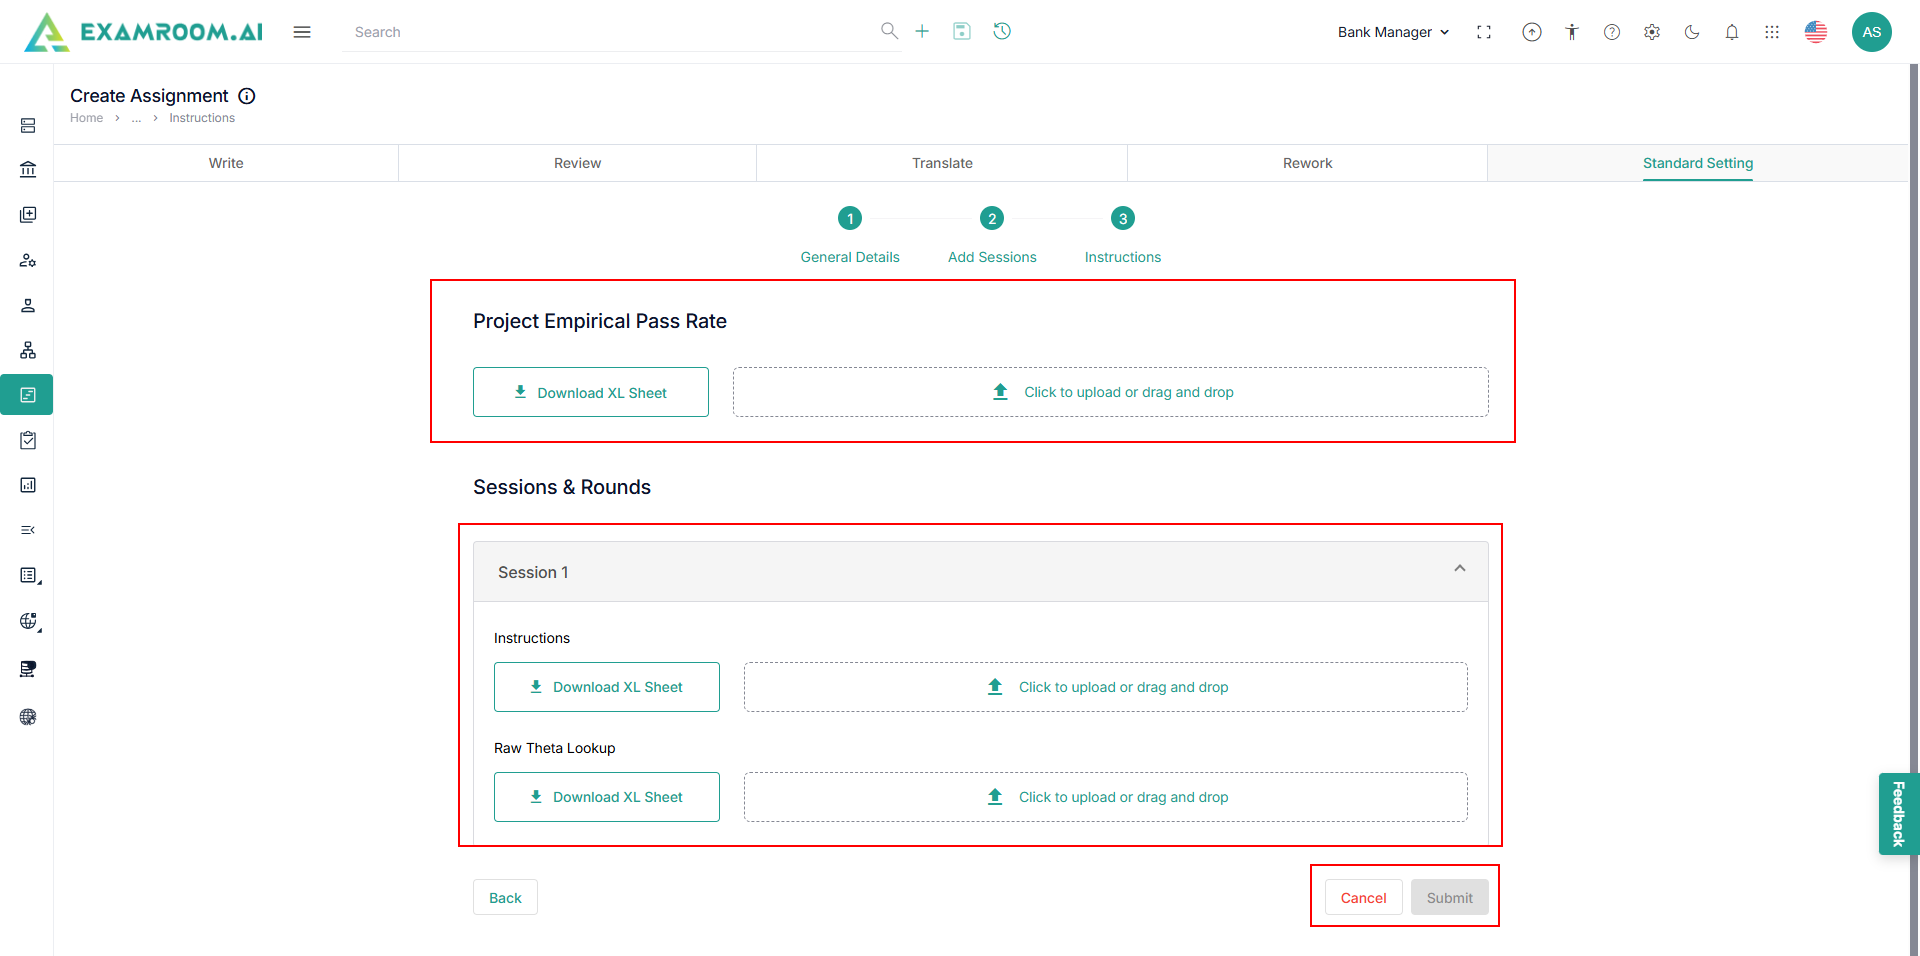
Standard Setting
To create a new assignment for Standard Setting, follow these steps.
- Click Standard Setting.
- The essential data for the General Details, Add Sessions, and Instruction Information pages are shown in consecutive order.
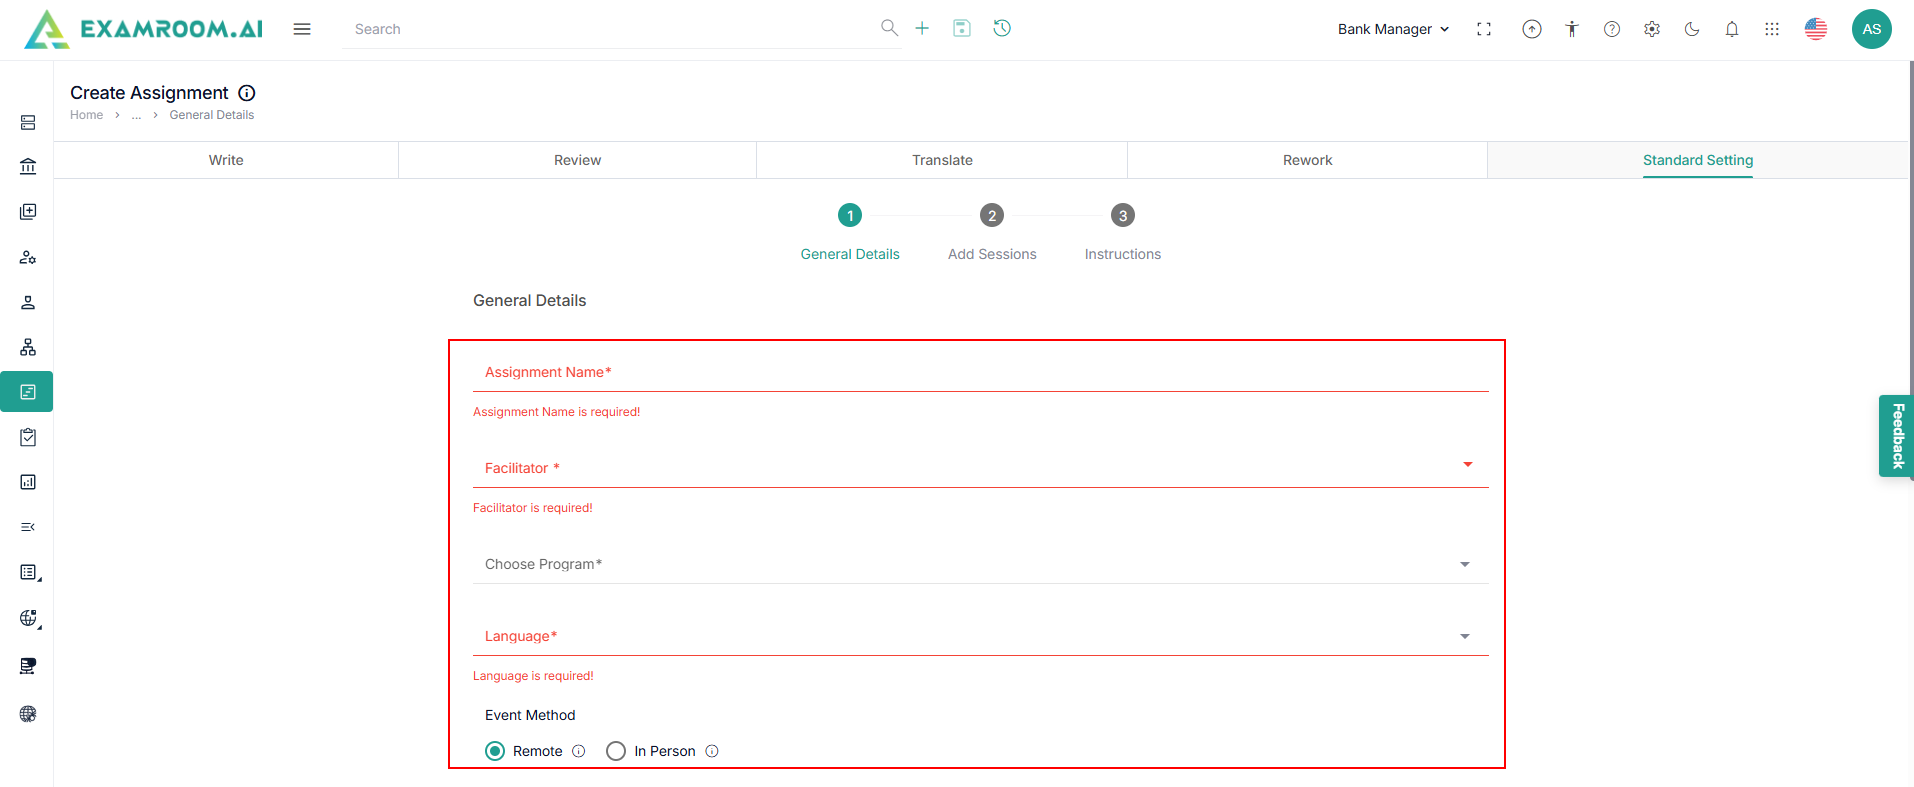
- Provide the following general details.
- Enter the Assignment Name.
- Select the Facilitator, Program, and Language from the dropdown.
- Choose the Event Method. Select either Remote or In Person based on how the session will be conducted.
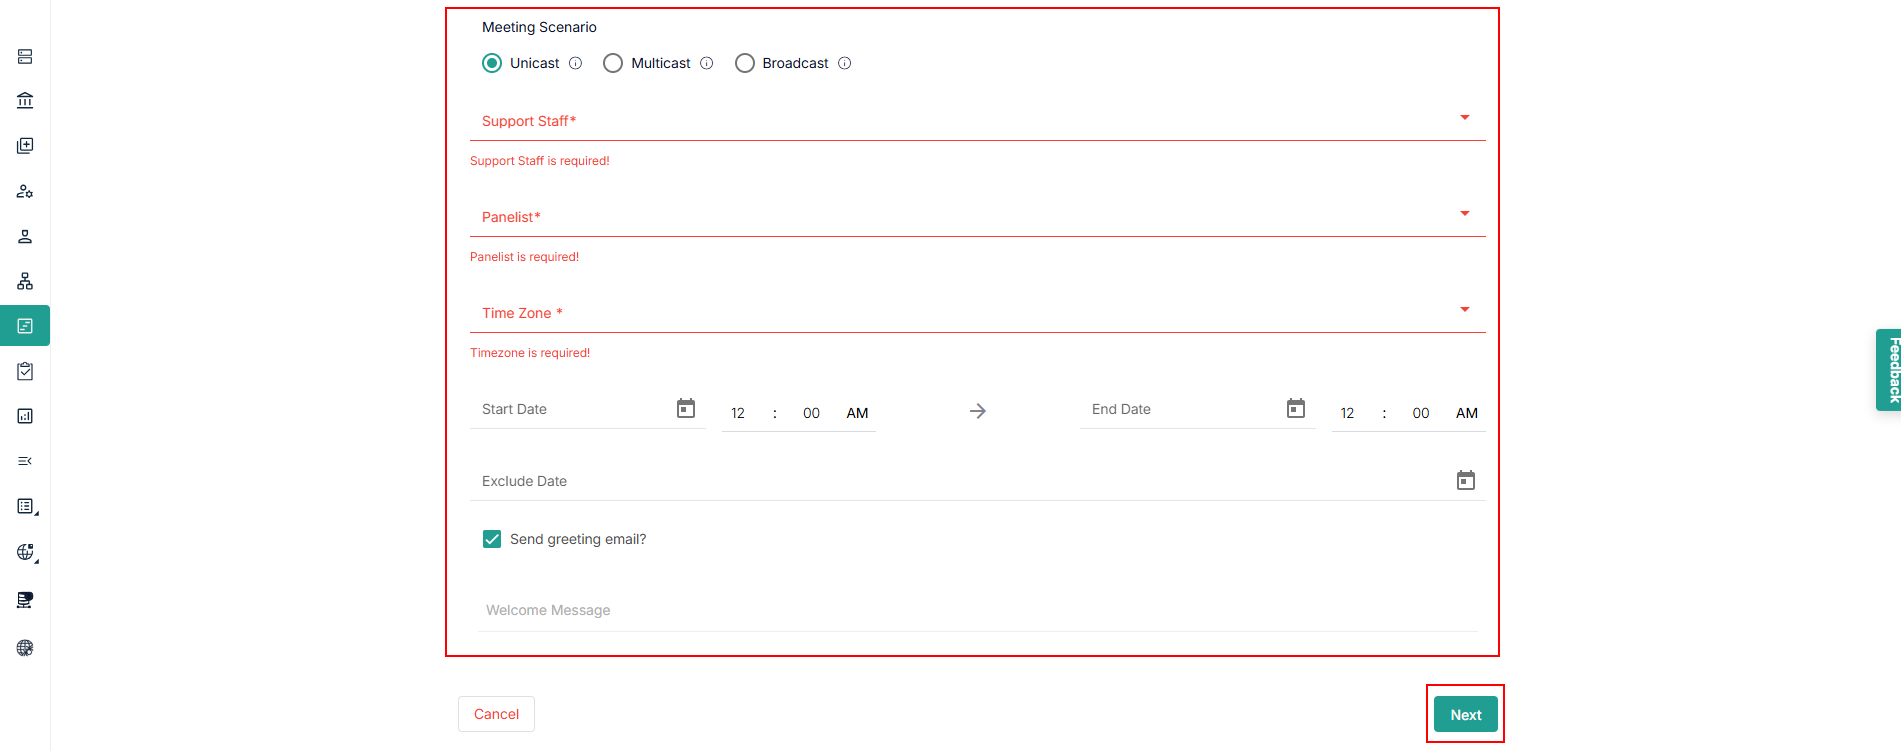
Note: If In Person is selected, the Meeting Scenario options will not be shown. - Select the Meeting Scenario (only for Remote) – Choose one from the following:
- Unicast – One-to-one session.
- Multicast – One-to-many session.
- Broadcast – One-to-all session.
- Select the Support Staff, Panelist from the dropdown list.
- Select the Time Zone – Set the time zone to schedule the session accurately.
- Set Start Date and End Date – Use the calendar and time selectors to define the session timeline.
- Add Exclude Date (optional) – Select any dates that should be excluded from the session.
- Send Greeting Email – Check this box if a welcome email should be sent automatically.
- Enter Welcome Message (optional) – Type a custom welcome message that will be included in the greeting email.
- Click Next – Move to the next step in the setup process.
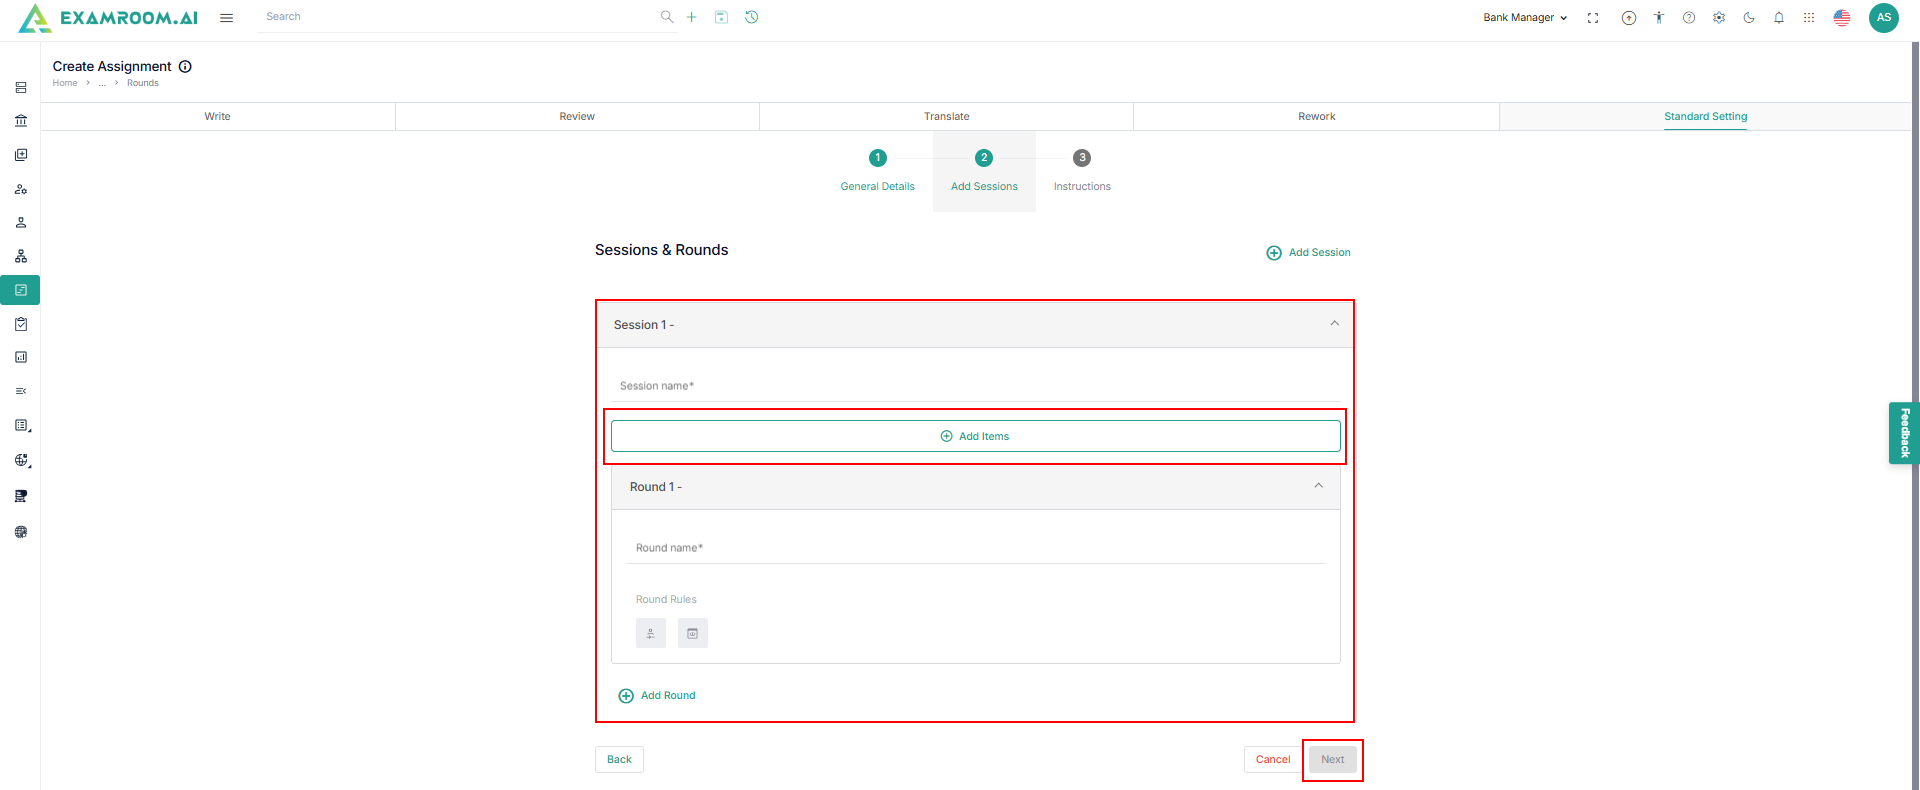
- Add Sessions page is displayed and provide the following information in Sessions & Rounds section.
- Enter Session Name to provide a name for the session. Each session can include one or more rounds.
- Click Add Items to select the items you want to include in this session.
- Enter Round Name to name each round under the session. Multiple rounds can be added using the Add Round option.
- Set Round Rules to each round, you can apply the following rules:
Self-Directed – Panelists can progress at their own pace during the round.
Display Answer – Enables display of correct answers for panelists during evaluation.
Note: You can continue adding multiple sessions and rounds as needed using the Add Session and Add Round buttons.
- Click Next to view the Instructions page.
- Provide the following information on the Instructions page.
- Project Empirical Pass Rate:
- Click Download XL Sheet to get the template.
- Upload the filled file using the Click to upload or drag and drop area.
- Click Download XL Sheet to get the template.
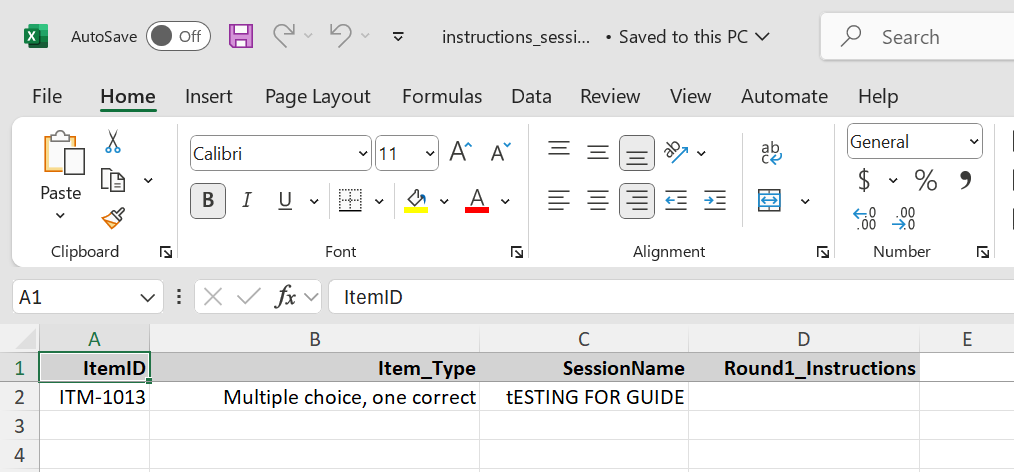
- Session Instructions:
- Download the Instructions XL Sheet template.
- Upload the filled file using the Click to upload or drag and drop area.
- Download the Instructions XL Sheet template.
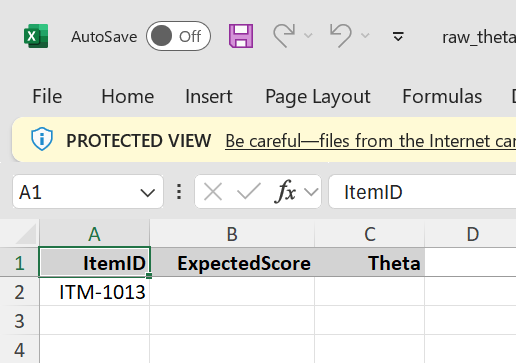
- Raw Theta Lookup:
- Download the template by clicking Download XL Sheet.
- Upload the filled file using the Click to upload or drag and drop area.
- Download the template by clicking Download XL Sheet.
- Project Empirical Pass Rate:
- Once all required files are uploaded, click Submit to finish the setup. Use Cancel to discard the process.